📖USER MANUAL
CHEPPY ENGLISH LEARNING APPLICATION
Version 1.1 - Updated May 8, 2026
1. OVERVIEW
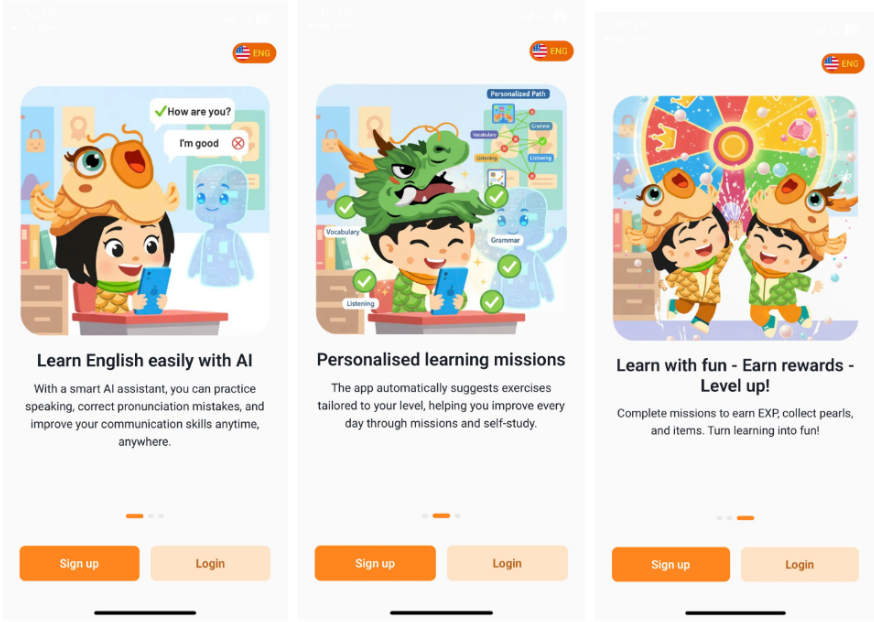
1.1. General Introduction
This document is designed to assist learners in:access, use, and learningCheppy is an online English learning platform that utilizes artificial intelligence (AI) and gamification to help students learn through play and play through learning. The learning content is based on the curriculum prescribed by the Ministry of Education and Training (MOET) combined with the European Common Framework of Reference for Languages (CEFR), aiming to help students comprehensively develop their English language skills.
1.2. Conversion Terminology
The glossary below includes terms used in the gamified application, ensuring that the terminology is understood and used consistently by students, teachers, and parents.
| Pedagogical Language | Language in the App | Function |
|---|---|---|
| Unit/Lesson | Mission | Each Mission The application is structured around a specific theme, helping students feel they have a clear goal and a defined journey. |
| Exercise | Stage/Exercise | Each Mission contains theStages, Each stage consists of questions focusing on the same theme, aiming to fulfill the skill objectives and competency outputs of the Mission. |
| Score | Score | The score after completing a Stage is calculated based on the number of correct answers out of the total number of questions. |
| EXP/Experience Points | For each completed task, students will receive corresponding experience points. These points are used to determine rank advancement or to receive academic achievements. | |
| Reward | For each completed task, students receive additional gems as rewards, which can be used to purchase costumes and accessories for their characters. | |
| Competition Tracking Table | Leaderboard | The system displays student rankings by class/grade level based on metrics such as rewards and EXP, motivating students to maintain their study habits. |
Although languages change,Lesson structure - skill objectives - competency outcomesThis is still ensured under the supervision of the educational advisory team.
2. INSTALLATION INSTRUCTIONS
Step 1Download the app
Access the storeApp Store (iOS) or CHPlay(Android), search for "Cheppy" in the search bar. Once the "Cheppy" app appears, tap "Install" to download it to your device.
![]()
![]()
Step 2: After successfully downloading and installing the application, the user opens it.
Step 3: Tap on the icon To change the display language between English and Vietnamese.
2.1. REGISTRATION INSTRUCTIONS
Step 1: Press the Register button. To switch to the new account creation screen.
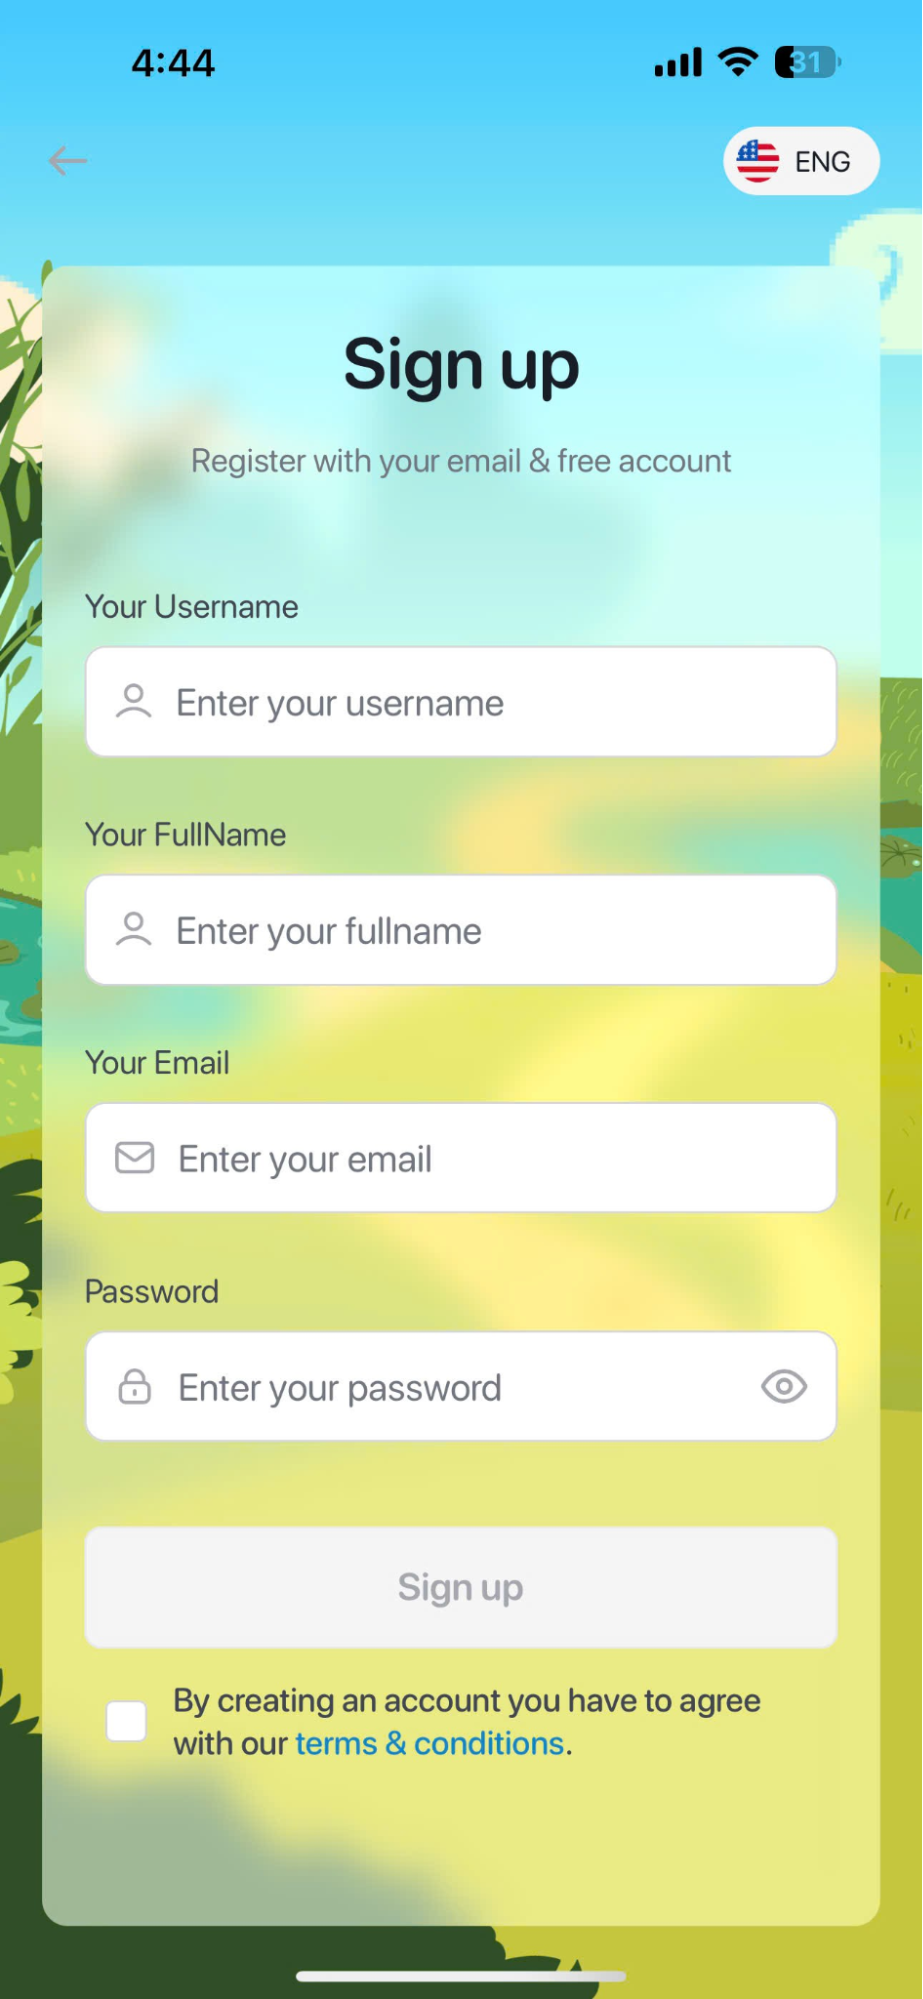
Step 2: Enter your full account information, including:
- Username: Login name.
- Full NameFull name.
- Email: Email address.
- Password: The password must be between 8 and 16 characters and include at least one digit.
- Confirm Password: Re-enter your password.
Note: The information entered in the Password and Re-enter Password fields must be the same.
Step 3: After filling in all the information, users click on the "Terms and Policies" link to understand the terms related to using the application. If they agree to the terms, they check the box.
Step 4: Press the Register button.
To complete account creation.
Note: After clicking the Register button, some information may be invalid. Please re-enter the required information to ensure it is correct.
2.2. LOGIN INSTRUCTIONS
Step 1: InThe login screen offers two ways for users to perform the action.
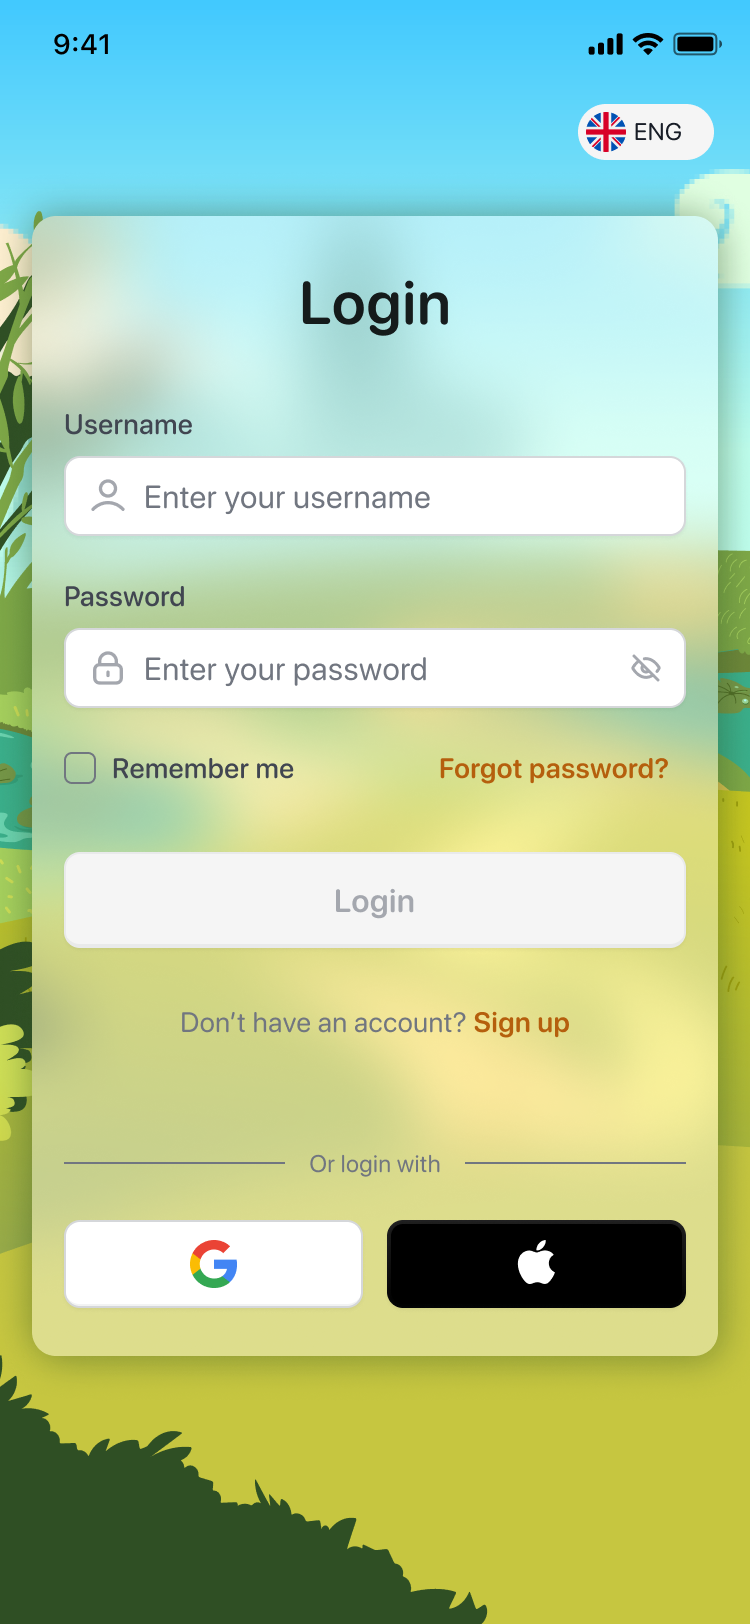
Method 1:Enter your full account information, including:
- Username: Login name.
- Password: Password.

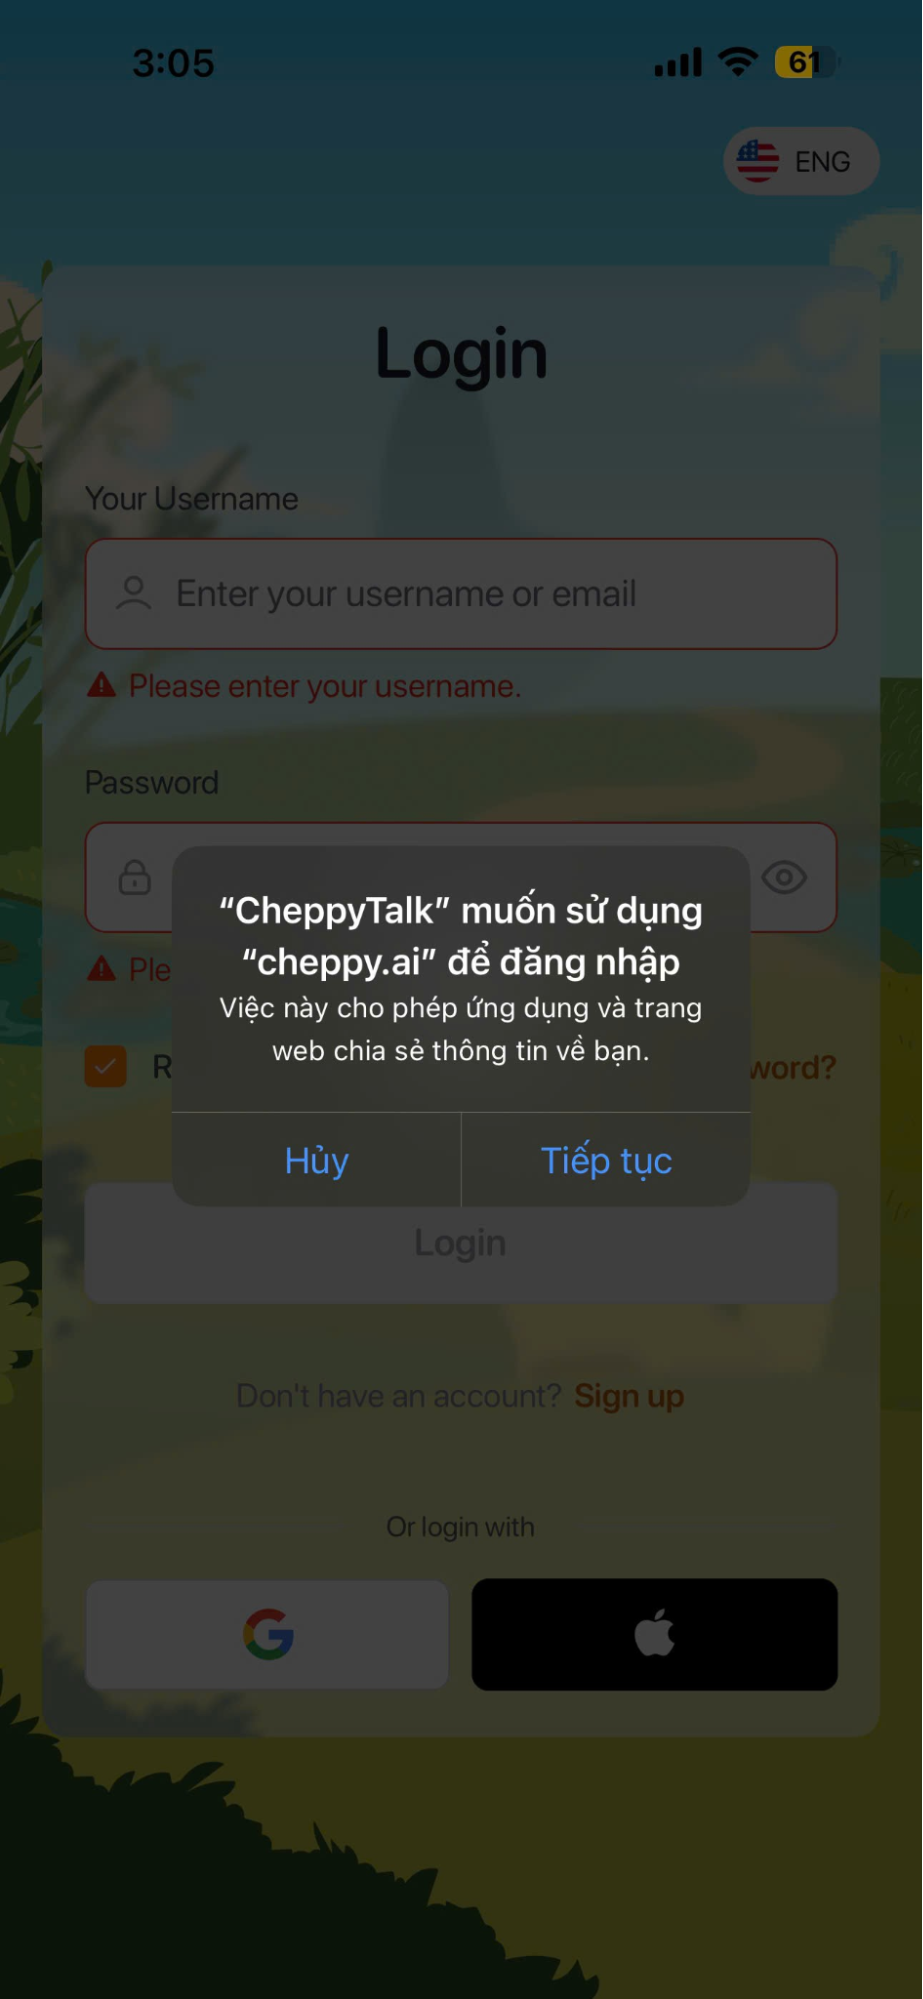
Method 2:Sign in quickly using your Google or Apple account.
Note: The user selects [Continue] for the system to proceed with authentication.

Step 2:Press the button to complete logging into the application.
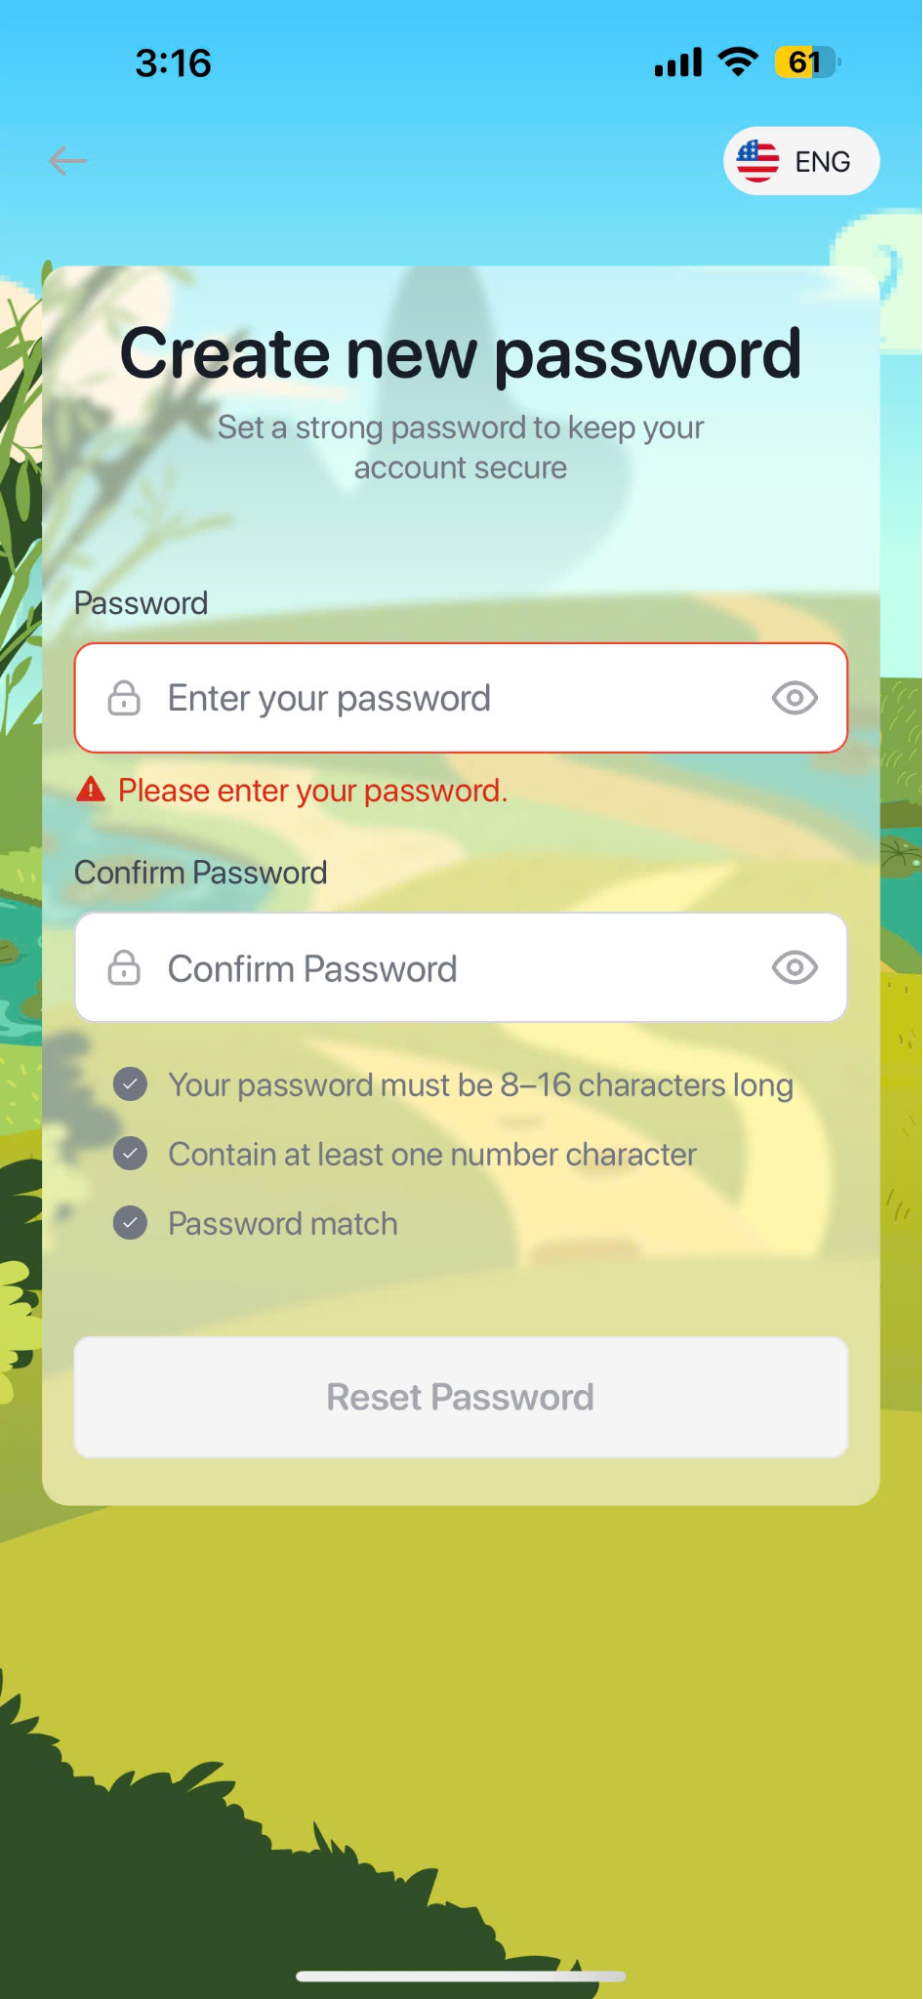
2.3. INSTRUCTIONS FOR RESETTING YOUR PASSWORD
Step 1:If you forget your password, click here. ![]()
Step 2: Enter the email address you registered with the app and press the button.

Step 3:Access your personal email inbox and enter the 6-digit code.

Note: If the verification code is not received or has expired, the user should press the button.Resend to request the code be resent.
Step 4:Press the button To confirm the verification code.
Step 5: The user enters the new password and presses the button. To complete setting a new password.
3. ACCOUNT INFORMATION
Step 1: InAccount information screen; fill in all the required information.
- Boy/Girl: Gender.
- Name: Display name in English, with a maximum length of 20 characters.
- Grade: Class.
- Your birthday: Date of birth.
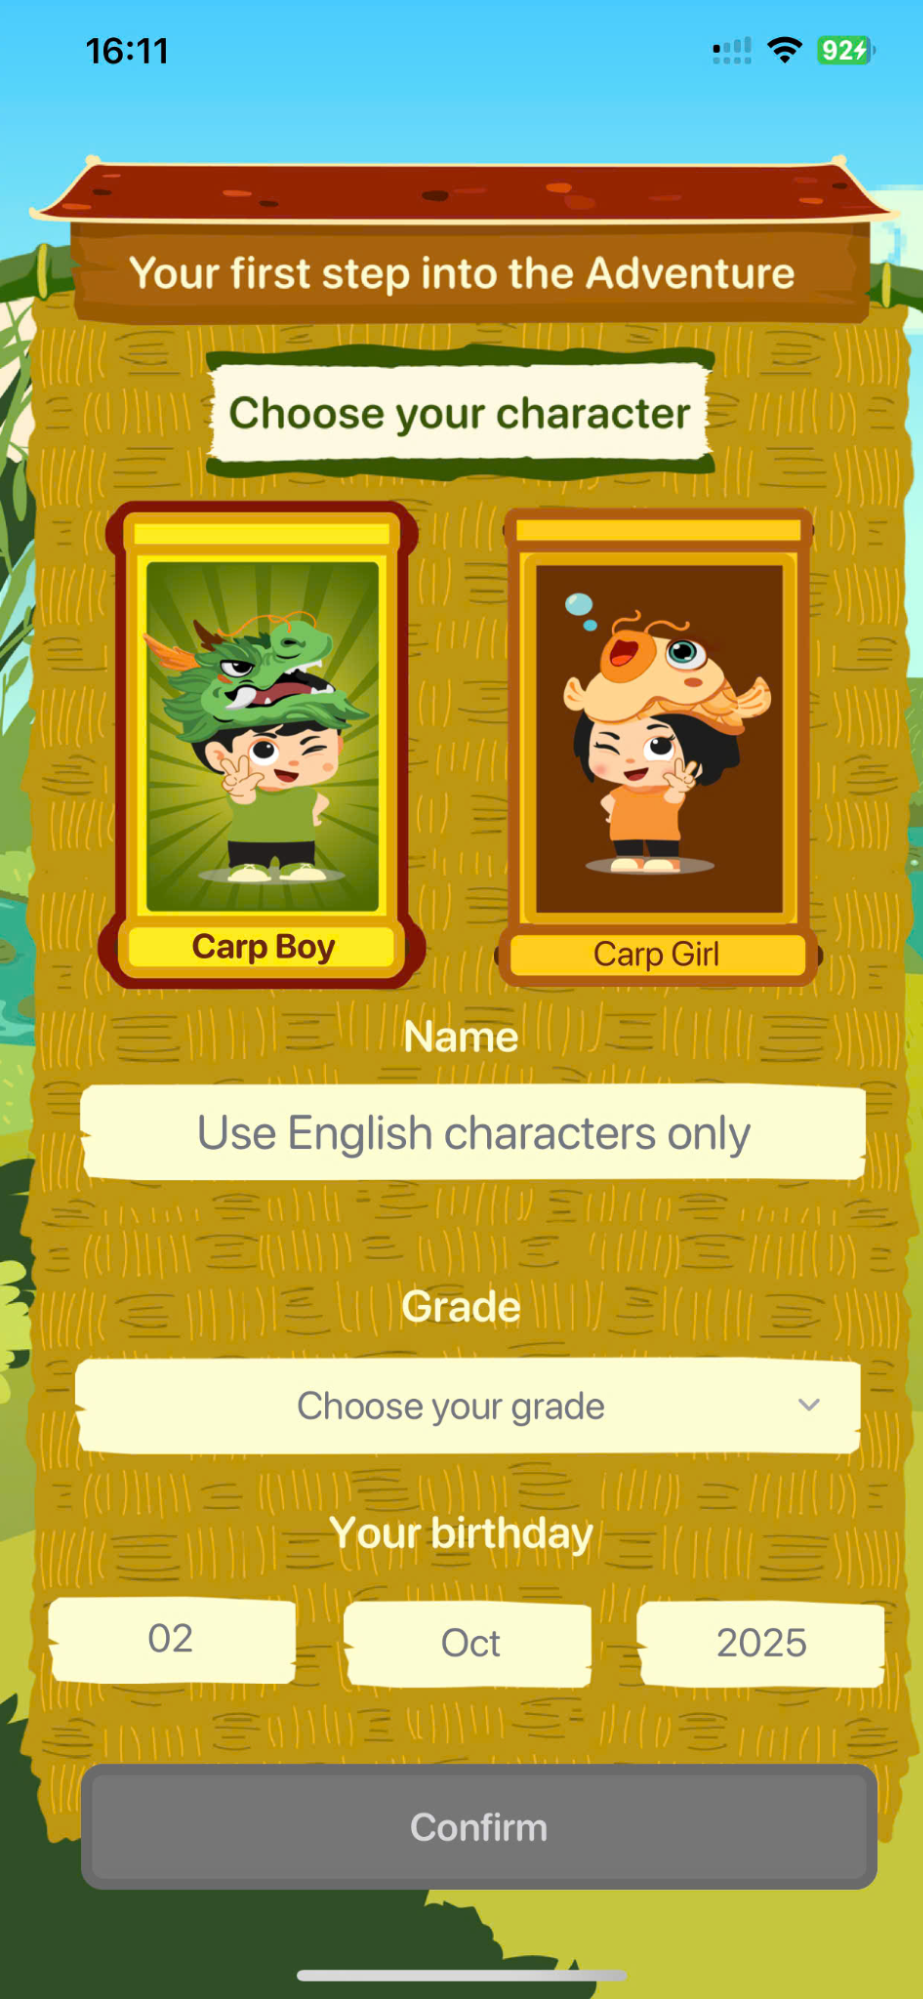
Step 2: After filling in all the information, press the button. To confirm the information.
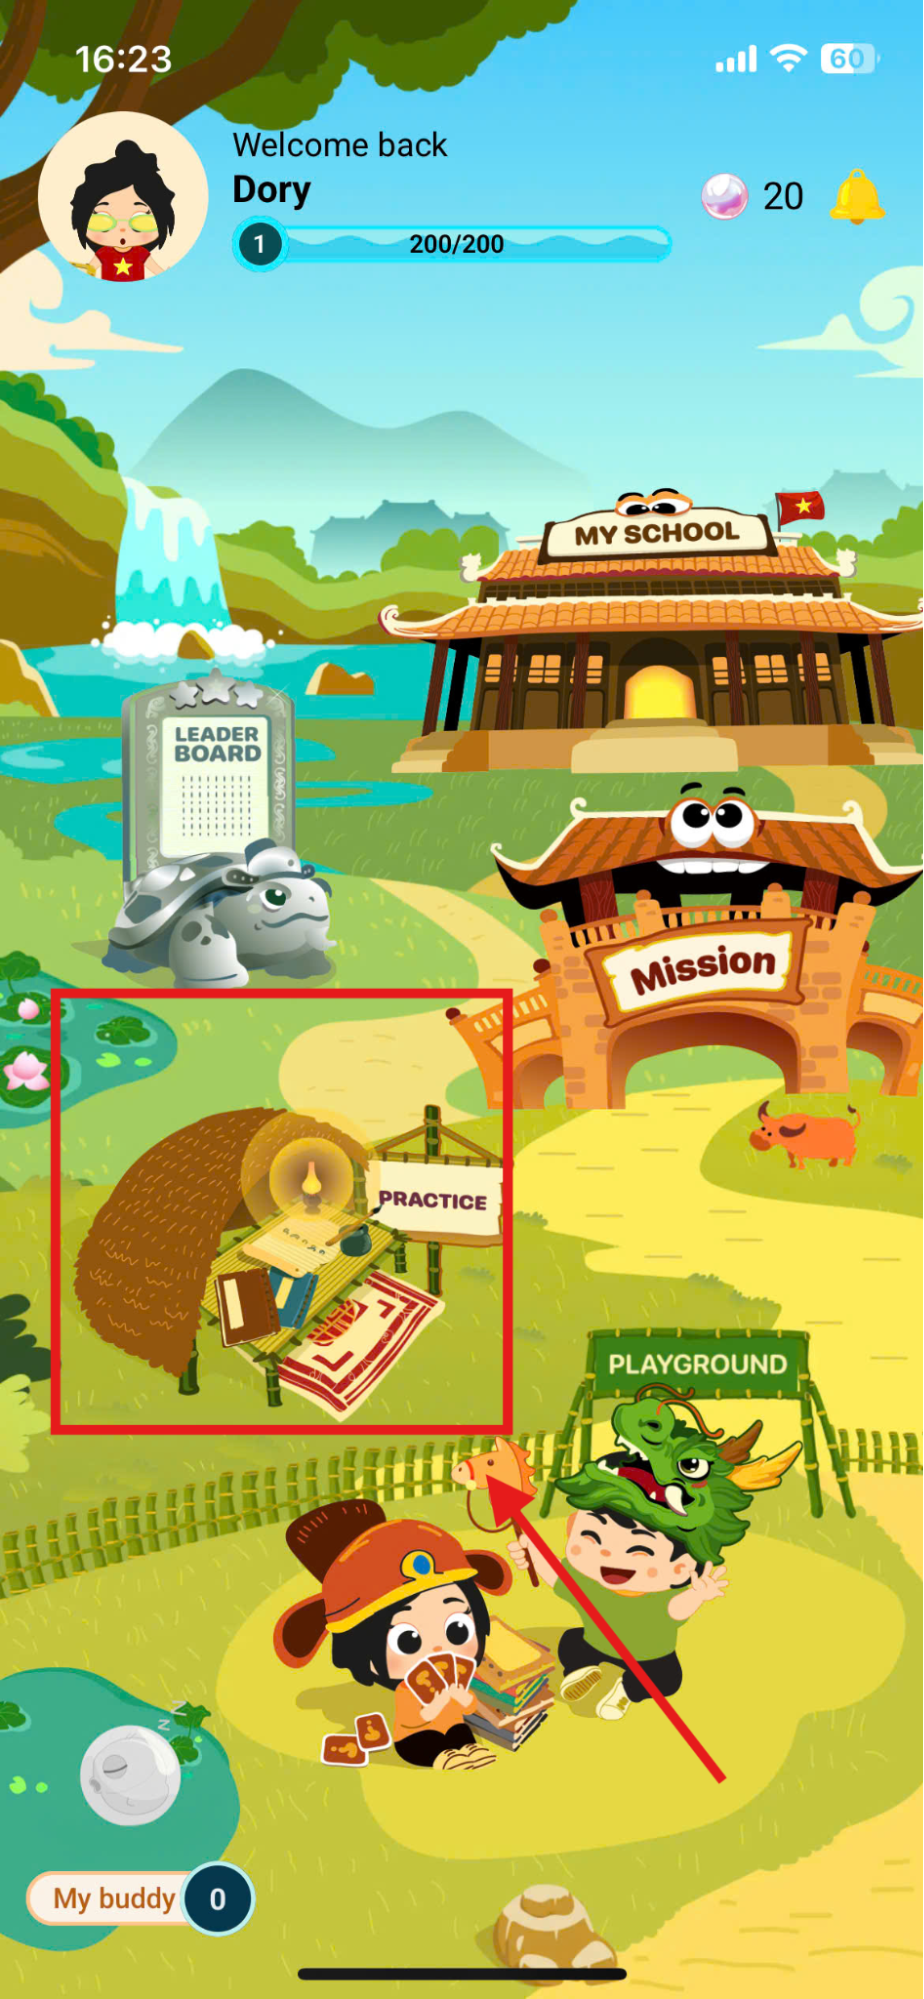
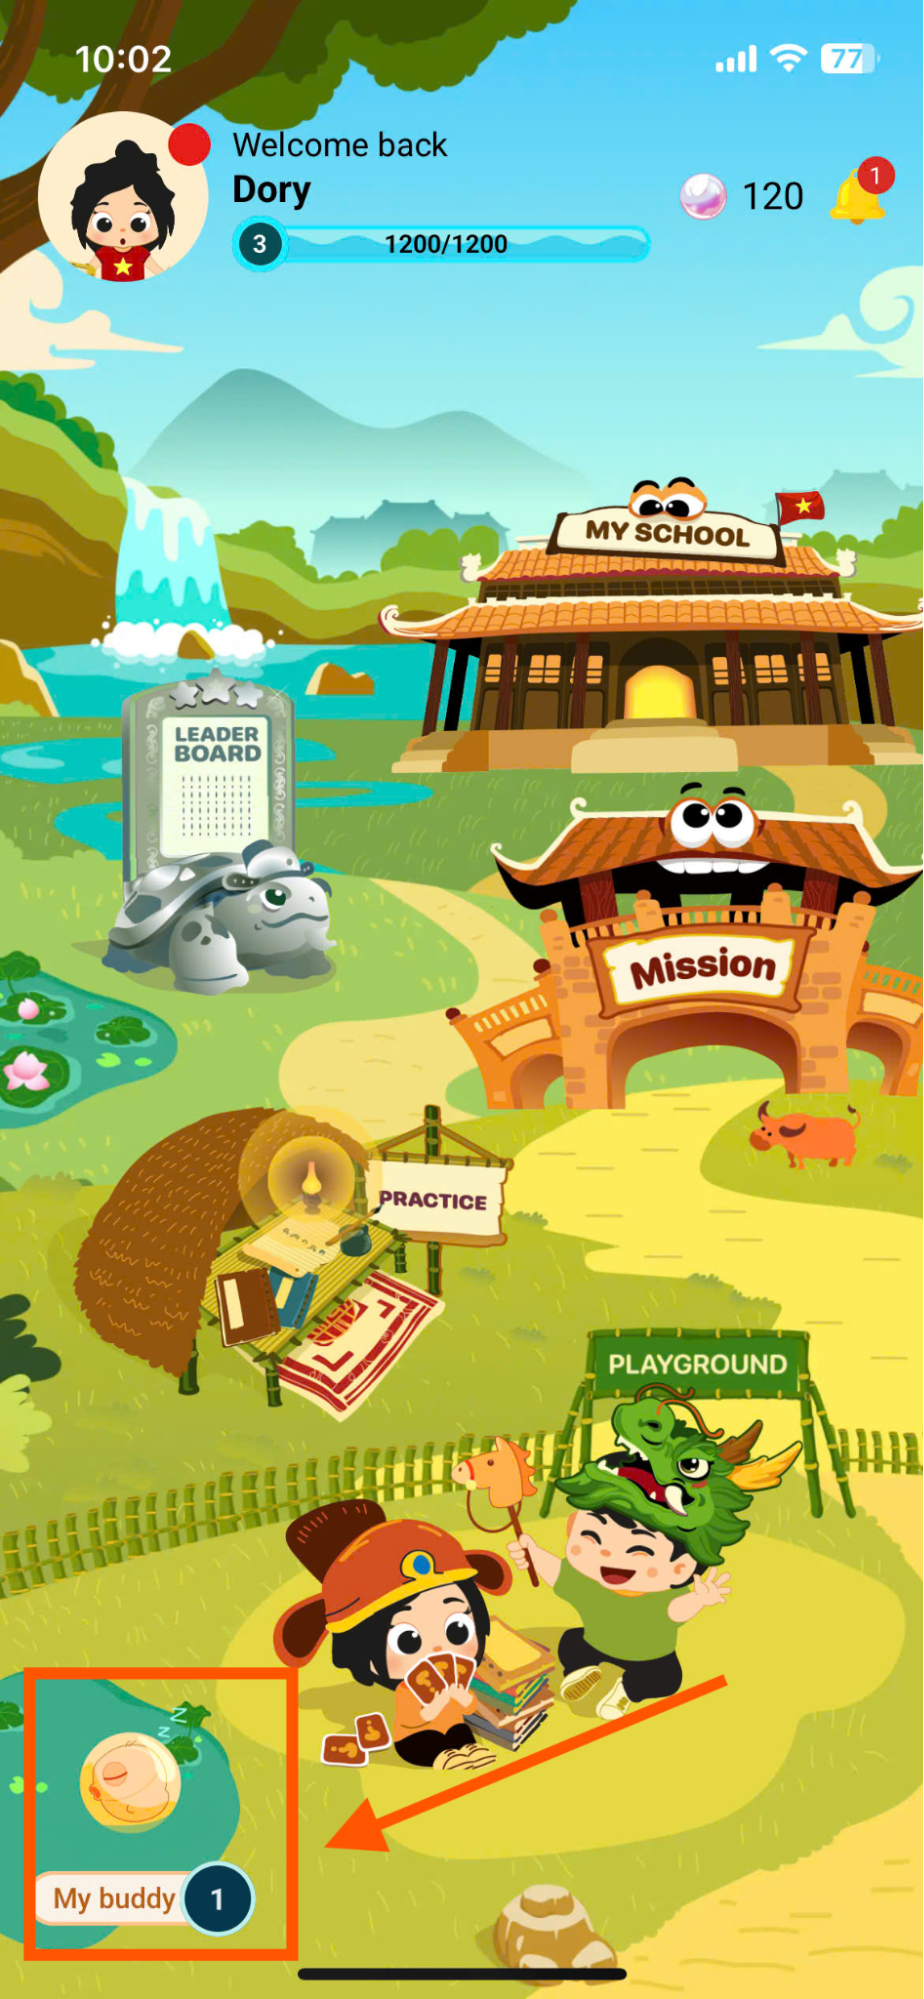
4. HOME SCREEN
- Purpose: This section provides users with quick access to learning areas within the app.

| STT | Icon | Function | Describe |
|---|---|---|---|
| 1 |  | My Profile(Personal information) | - View and manage users' personal information.- Track streaks (consecutive learning days), EXP (experience points), gems, and learning progress reports. |
| 2 |  | My School(School) | View information about the school and classes the user is currently attending. |
| 3 | Notification(Notification) | View and receive latest news | |
| 4 | Reward (Award) | Receive rewards after completing tasks and use them to purchase items. | |
| 5 |  | Mission(Mission) | Display the learning tasks that learners need to complete. |
| 6 |  | Practice(Practice) | It helps players review incorrect answers, reinforce their knowledge, and practice their skills. |
| 7 |  | Leaderboard(Rankings) | Display student rankings by grade and grade level. |
| 8 | 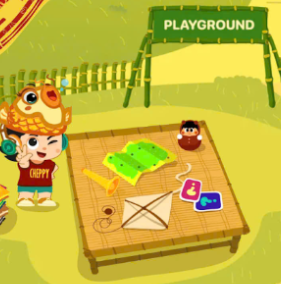 | Playground(Playground) | This area focuses on developing English speaking skills and reflexes through various interactive activities that combine learning and playing. |
| 9 |  | Streak pet | This section displays students' learning progress and pet-raising activities. |
5. MY PROFILE
Step 1: From the main screen, tap your profile picture in the upper right corner of the screen.
Step 2: In the My Profile screen,Users can view detailed information in the Overview bar, including.
- Display name: Display name.
- Streak Pet: Showcasing the learning series and pets
- Reward: The total number of gems used to unlock items.
- Progress bar: The progress bar shows the level of EXP progress required to level up.

Step 3: Press tab to view the summary report of learning outcomes.
| STT | Chart title | Describe |
|---|---|---|
| 1 | Current academic results | 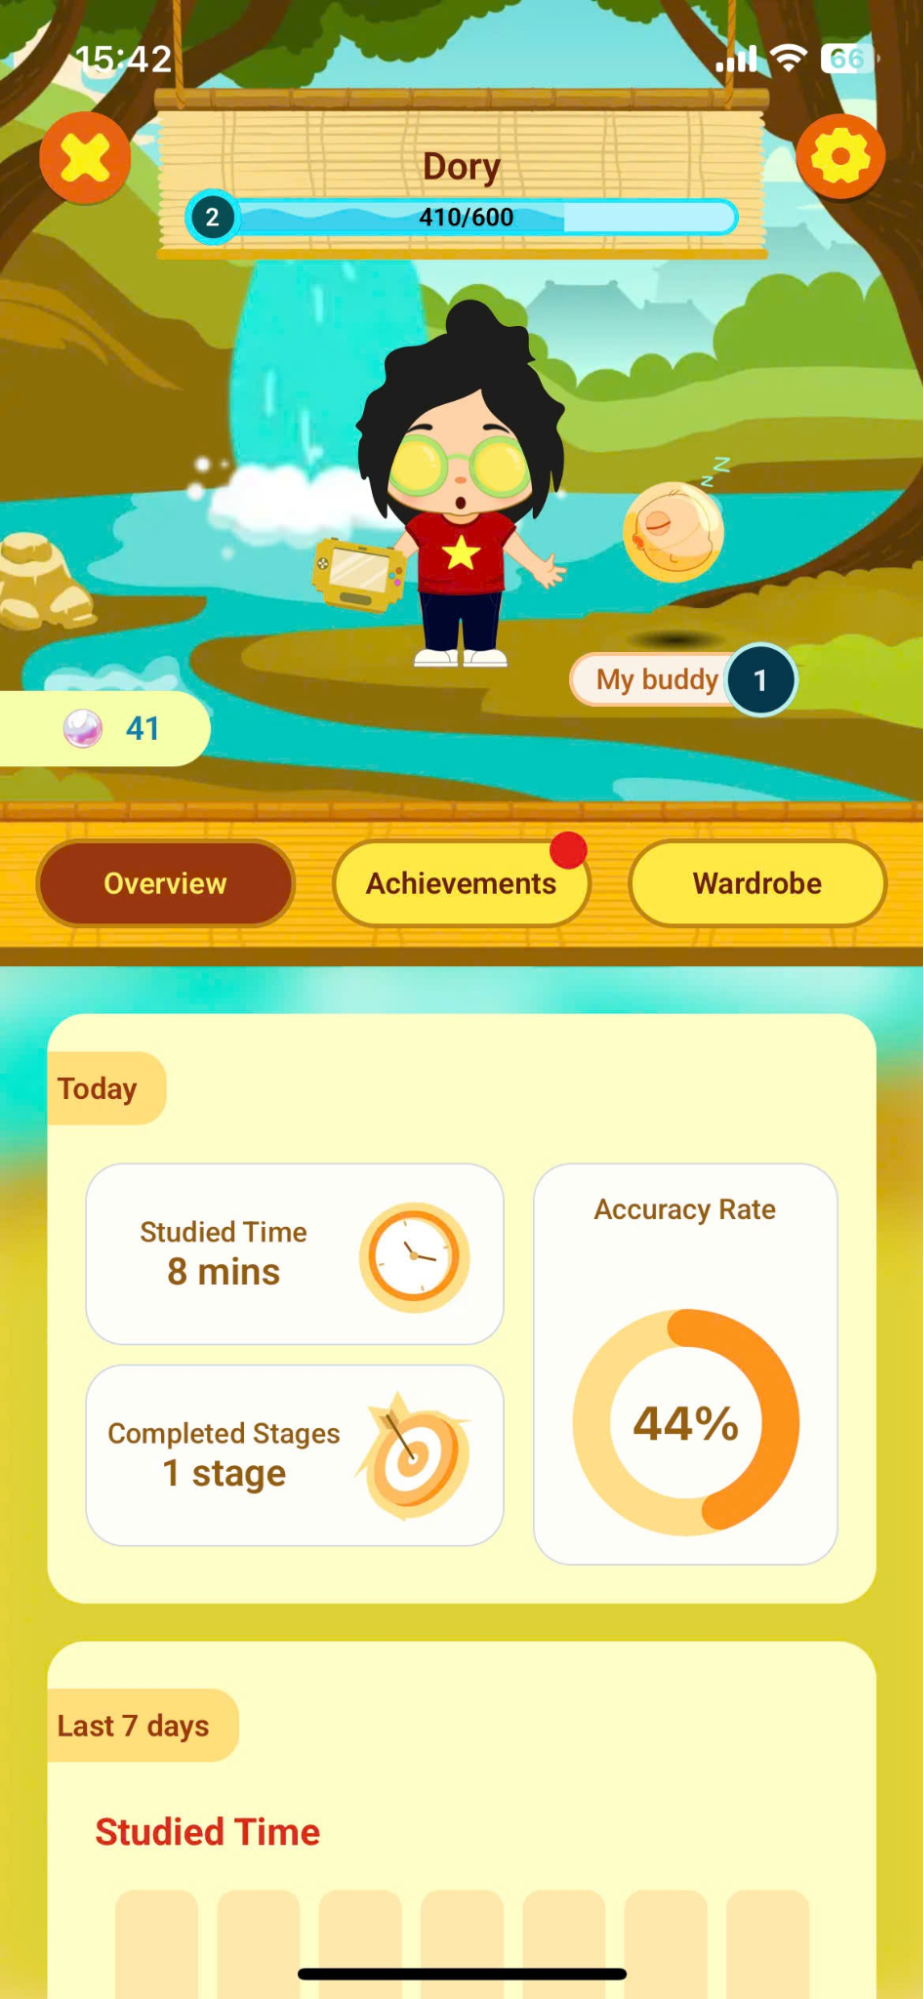 Present an overview of learning outcomes for the current day with the following information:Studied Time: Total study timeCompleted Stages: Total number of stages completedAccuracy Rate: The percentage of correct answers given on the test. Present an overview of learning outcomes for the current day with the following information:Studied Time: Total study timeCompleted Stages: Total number of stages completedAccuracy Rate: The percentage of correct answers given on the test. |
| 2 | Academic results for the last 7 days | Study time chart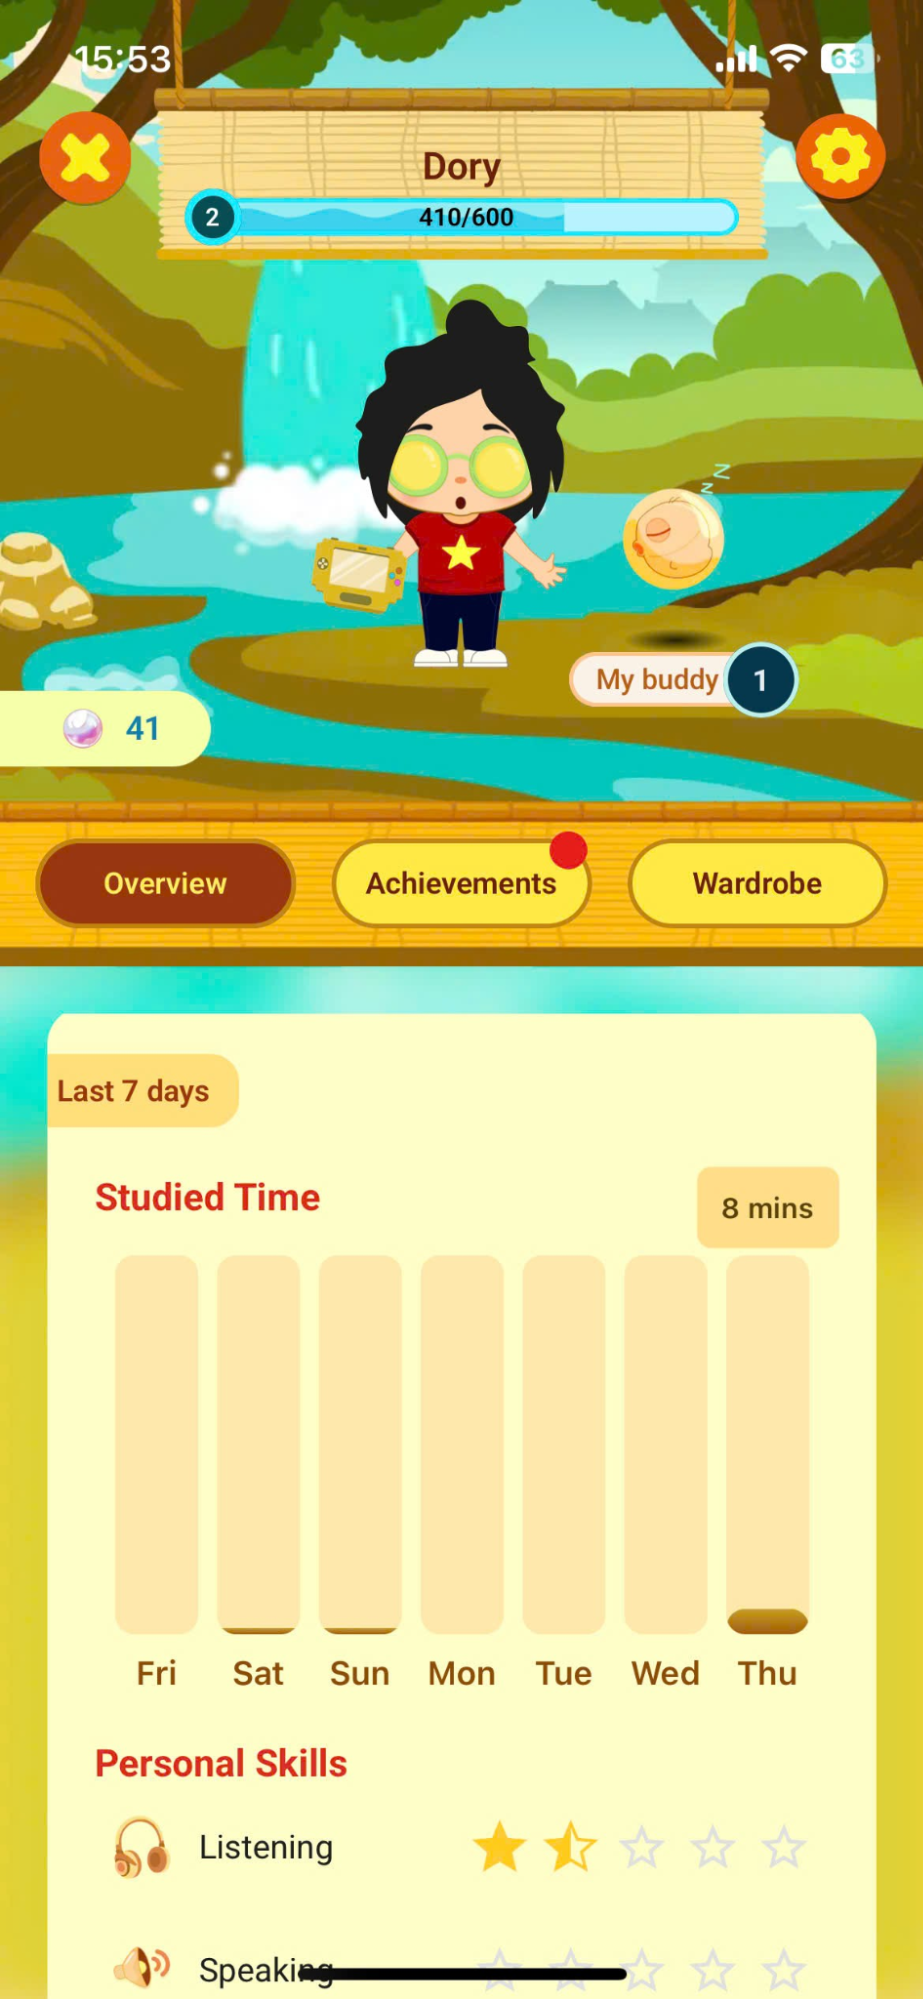 Show the students' daily study time over the past 7 days.NoteWhen you click on the corresponding column, the system displays the detailed time (e.g., 45 mins). Show the students' daily study time over the past 7 days.NoteWhen you click on the corresponding column, the system displays the detailed time (e.g., 45 mins). |
| 3 | Skill chart | Skill chart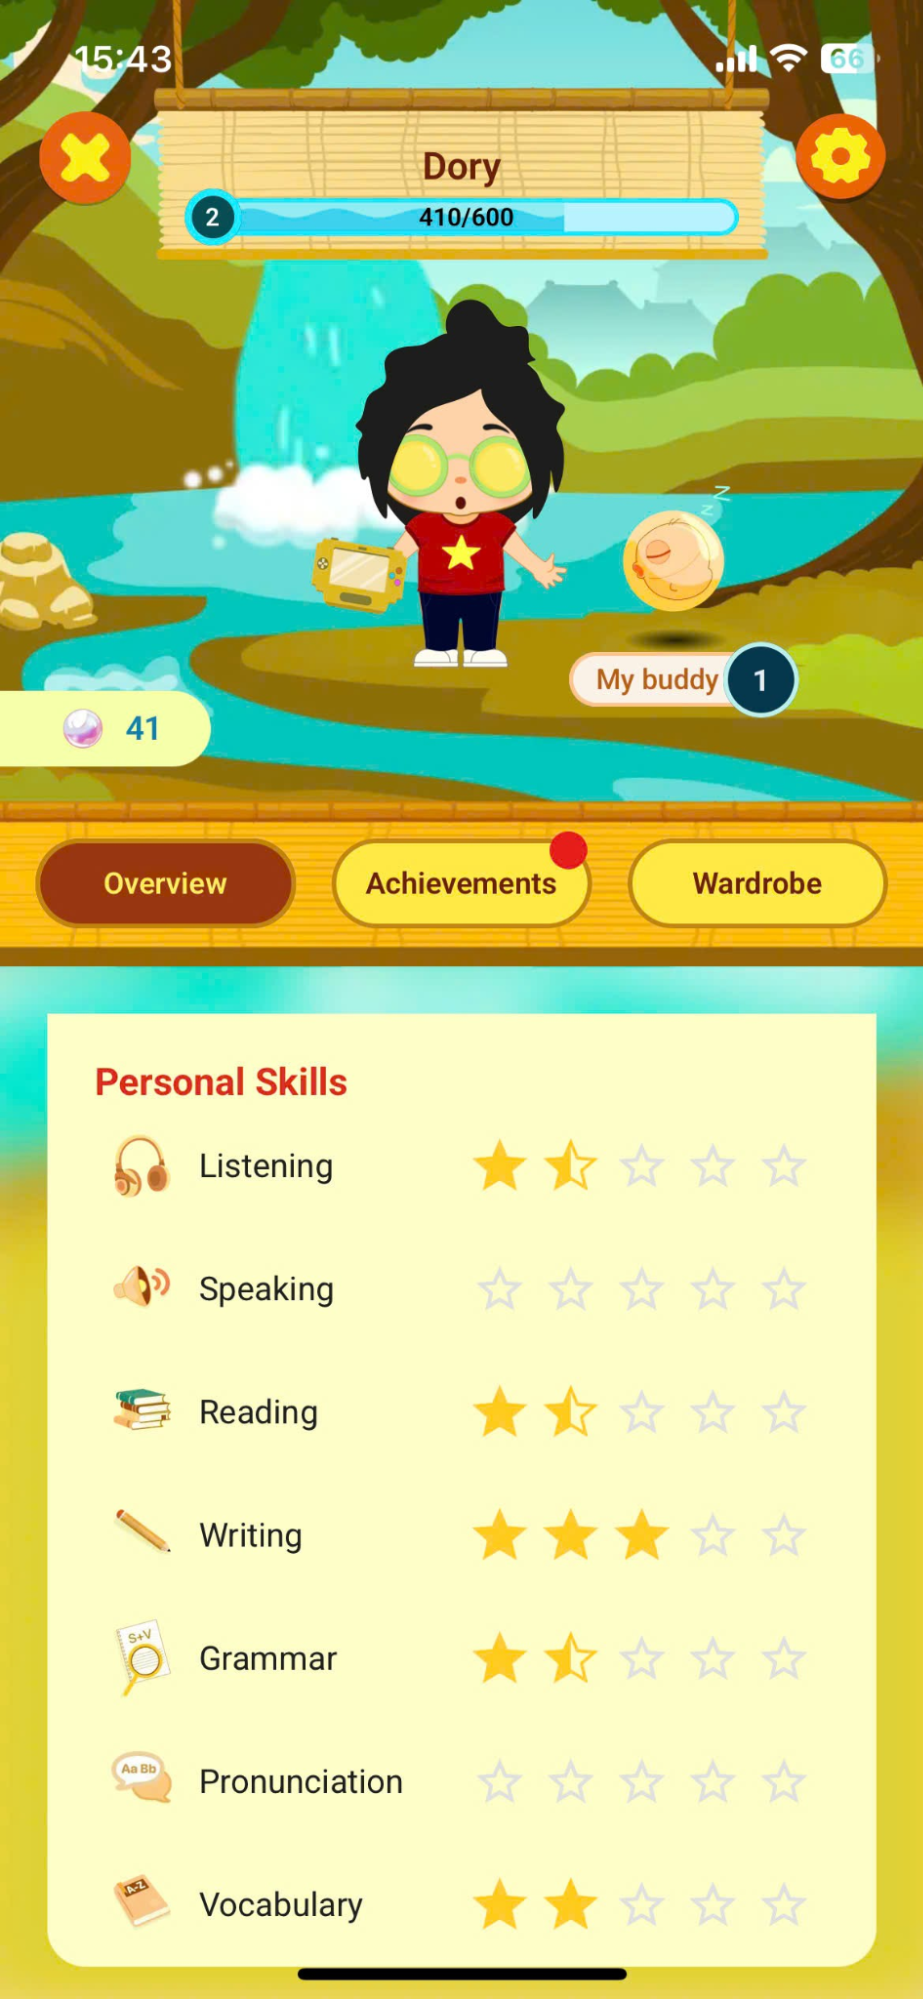 Displays students' proficiency levels in each English skill.PronunciationListeningWritingSpeakingVocabularyReadingGrammarNote: Each skill is rated on a scale of 0 to 5 stars. Displays students' proficiency levels in each English skill.PronunciationListeningWritingSpeakingVocabularyReadingGrammarNote: Each skill is rated on a scale of 0 to 5 stars. |
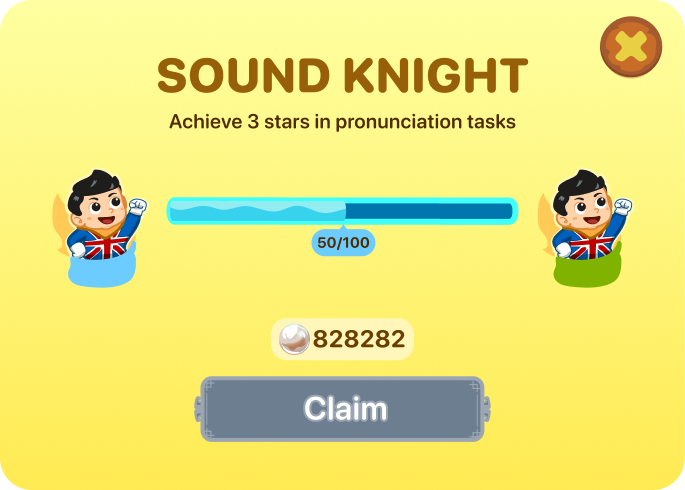
Step 4:Press tab to view achievements and badges earned.
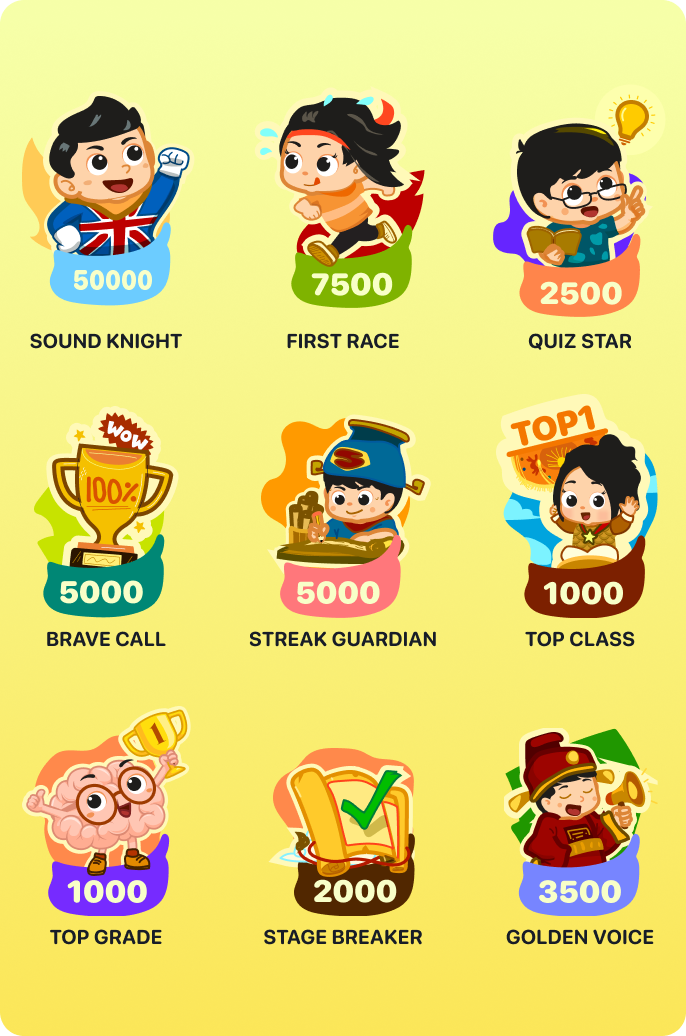
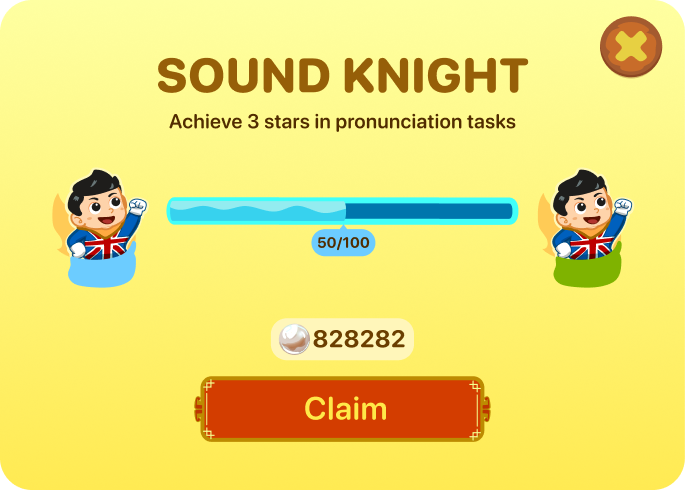
Note: To view detailed information about achievement badges, users click on the corresponding badge icon.
- Name of the emblem.
- The objective to be achieved.
- Progress is shown via a progress bar.
- Rewards received after completing the badge's objective.
For badges that have not yet been achieved, the user presses the button. To exit the badge details screen.
Step 5:Press tab To open the wardrobe screen.
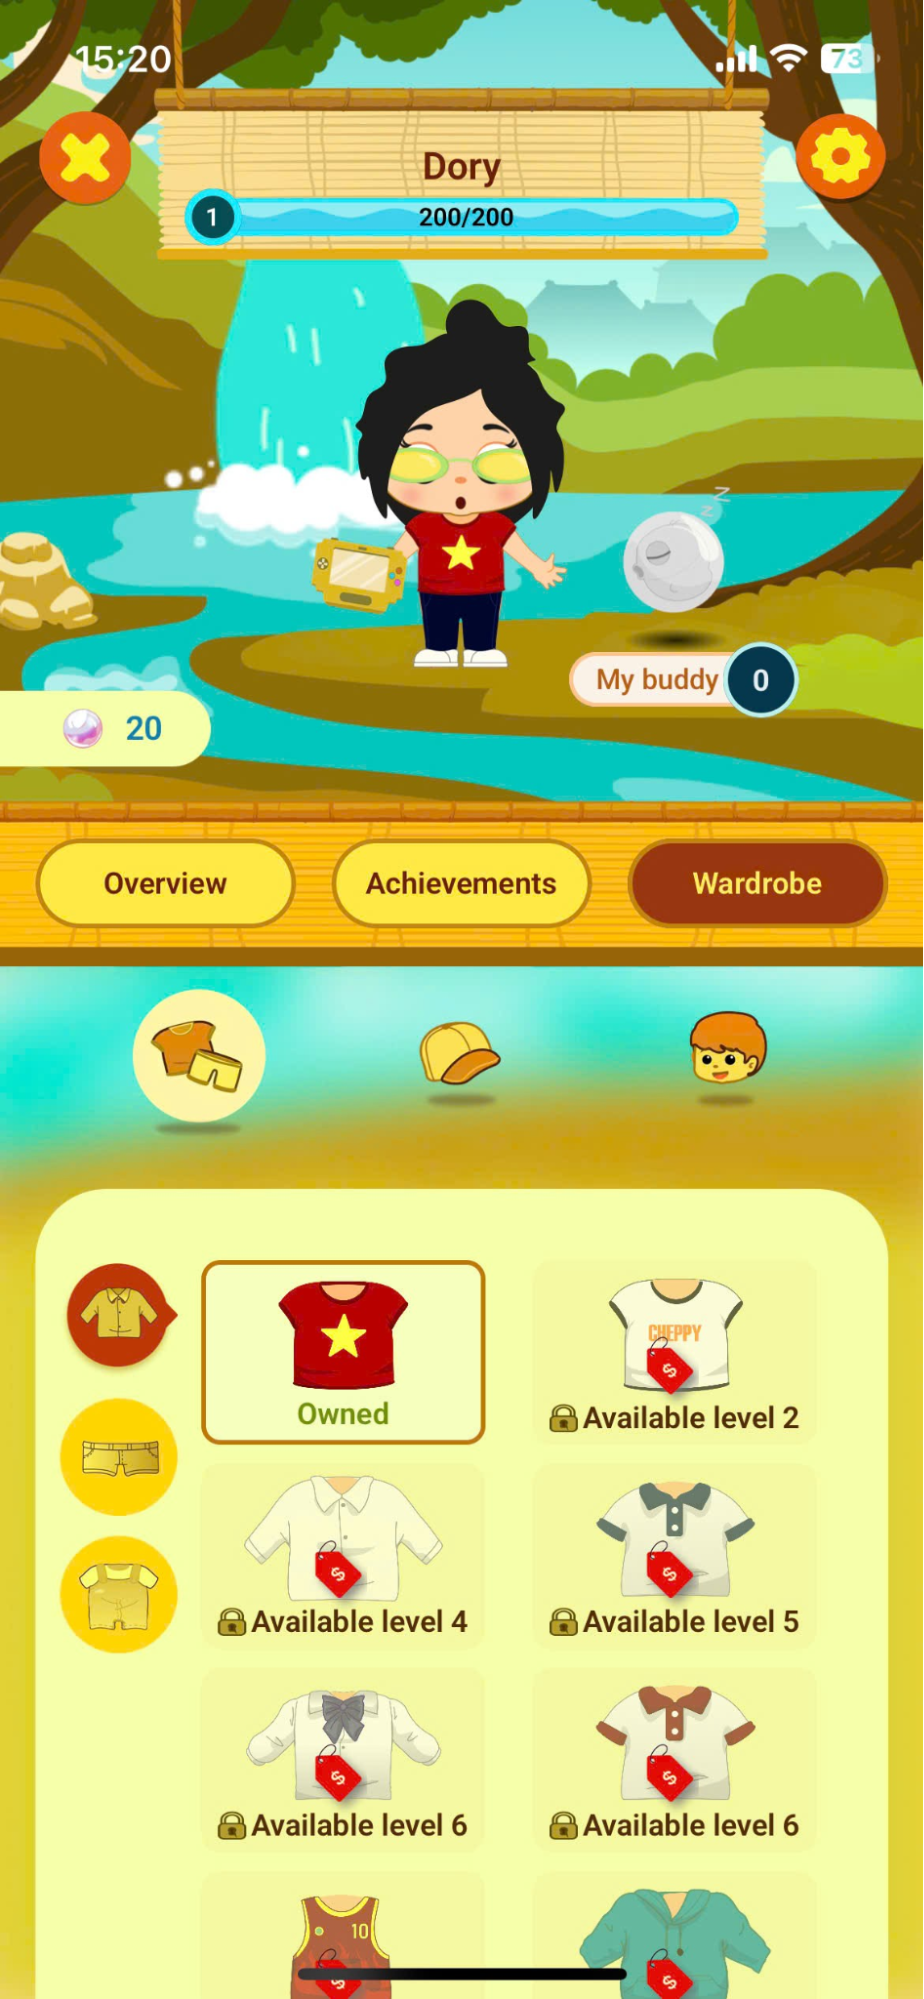
Step 6: Items are categorized by group and user.Scroll down in your inventory to see all the items.

Note: The item's states include:
| STT | Icon | Describe | Operation |
|---|---|---|---|
| 1 |  | Itemcan be unlocked | Select an item and use gems to unlock it. |
| 2 | 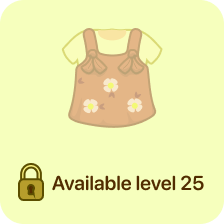 | ItemNot unlocked | Complete the tasks and challenges.To reach the corresponding level to unlock items. |
Step 7: After After selecting the items they wish to purchase, the user presses the button.
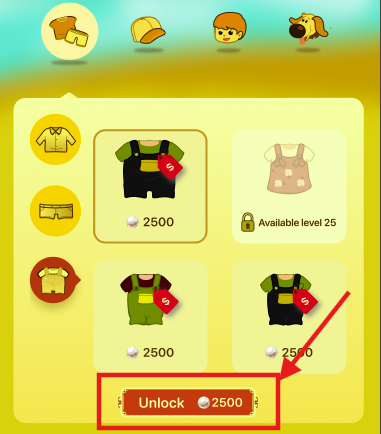
Step 8: In the shopping cart screen, users can see the total cost of the selected items.
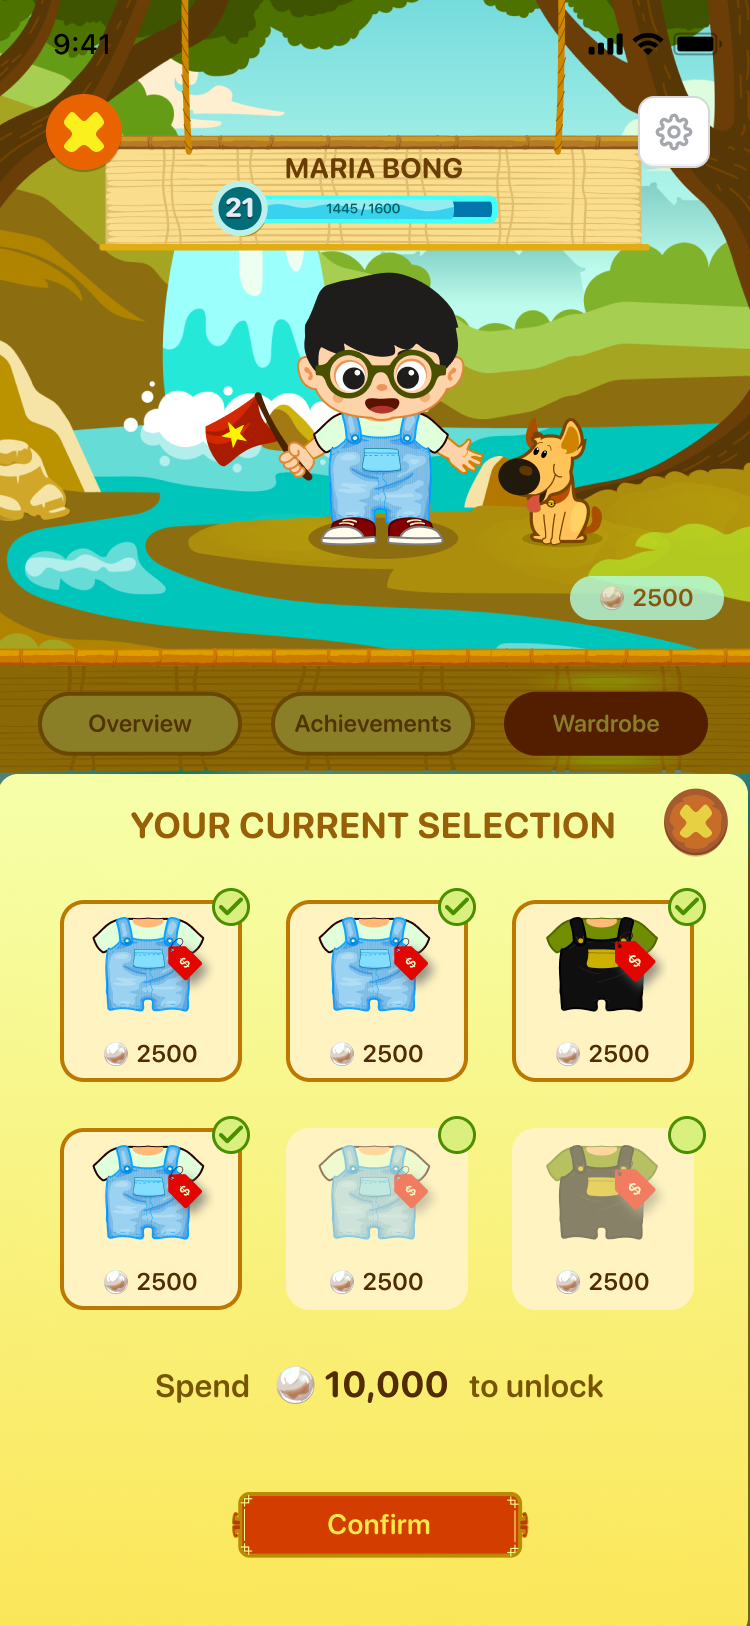
Step 9:Press the button To confirm the purchase of the item.
Note: If you don't have enough gems, please click the icon.![]() to deselect
to deselect![]() .
.
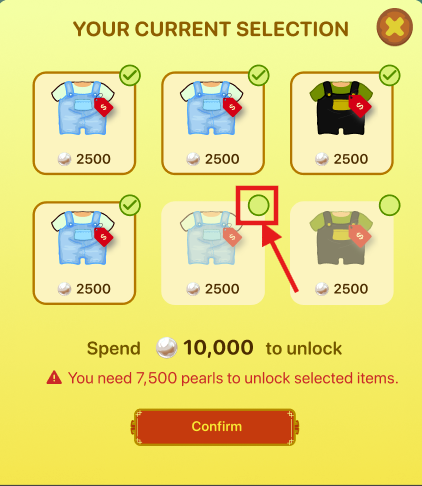
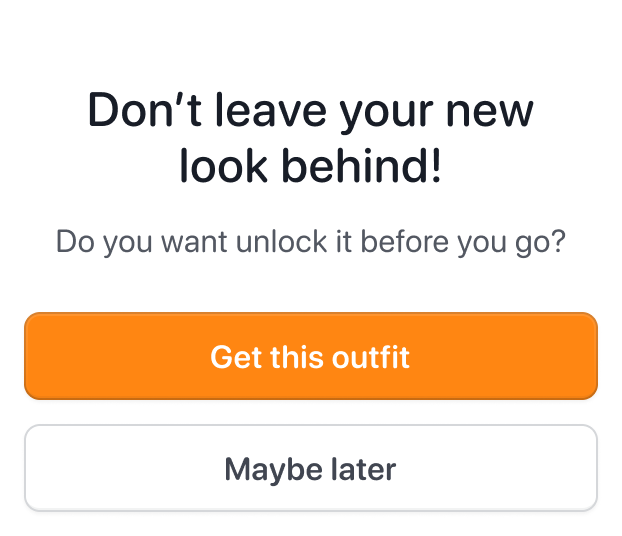
Step 10: In the case where the user presses the button
If the purchase is not completed successfully, the system will display a message including:
- Press the button
 To return to the shopping cart screen.
 - Press the button
 To keep your old outfit and exit the My Profile screen.
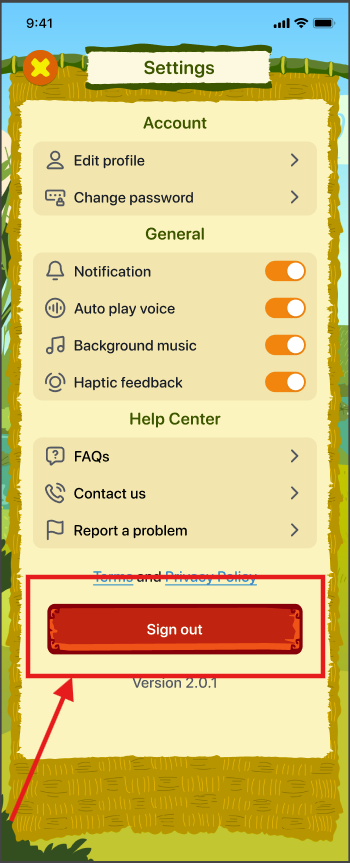
6. SETTINGS
Step 1: In the My Profile screen, click the icon. .
.
Step 2:After selecting the option, the system displays the settings screen.
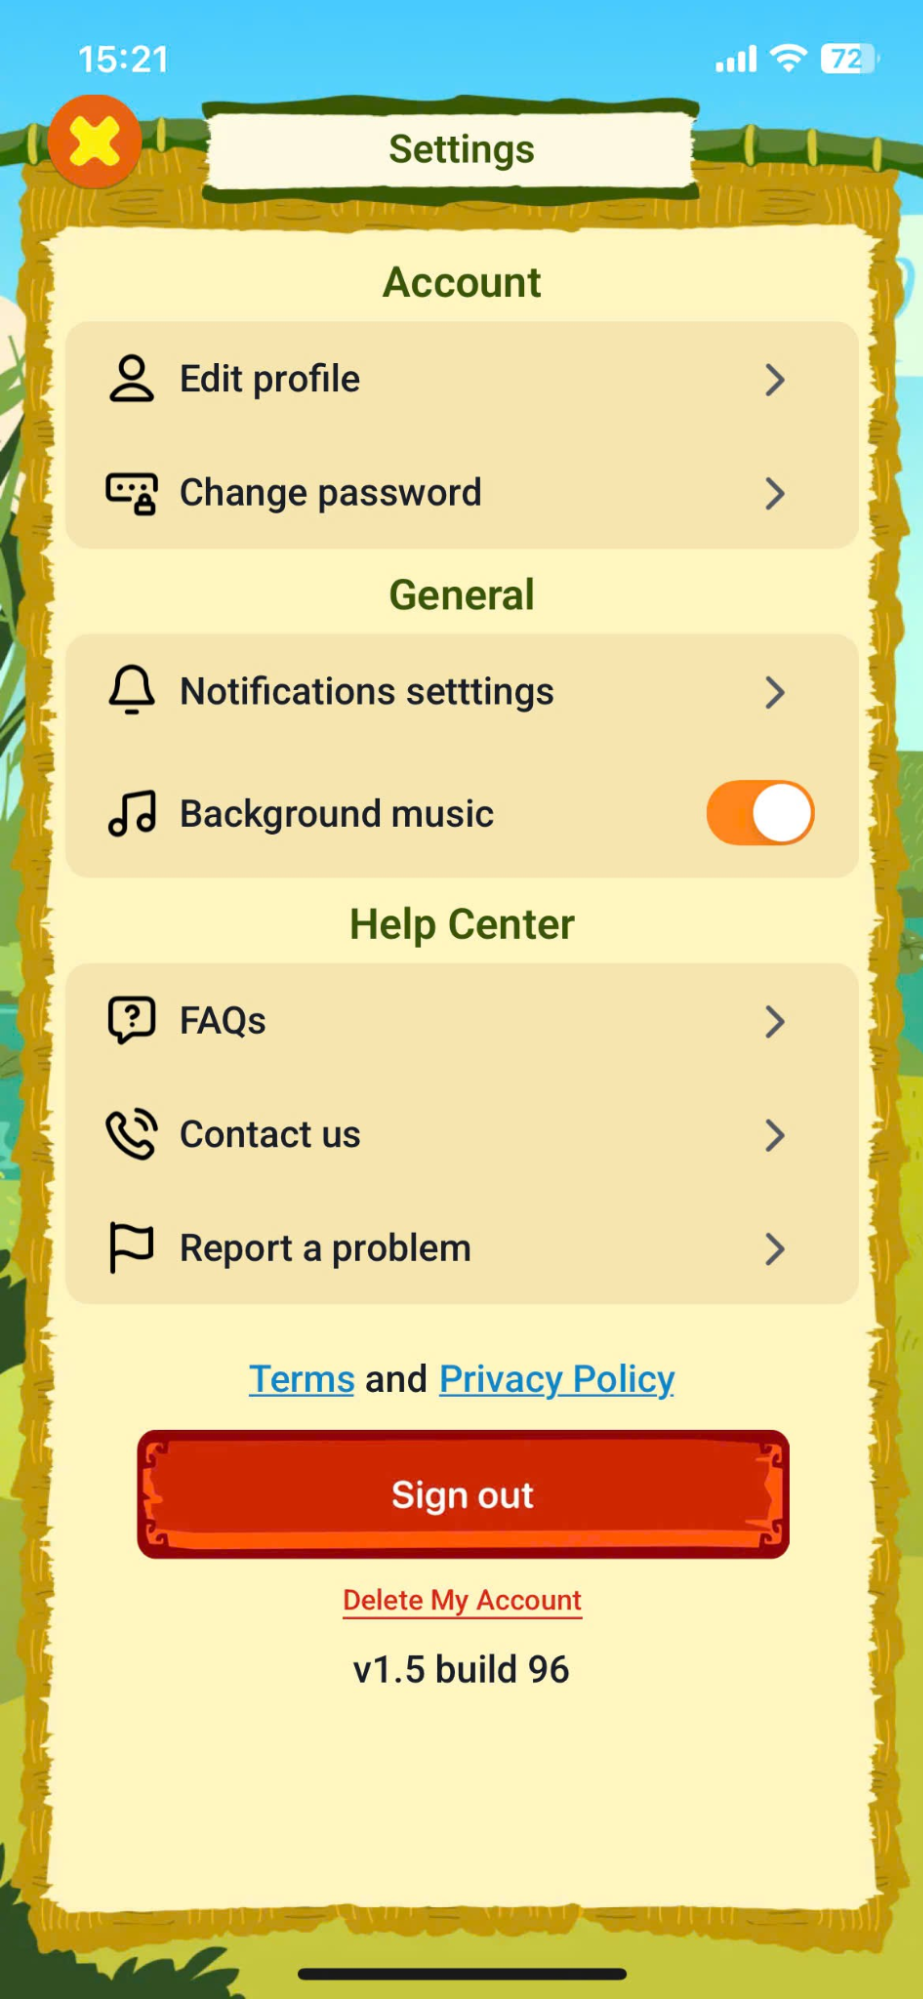
Step 3:Here, users can turn the Notification function on or off.
Step 4: Press the button To log out of your account on the app.
6.1. EDIT PROFILE
Step 1:Press the button to edit your account information. 
Step 2: In the Edit profile screen, users can view detailed information, including:
- Username: Login name.
- Display name: Display name.
- Email: Email address.
- Mobile number: Phone number.
- My birthday: Date of birth.
- Gender: Gender.
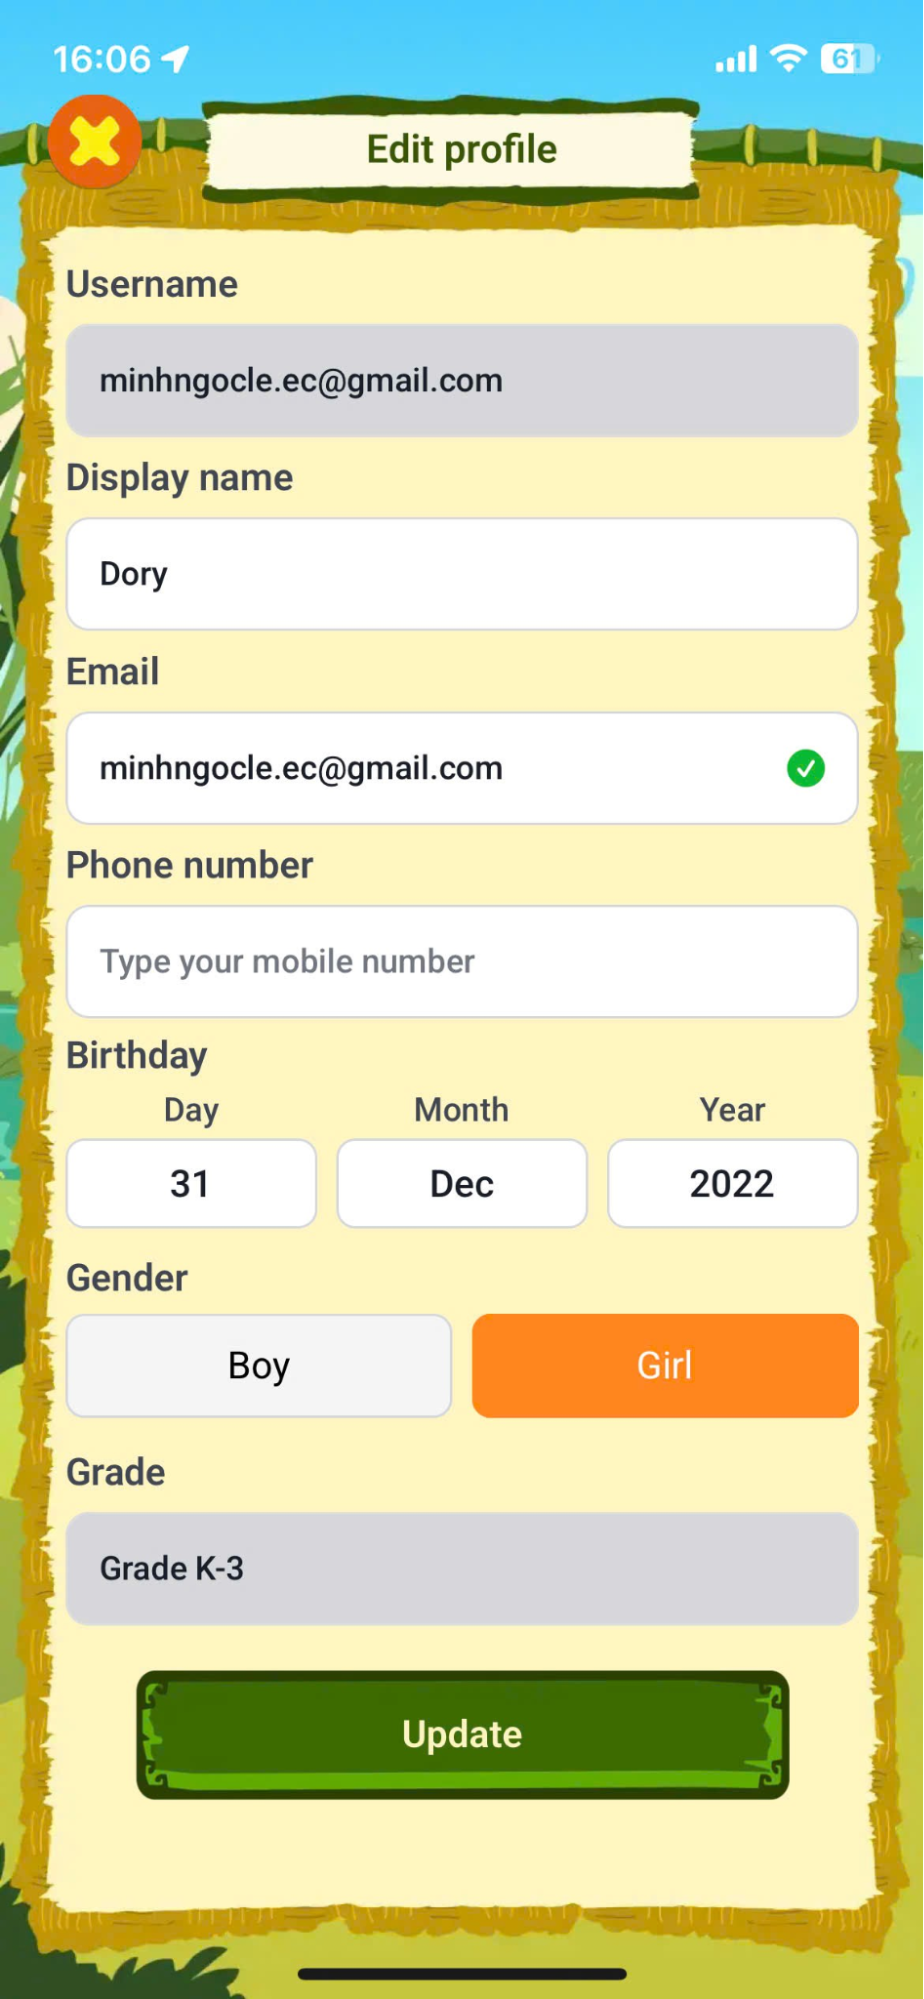
Step 3:After updating the information, the user presses the button. To save the changed information.
Note: If data saving fails, please check:
- Internet connection.
- Fill in all required fields completely.
- Enter the information in a valid format.
- Do not modify the account's default information, including the username.
6.2. CHANGE PASSWORD
Step 1: Press the button![]() to change your password.
to change your password.
Step 2:On the password change screen, users can view detailed information, including:
- Current password: Current password
- New password: The password must be between 8 and 16 characters and include at least one digit.
- Confirm password: Re-enter your new password.
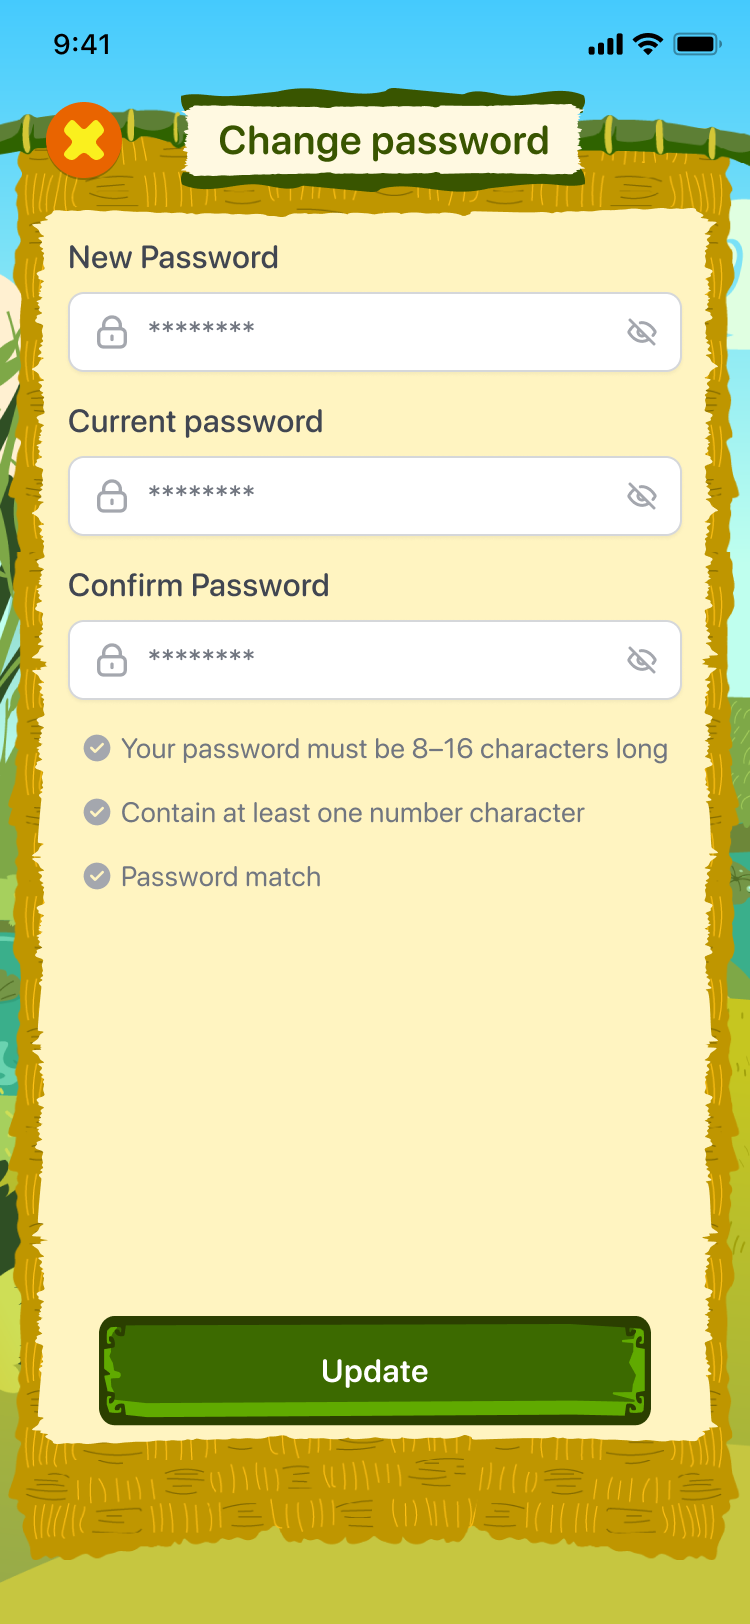
Step 3: Press the buttonTo save the new password.
6.3. FAQs (Frequently Asked Questions)
Step 1:Press the button To switch to the frequently asked questions screen.
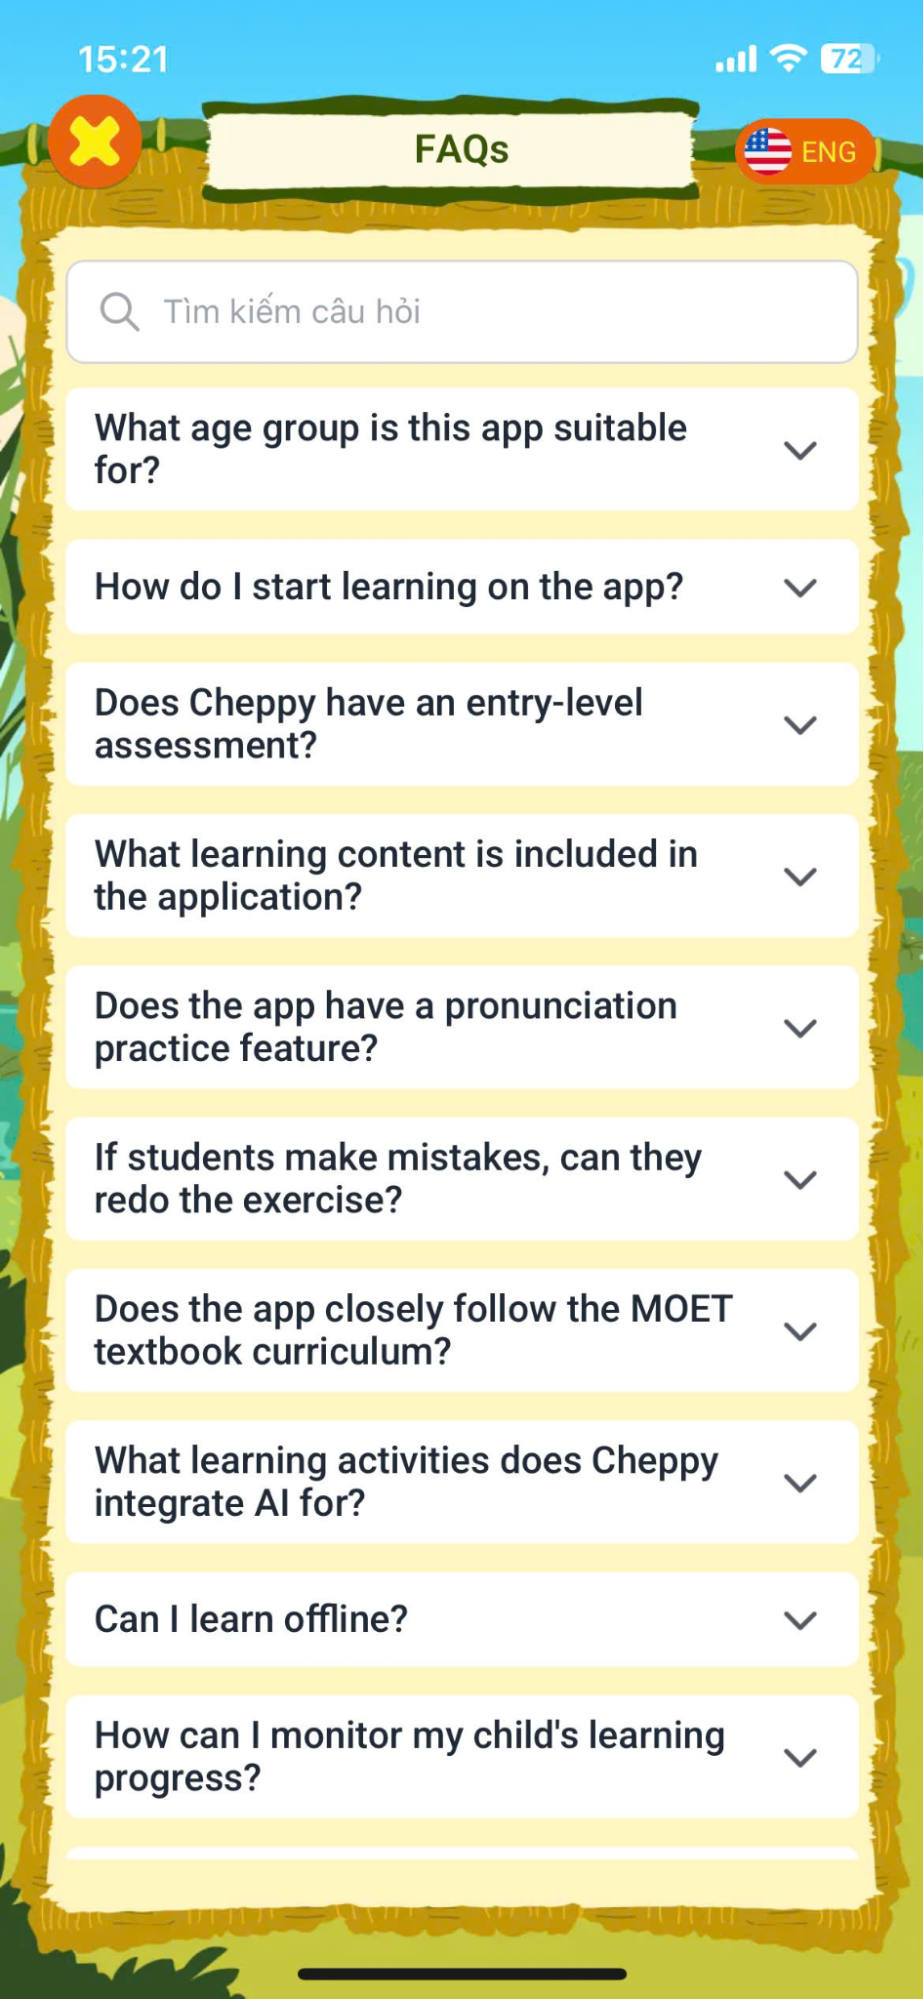
Step 2: Enter keywords to search for relevant questions.
Step 3: Click on the question to see the detailed answer.
6.4. CONTACT US
Step 1: Press the button![]() To switch to the contact information screen.
To switch to the contact information screen.
Step 2: The system will displayThe default email application on the device.
Step 3: SAfter entering your email content, click Send email to the Cheppy app support team.
6.5. REPORT A PROBLEM
Step 1:Press the button![]() To switch to the problem reporting screen.
To switch to the problem reporting screen.
Step 2:In the Report a problem screen, users enter detailed information, including:
- Your email address:
- Type of problem: The type of problem.
- Description: Describe the problem.
- Attachments: Attached images (in png or jpeg format)
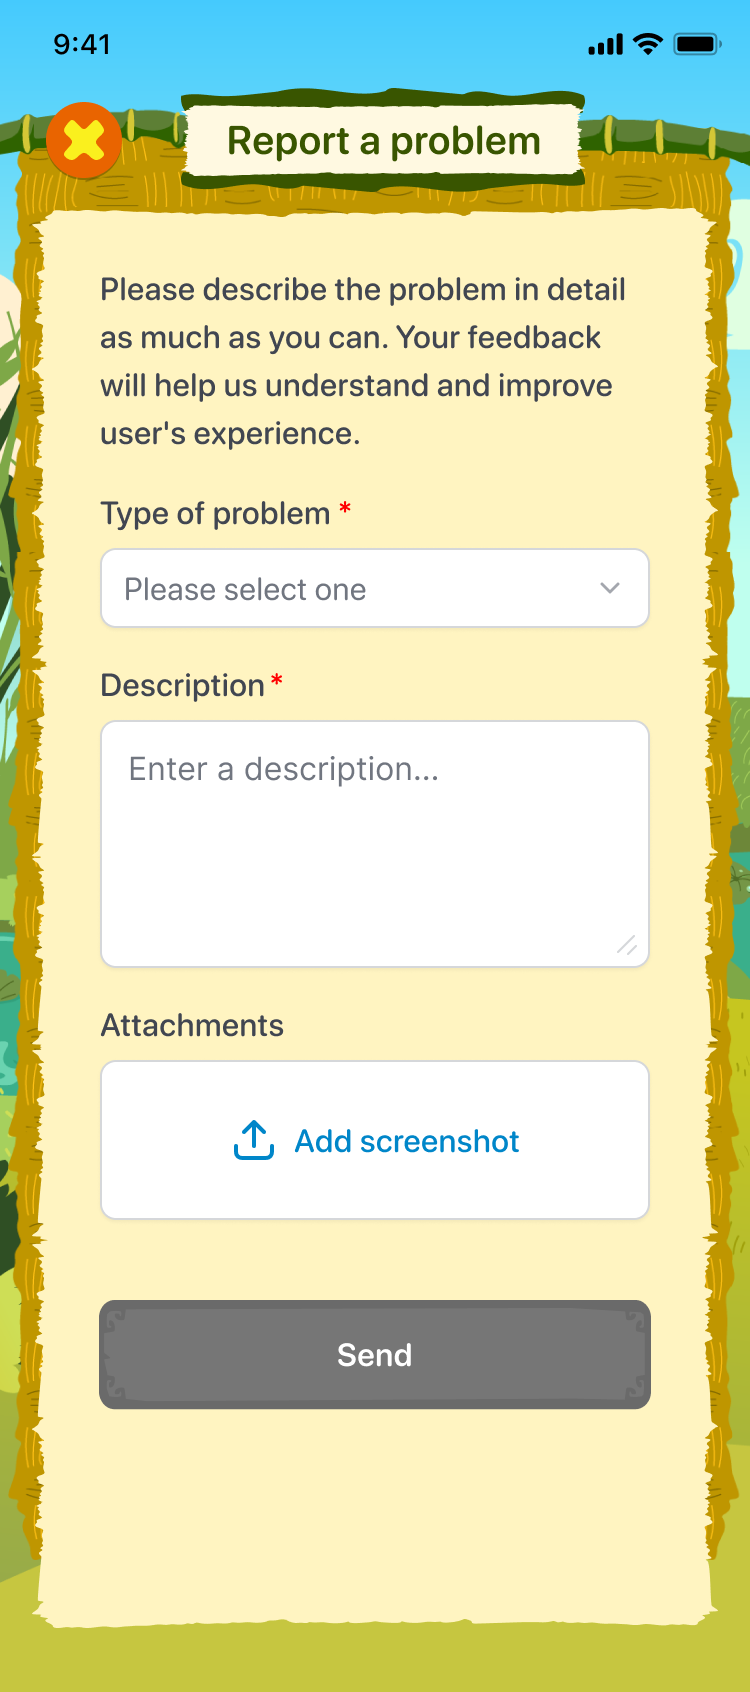
Step 3: After completing the information, press the button. to submit the report.
7. MY SCHOOL
Step 1: On the main screen, select the My School area icon.
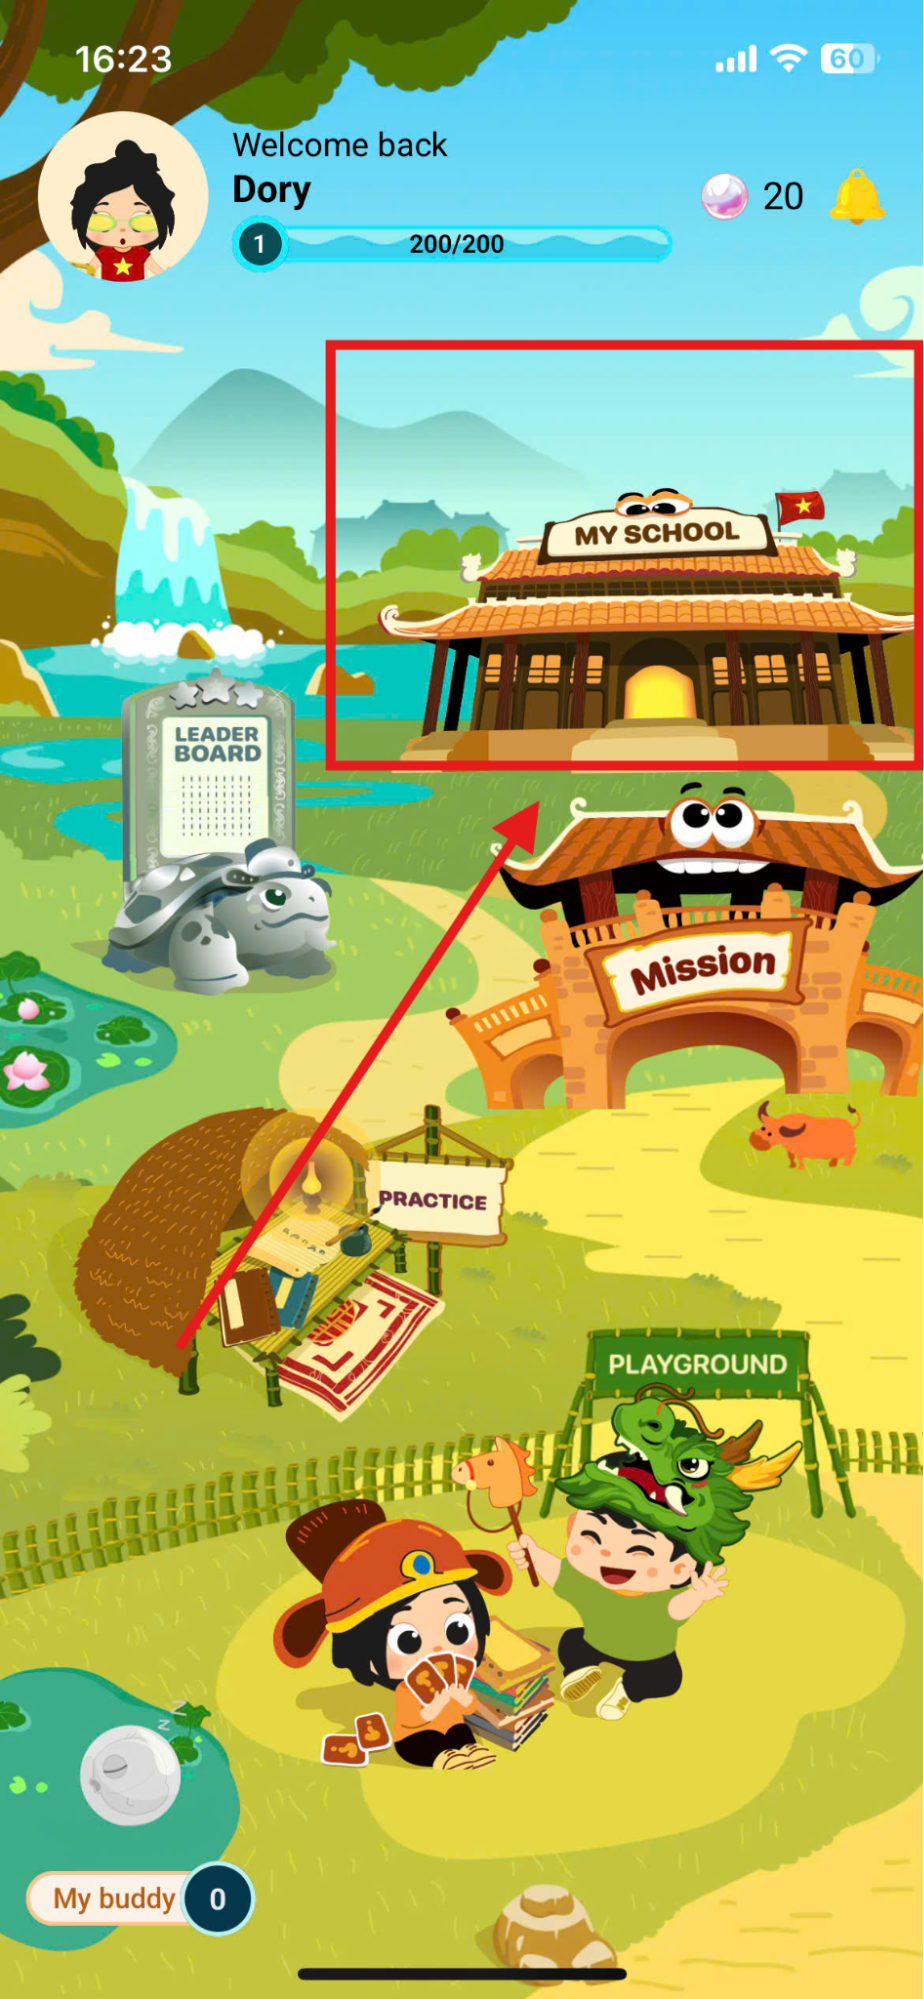
Step 2:The system displays the My School screen.
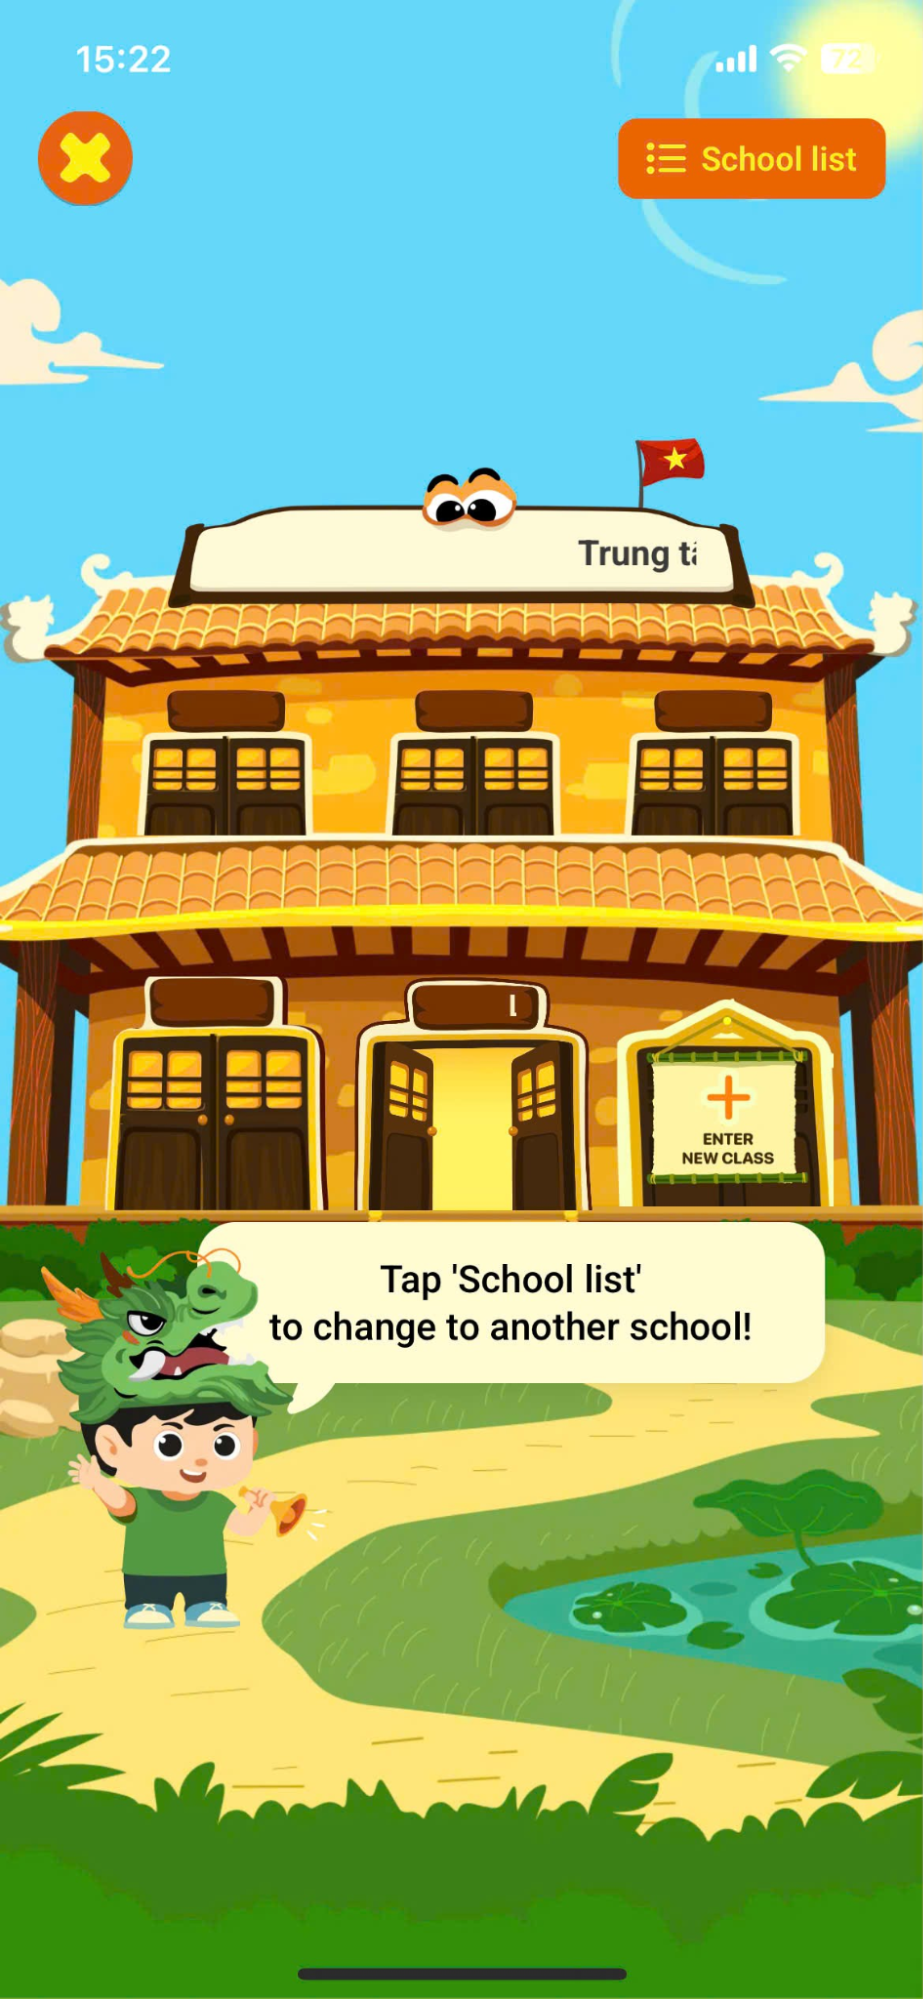
7.1. JOIN CLASS
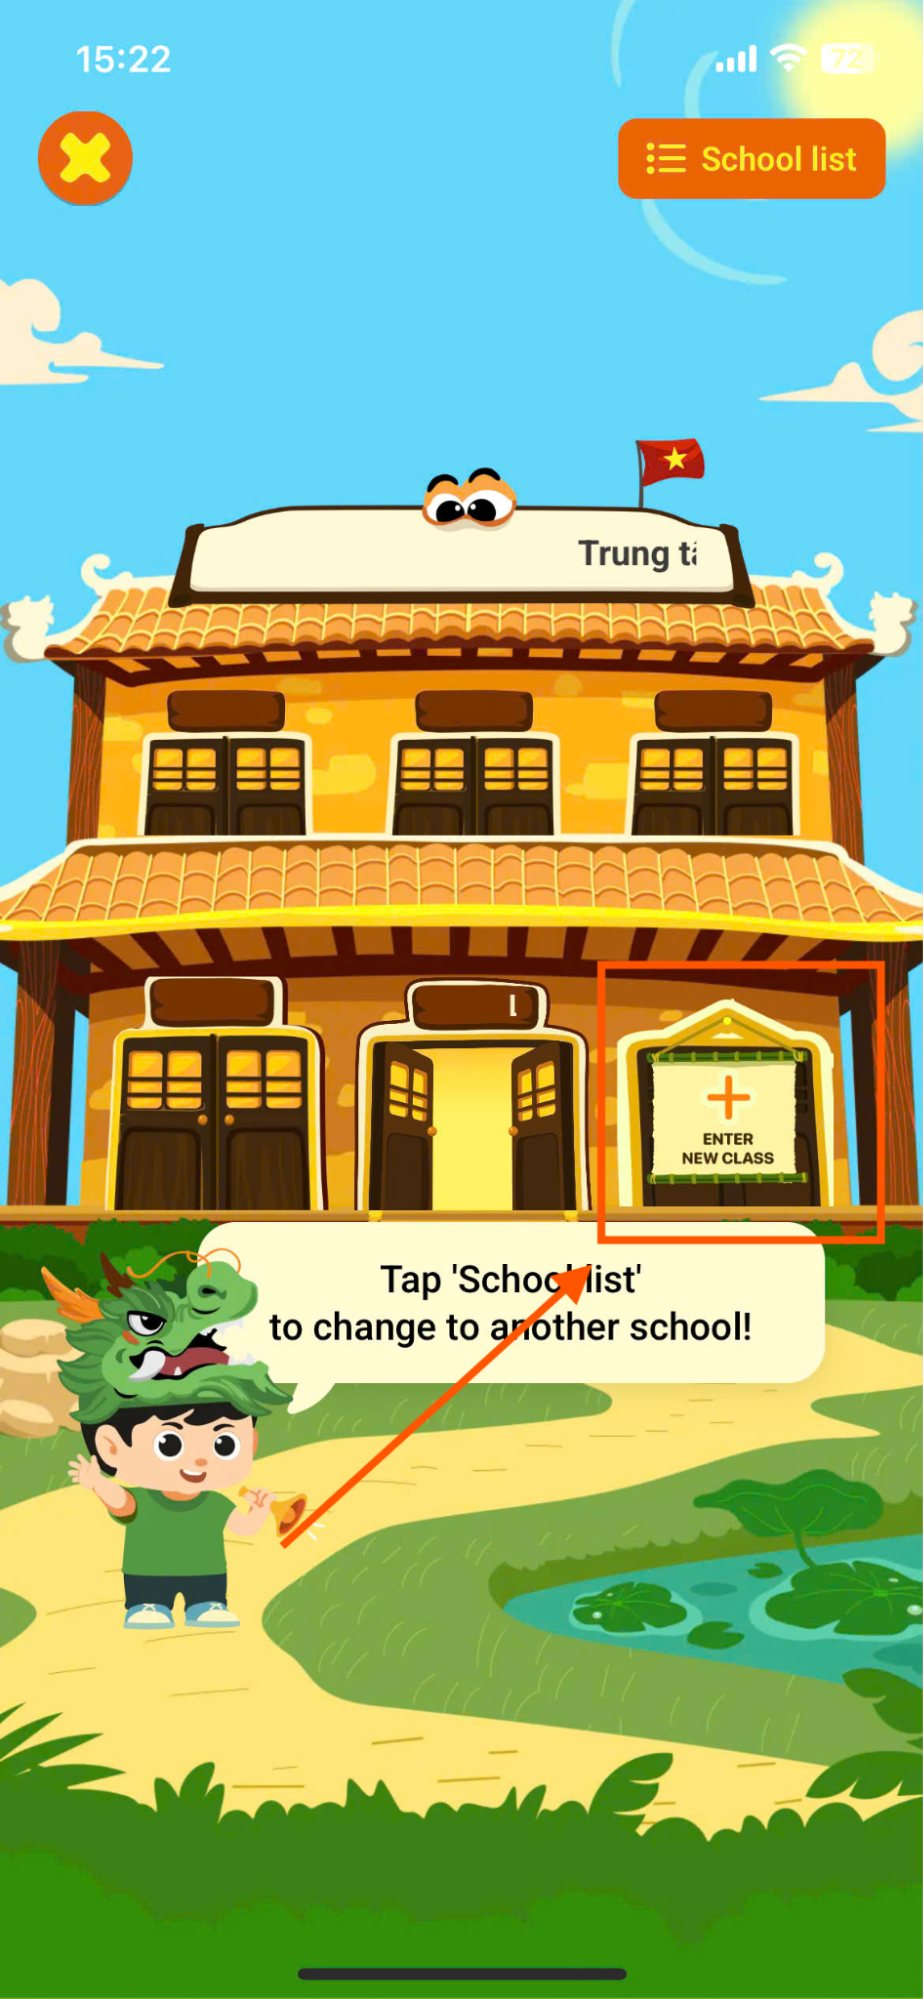
Step 1: In the My School screen, users can join a class in one of three ways.
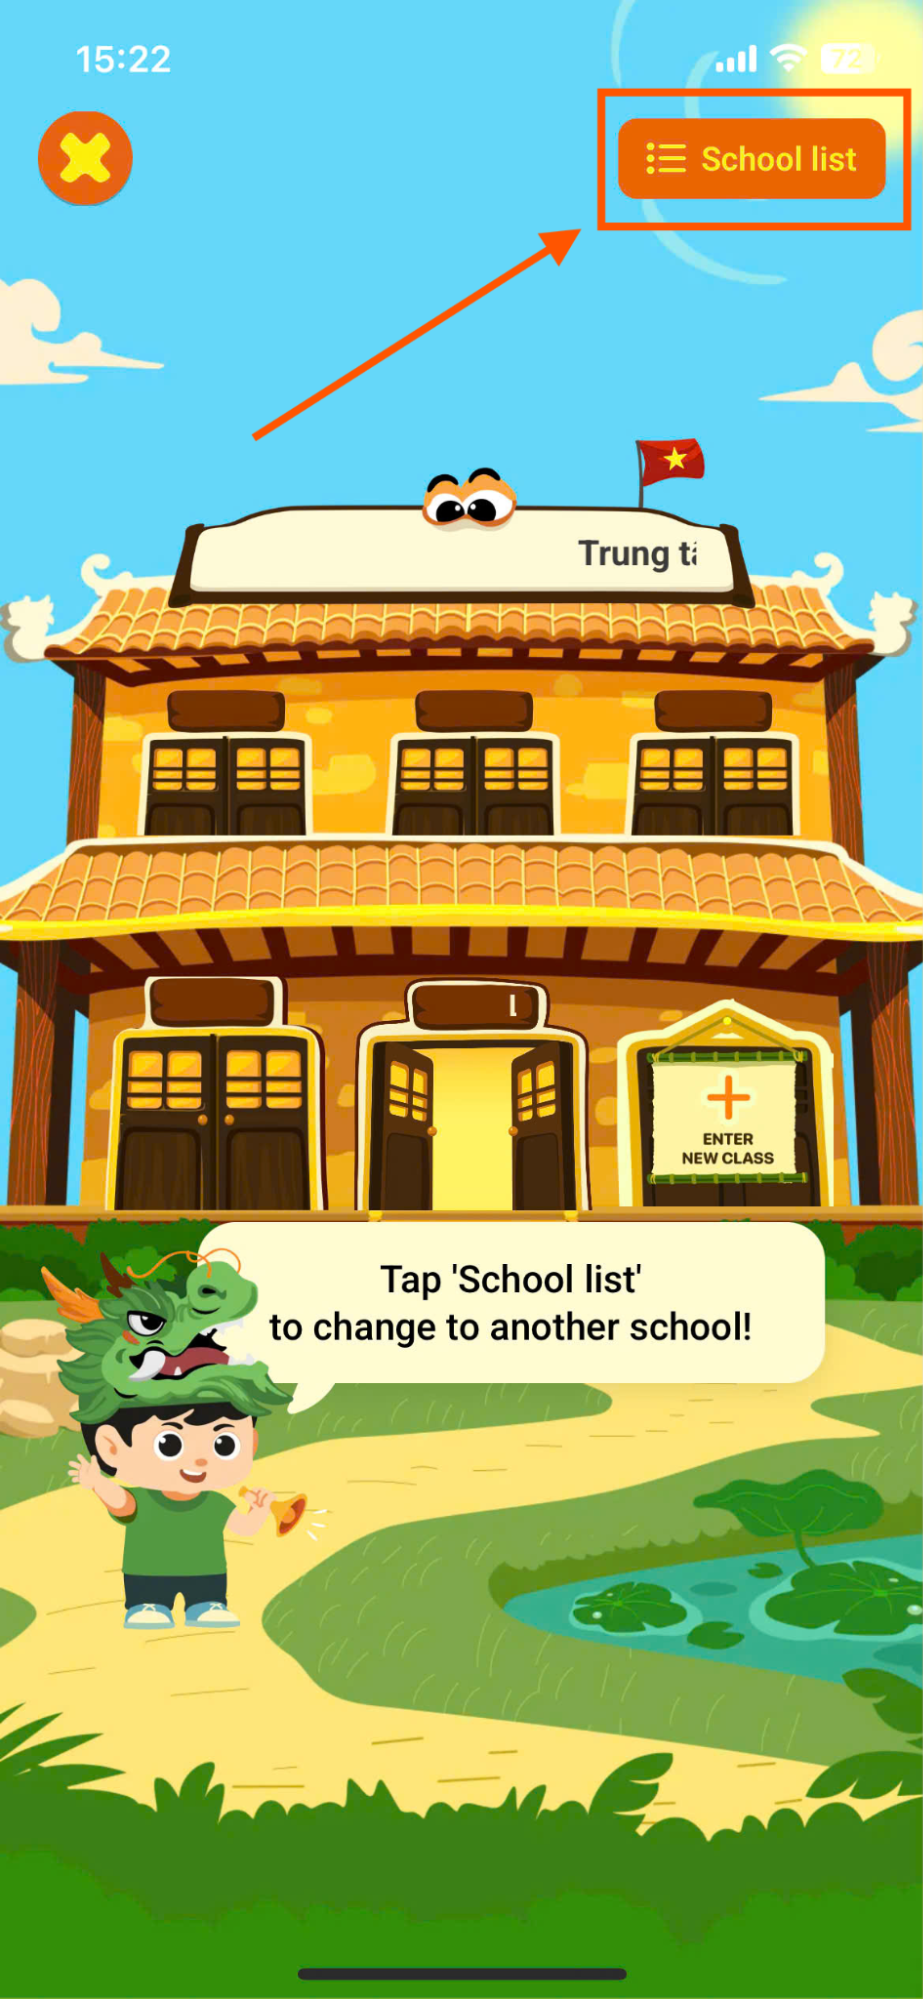
Method 1:Press the button To display a list of schools.
Then the user presses the button.![]()
Method 2:Click on the icon to join the class.
Method 3:Contact the teacher to add users to the class. After the teacher successfully adds them, the system will automatically update and display the new class in the My School screen.
Note: If the new class is not displayed after the teacher successfully adds it, the user should check and provide the teacher with the correct account information. If the class is still not displayed after checking the information, please contact Cheppy's support team via the Contact us section.
Step 2:Enter the class code provided by the teacher corresponding to the participating school.
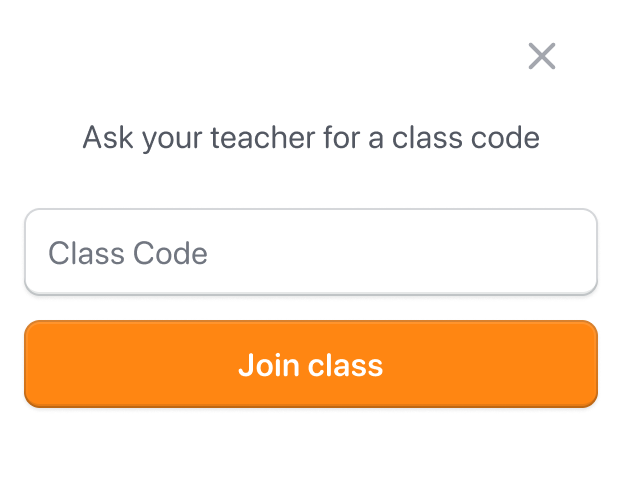
Step 3: Press the button to attend the class.
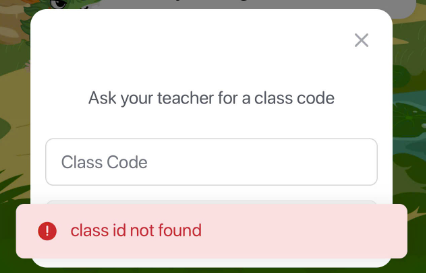
Note: If you receive an invalid notification, please double-check the class code provided by the teacher. If you have entered the correct class code but still receive an error message, please contact Cheppy app support via the Contact us section.
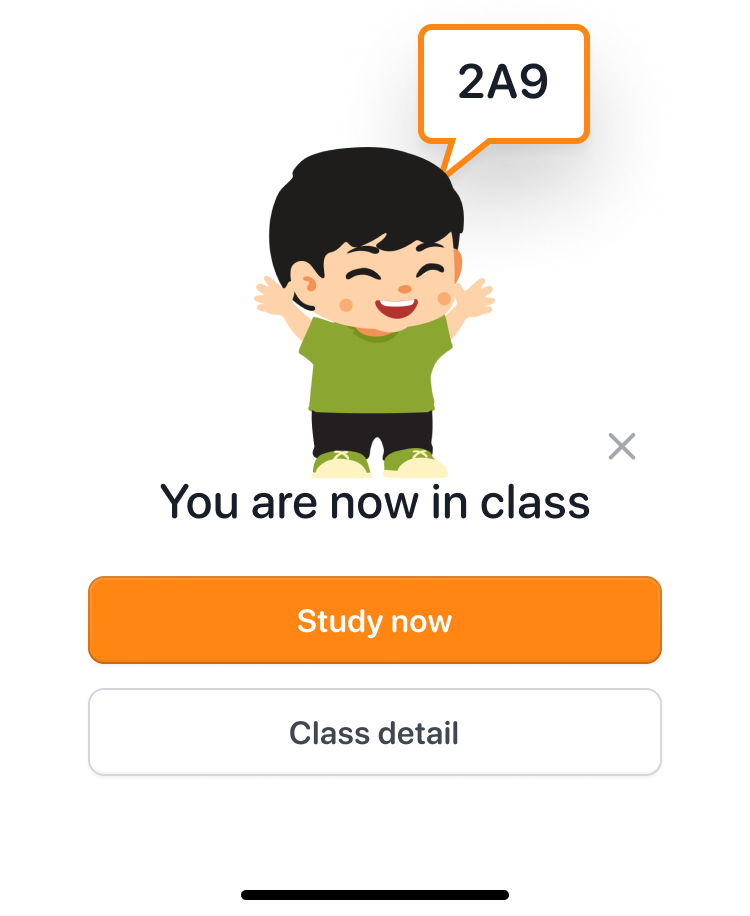
Step 4: After successfully entering the class code, npress button To begin exploring the learning areas of the app.
Step 5: Press the button To view detailed class information.
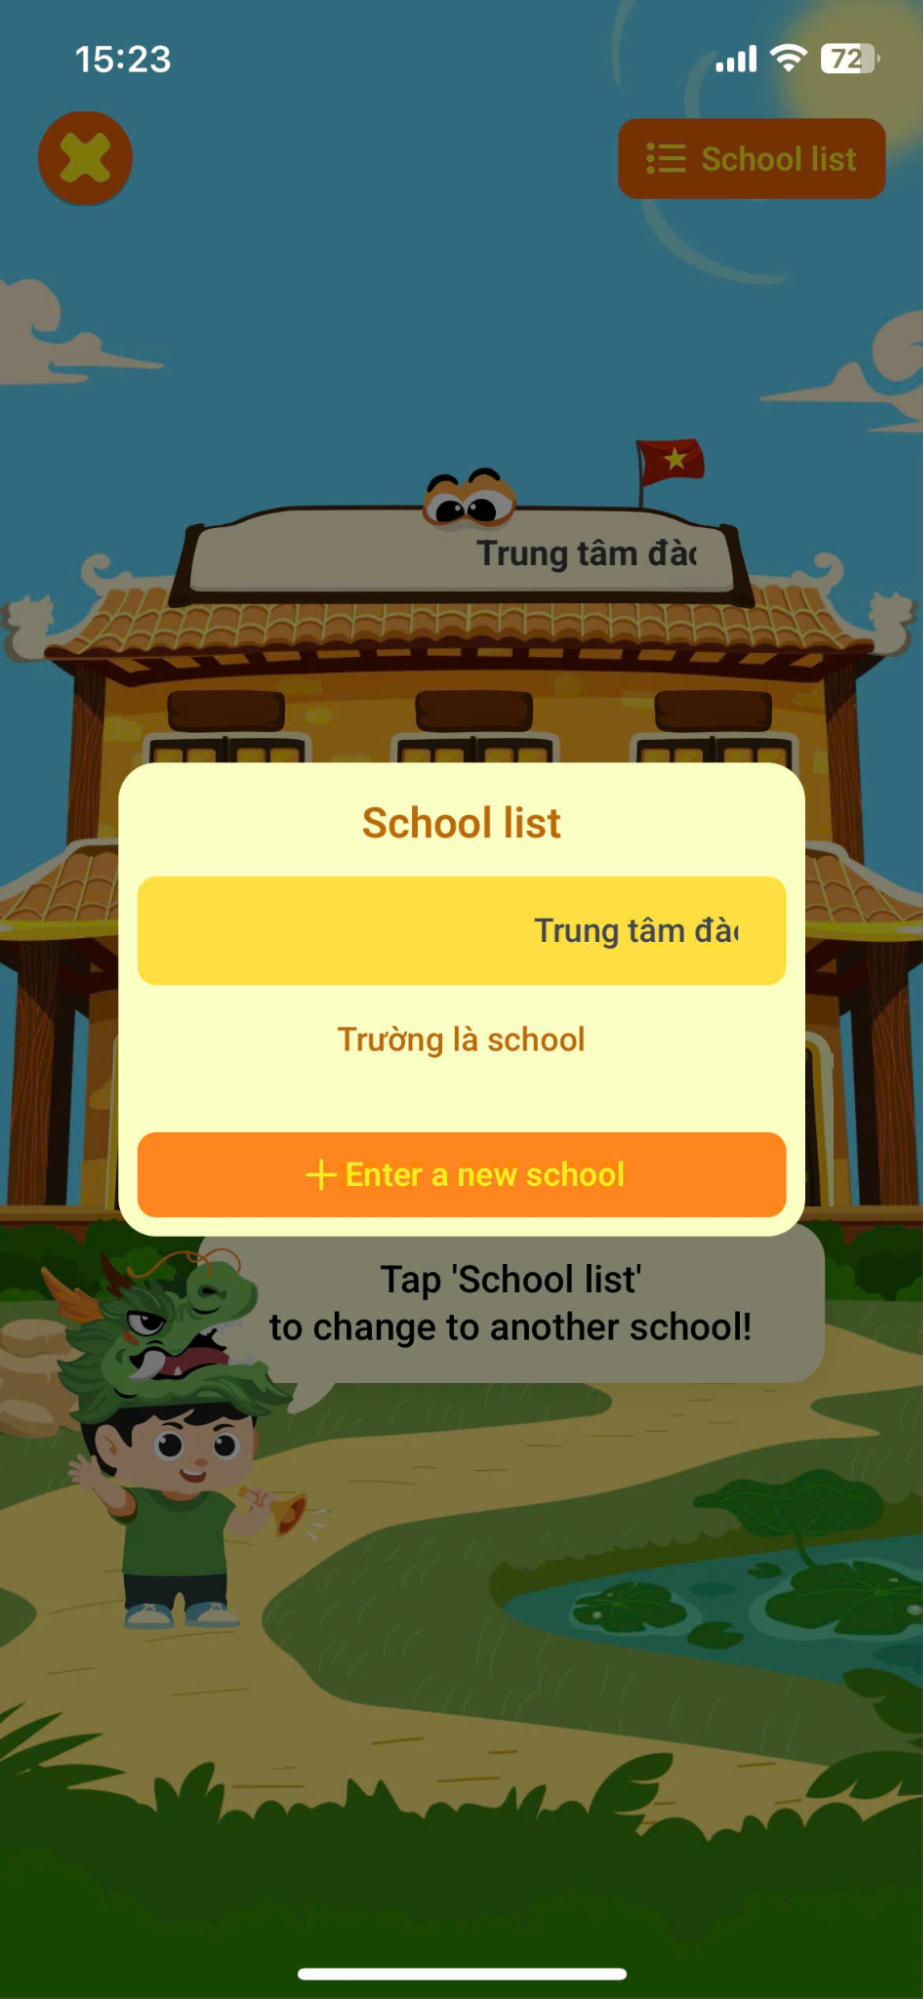
7.2. MY CLASS
Step 1:Press the buttonTo display a list of schools.
Step 2: Choose a school from the list.

Step 3: Click on the class icon to switch to the class information screen.
Note: The states of the classroom include:
| STT | Icon | Status | Operation |
|---|---|---|---|
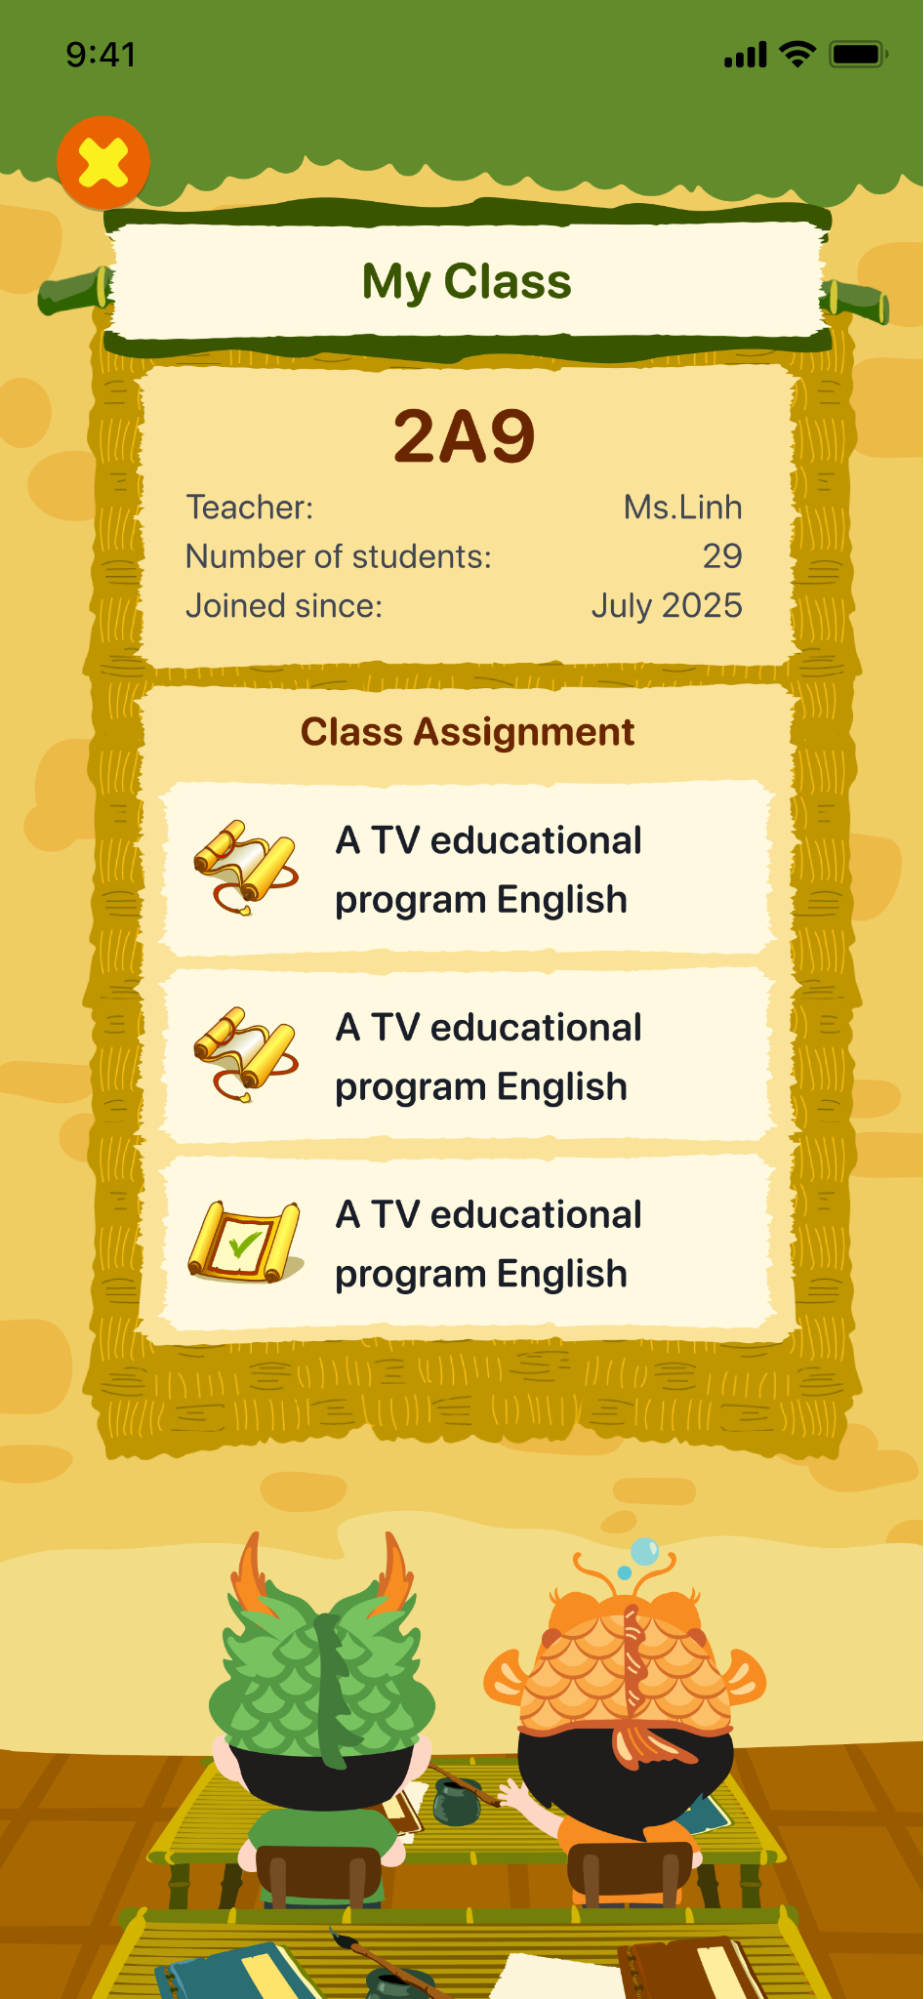
| 1 |  | The class is in progress. | Click the icon to switch to the class information screen. |
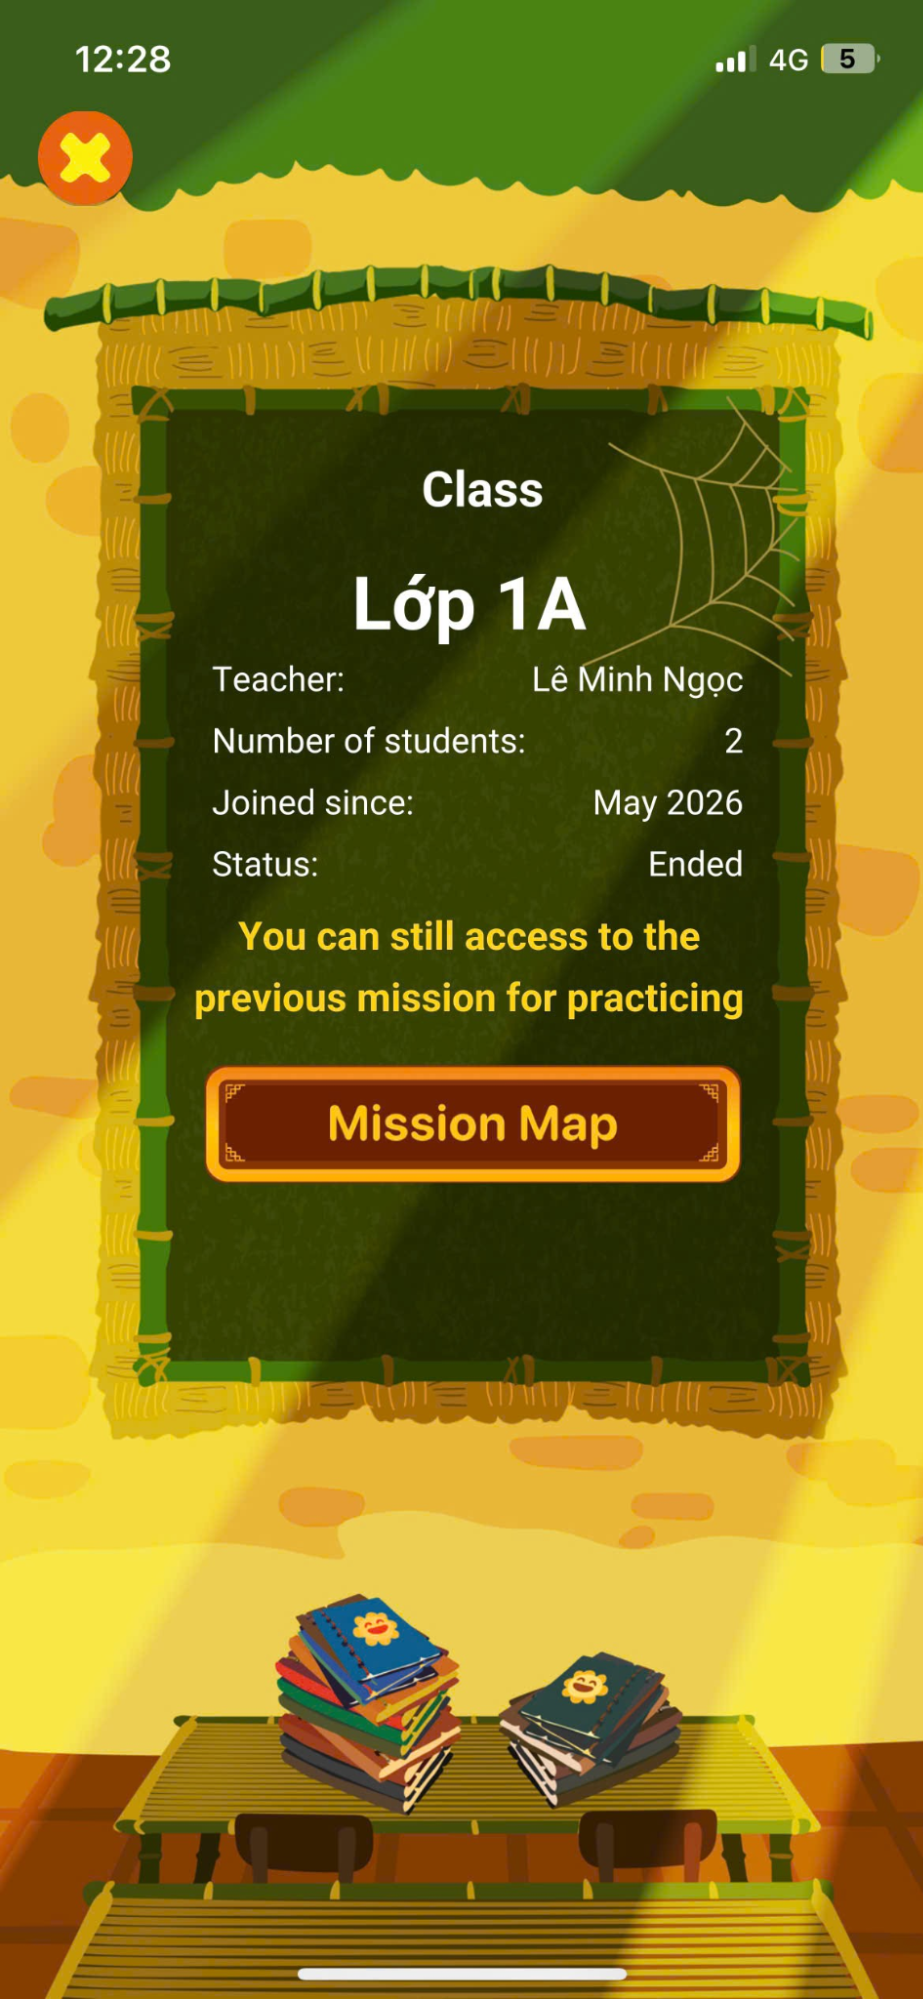
| 2 |  | The class has ended. | Click the icon to switch to the class information screen. |
| 2 |  | Not yet attended the class | Follow the instructions to join the class. |
Step 3: In the active classroom screen, users can view detailed information, including:
- Class name: Class name.
- Teacher name: Teacher's name.
- Number of students: Class size.
- Joined since: The time the class started.
- Class Assignment: List of assigned tasks.
Step 4: On the "Class Ended" screen, users can view detailed information.
Note: Press the button To switch to the Mission screen of the class.
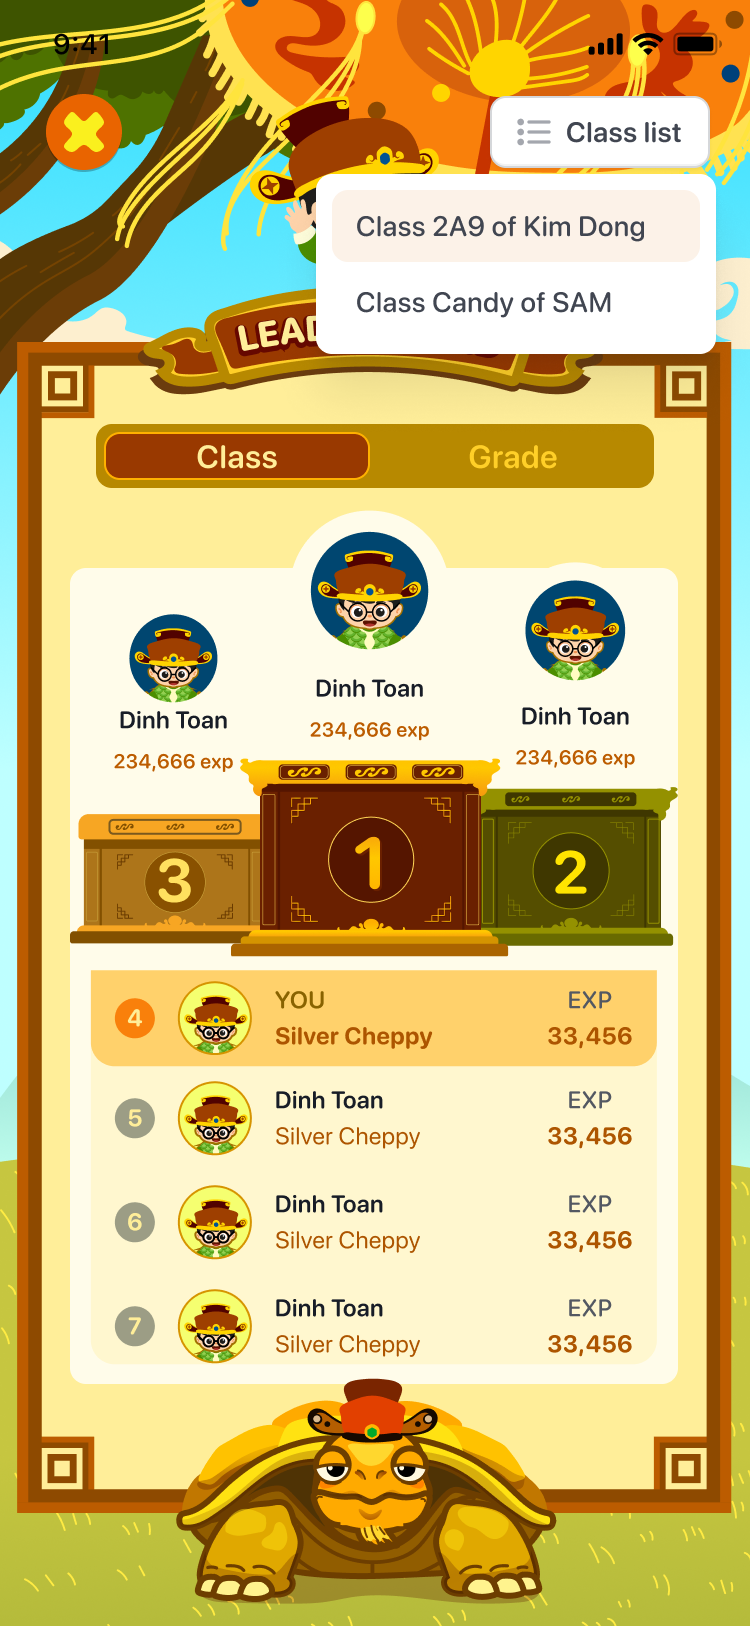
8. LEADERBOARD
Step 1: On the main screen, click on the Leaderboard area icon.

Step 2: On the Leaderboard screen, users can view rankings sorted by Level and EXP (Experience Points).

Step 2:Press tab![]() To view the rankings by class.
To view the rankings by class.
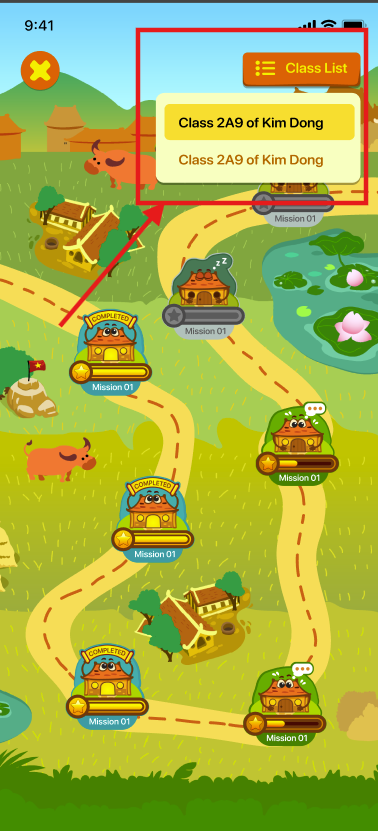
Step 3:Press the button To display a list of classes attended.
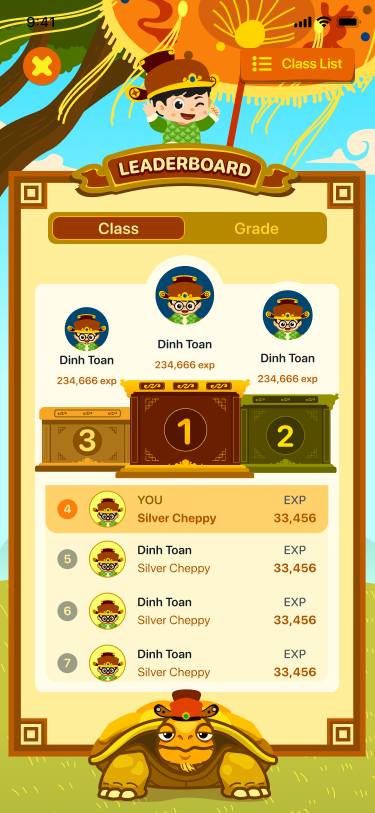
Step 4: Press selectClass to view the rankings.
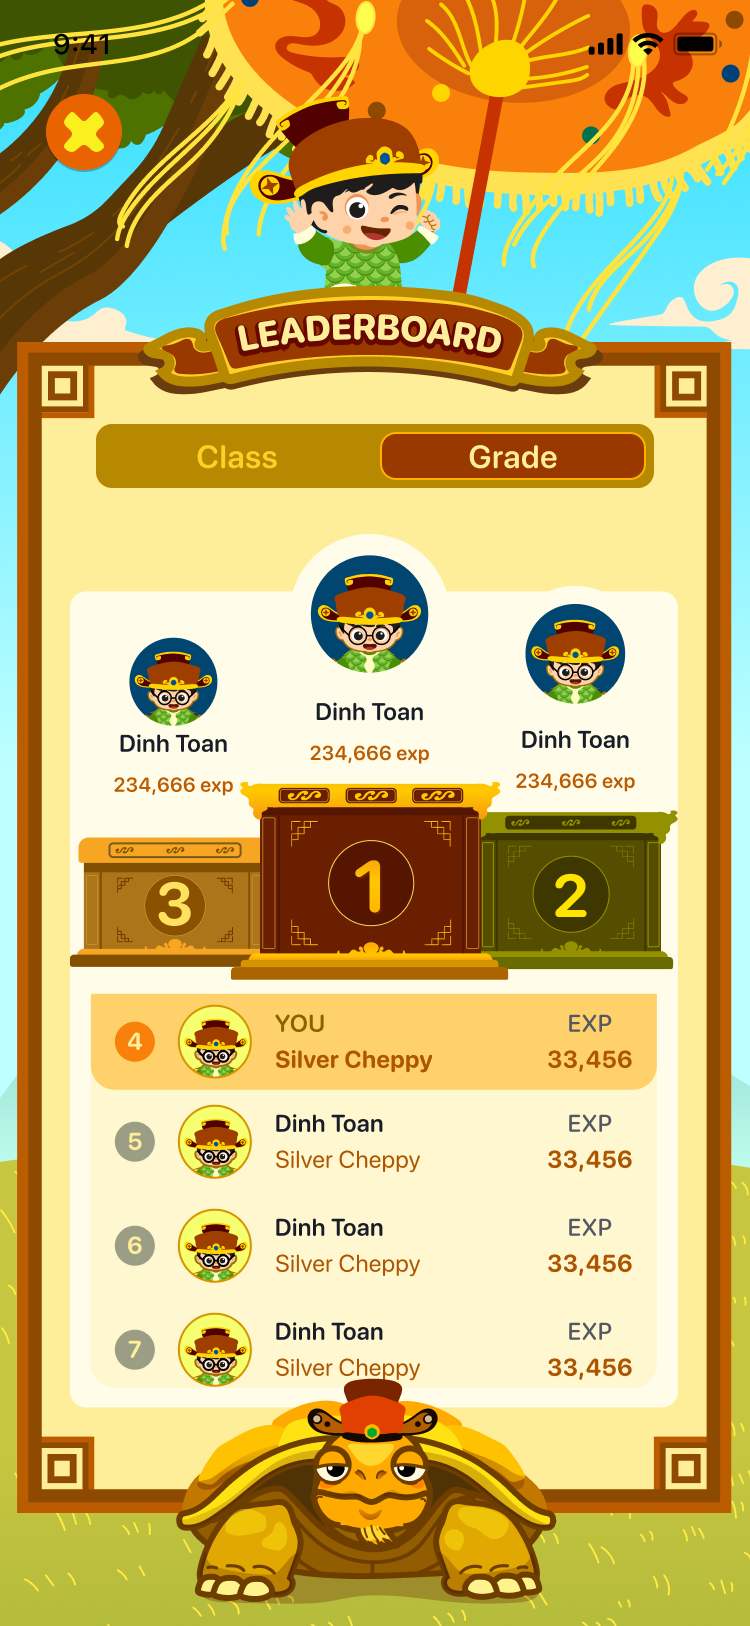
Step 5: Press tab![]() To view the rankings by grade level across all schools.
To view the rankings by grade level across all schools.
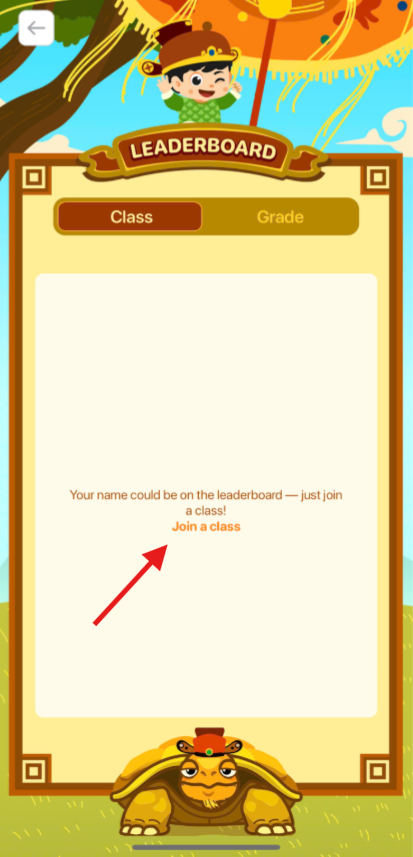
Note: If a student has not yet joined any classes, the system will display a message indicating that their class and grade level ranking has not been recorded. Users are advised to access the My School area to join a class.
9. MISSION
Step 1: On the main screen, click the Mission area icon.

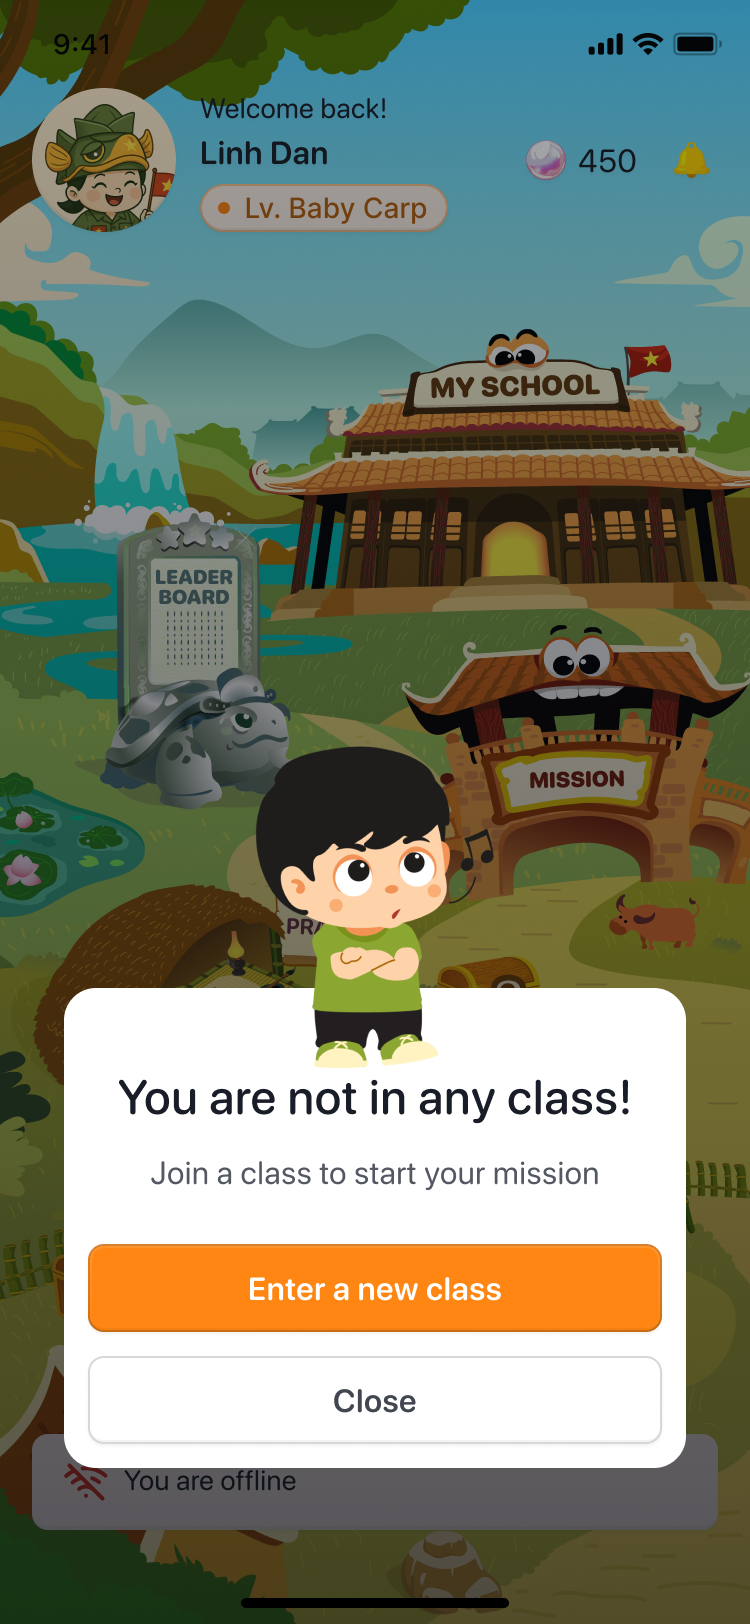
Note: If the user has not yet joined the class, please press the button. To switch to the My School area screen and follow the instructions to join the class, or press the button.
 to access other areas within the app.
Step 2: In the Mission screen, the system displays the Mission map.arrangedin orderThe teacher's latest assignment, the newest mission, will be on the right-hand side.
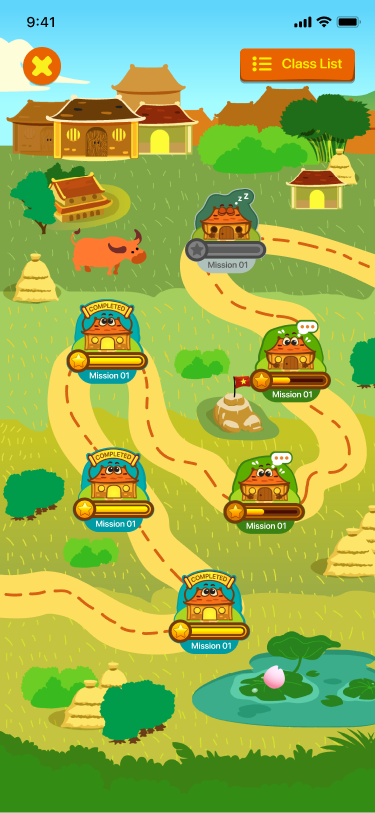
Note: Mission statesDisplay included information.
| STT | Icon | Status | Describe |
|---|---|---|---|
| 1 |  | Not yet unlocked | Mission is inaccessible because the Stage has expired or the unlock date has not yet arrived. |
| 2 | 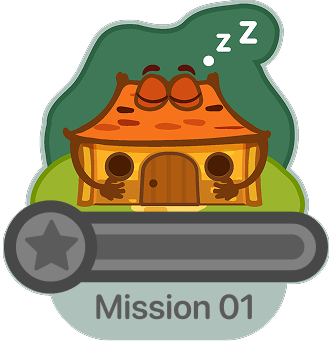 | Unlocked | Mission is unlocked, users canStart working through the Stages to get points recorded. |
| 3 | 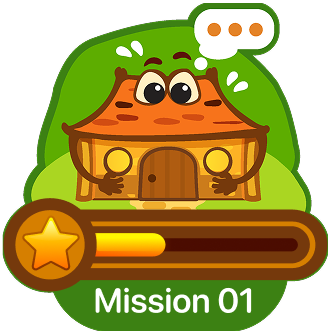 | Under construction | Users are completing the Stages. |
| 4 | 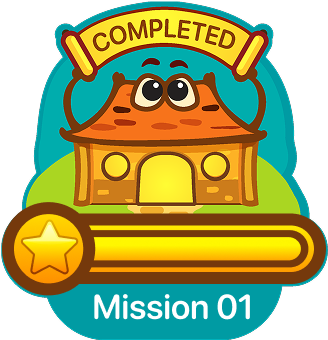 | Complete | The user has completed all the Stages and has been credited with points. |
Step 3: Press the button To display a list of classes attended.
Step 4: Select the class from the list.
Step 5: After nchose MissionUsers can view detailed information including:

- Thumbnail: Illustrative image.
- Mission name: The name of the mission.
- Stage: Number of exercises completed out of the total number of exercises.
- Progress bar: The status bar shows the progress towards completing the assignment.
With tcaseMission has opened.lock,The user presses the button. To switch to the Exercises map screen.

In the case of MissionNot yet openchemistry,The user taps on the area outside the Mission information screen to return to the map.Exercise.

9.1. STAGE (EXERCISES)
Step 1: InStage screen, map display system Exercise.
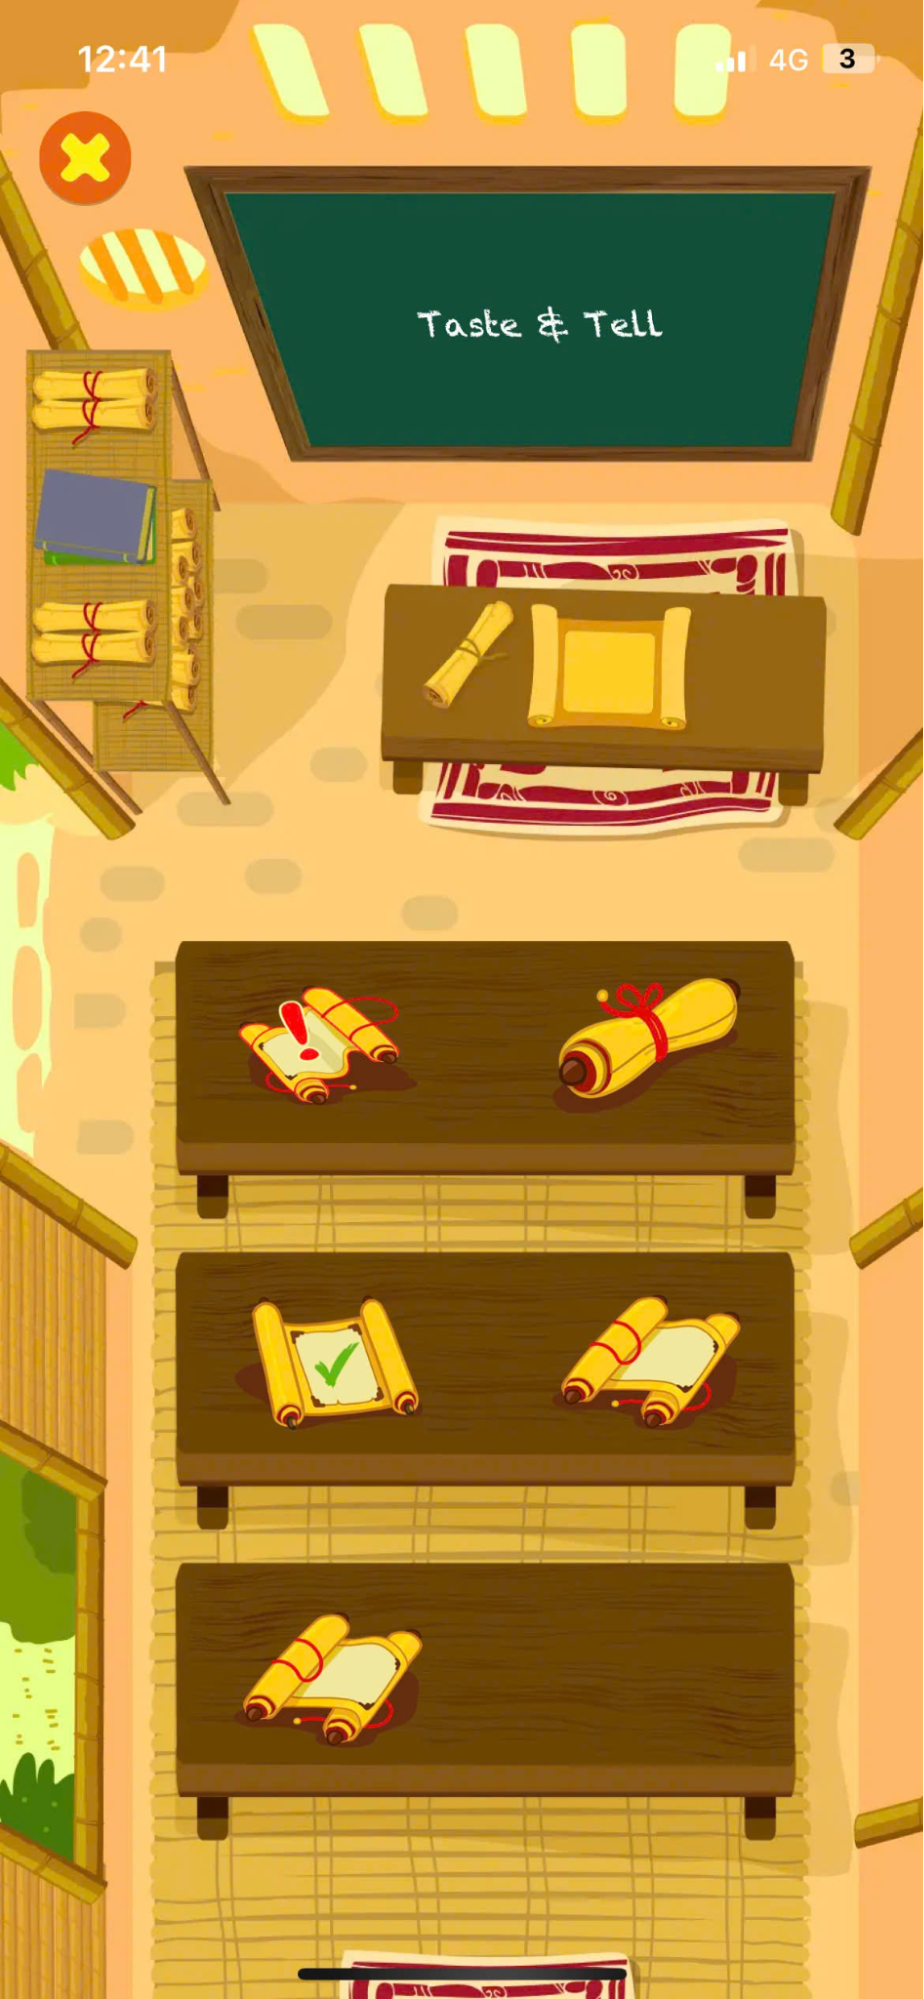
Note: Stage iconsDisplay included information.
| STT | Icon | Status | Describe |
|---|---|---|---|
| 1 |  | Complete | The user has completed the Stage and received points. |
| 2 |  | The deadline is approaching. | The user hasn't completed the Stage yet, and the deadline is less than 1 day away. |
| 3 |  | Under construction | Stage is unlocked, users canStart working to get points recorded. |
| 4 |  | Not yet unlocked | Stage is inaccessible because the unlocking period has expired or the unlocking date has not yet arrived. |
Step 2: After selecting Exercises, Users can view detailed information about the assignment, including:
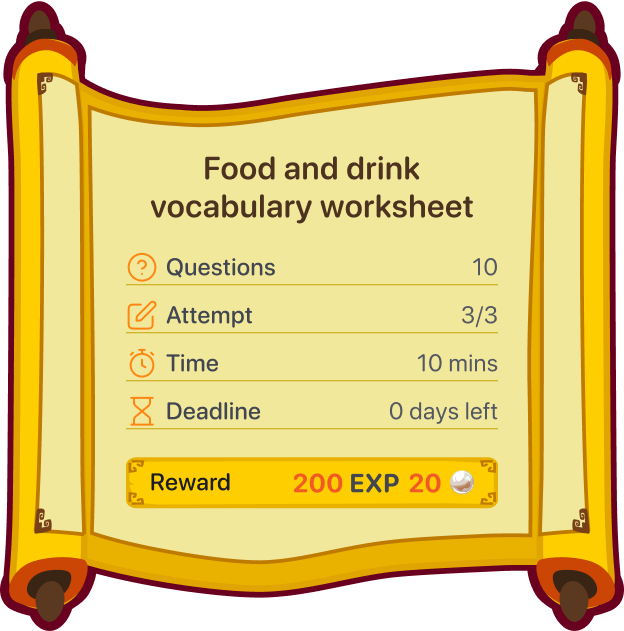
- Stage name: Exercise name.
- Questions: Number of questions.
- Best score: The highest score achieved in all attempts.
- Attempt: Number of attempts.
- Time: Time allotted for the test.
- Deadline: Deadline for completing the assignment.
- Rewards: Rewards received after completing a Stage include Gems and EXP points.
Note: The Stage states display information including:
| STT | Image | Status | Operation |
|---|---|---|---|
| 1 |  | Unlocked | Press the buttonTo begin the assignment. |
| 2 | 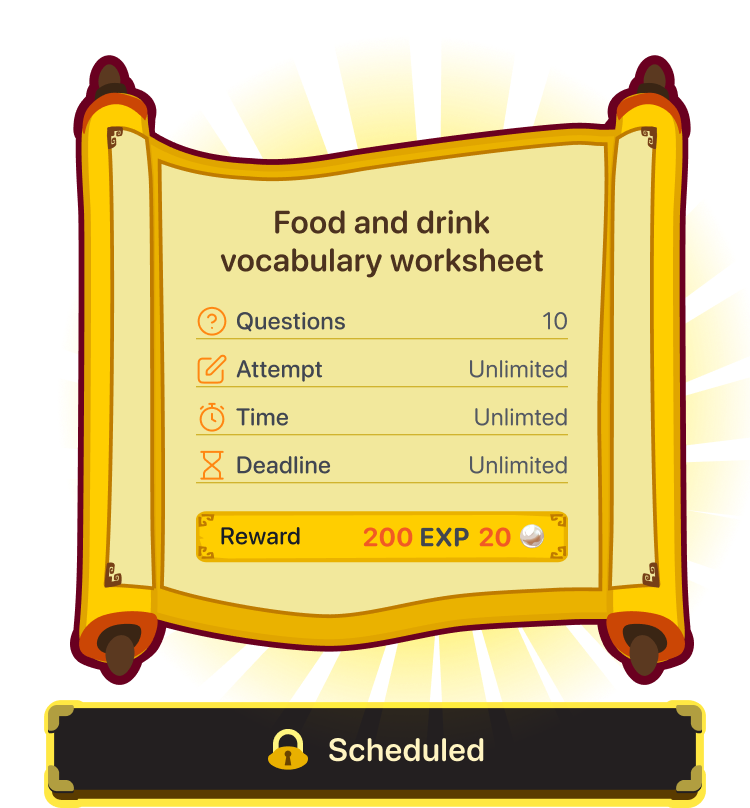 | Not yettime allotted for the exam | Click on the area outside the Stage information screen to return to the Stage map. |
| 3 | 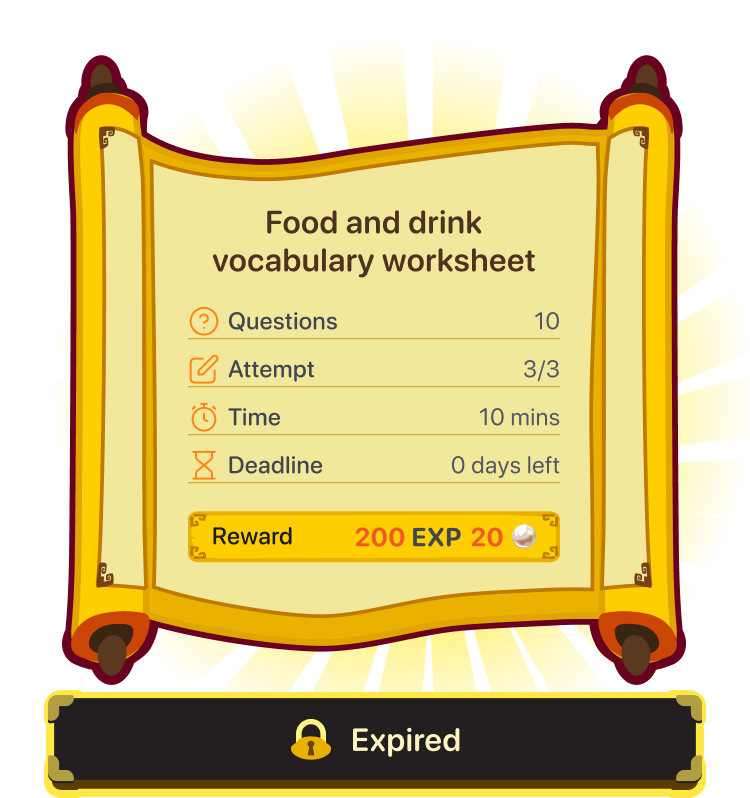 | The deadline for submitting the assignment has passed. | Click on the area outside the Stage information screen to return to the Stage map. |
| 4 | 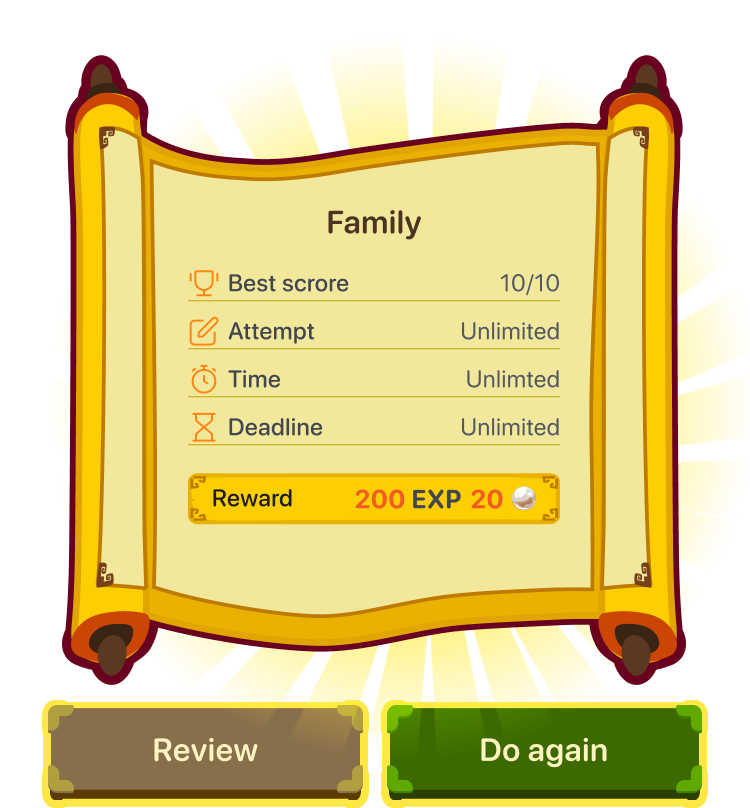 | Completeand there are still turns left to complete the test. | Press the button To redo the assignment.Or press the button To redo the assignment.Or press the button To review the results of the assignment with the highest score. To review the results of the assignment with the highest score. |
| 5 | 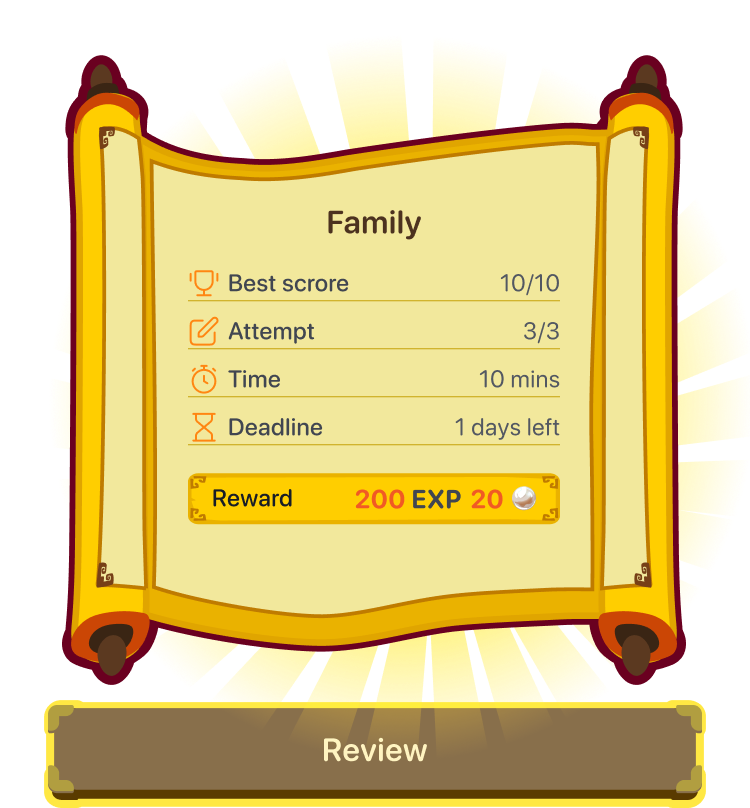 | Complete and that's the end of the turn to take the test. | Press the button To review the results of the assignment with the highest score. To review the results of the assignment with the highest score. |
Step 3: Select the unlocked Stage.
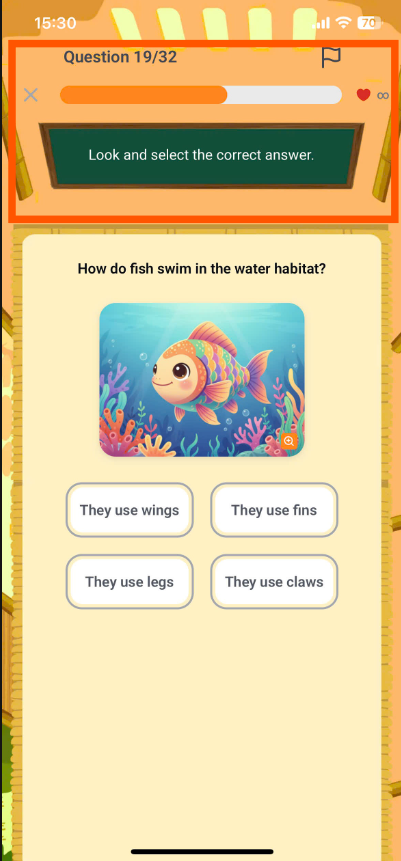
Step 4: On the Homework screen, the top bar contains information to assist the user:
| STT | Icon | Describe |
|---|---|---|
| 1 |  | Number of questions |
| 2 |  | Exam time |
| 3 |  | Number of incorrect answers allowed |
| 4 |  | Instructions on how to work with different types of exercises. |
| 5 | What is this fruit? | Question |
| 6 |  | Exit the assignment screen. |
| 7 |  | Confirm the answer |
Note: After clicking on the iconThe user receives the following confirmation message.
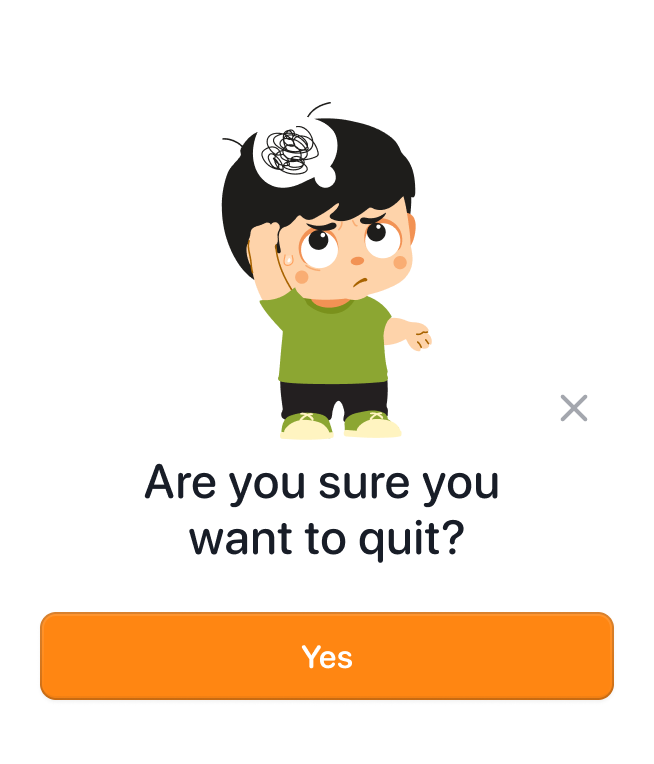
In the case of pressing the button The entire question-answering process will not be recorded, meaning the user will not receive any rewards or experience points for that Stage.
Step 5:In the Exercises screen, users can interact and answer questions across a variety of exercise types.
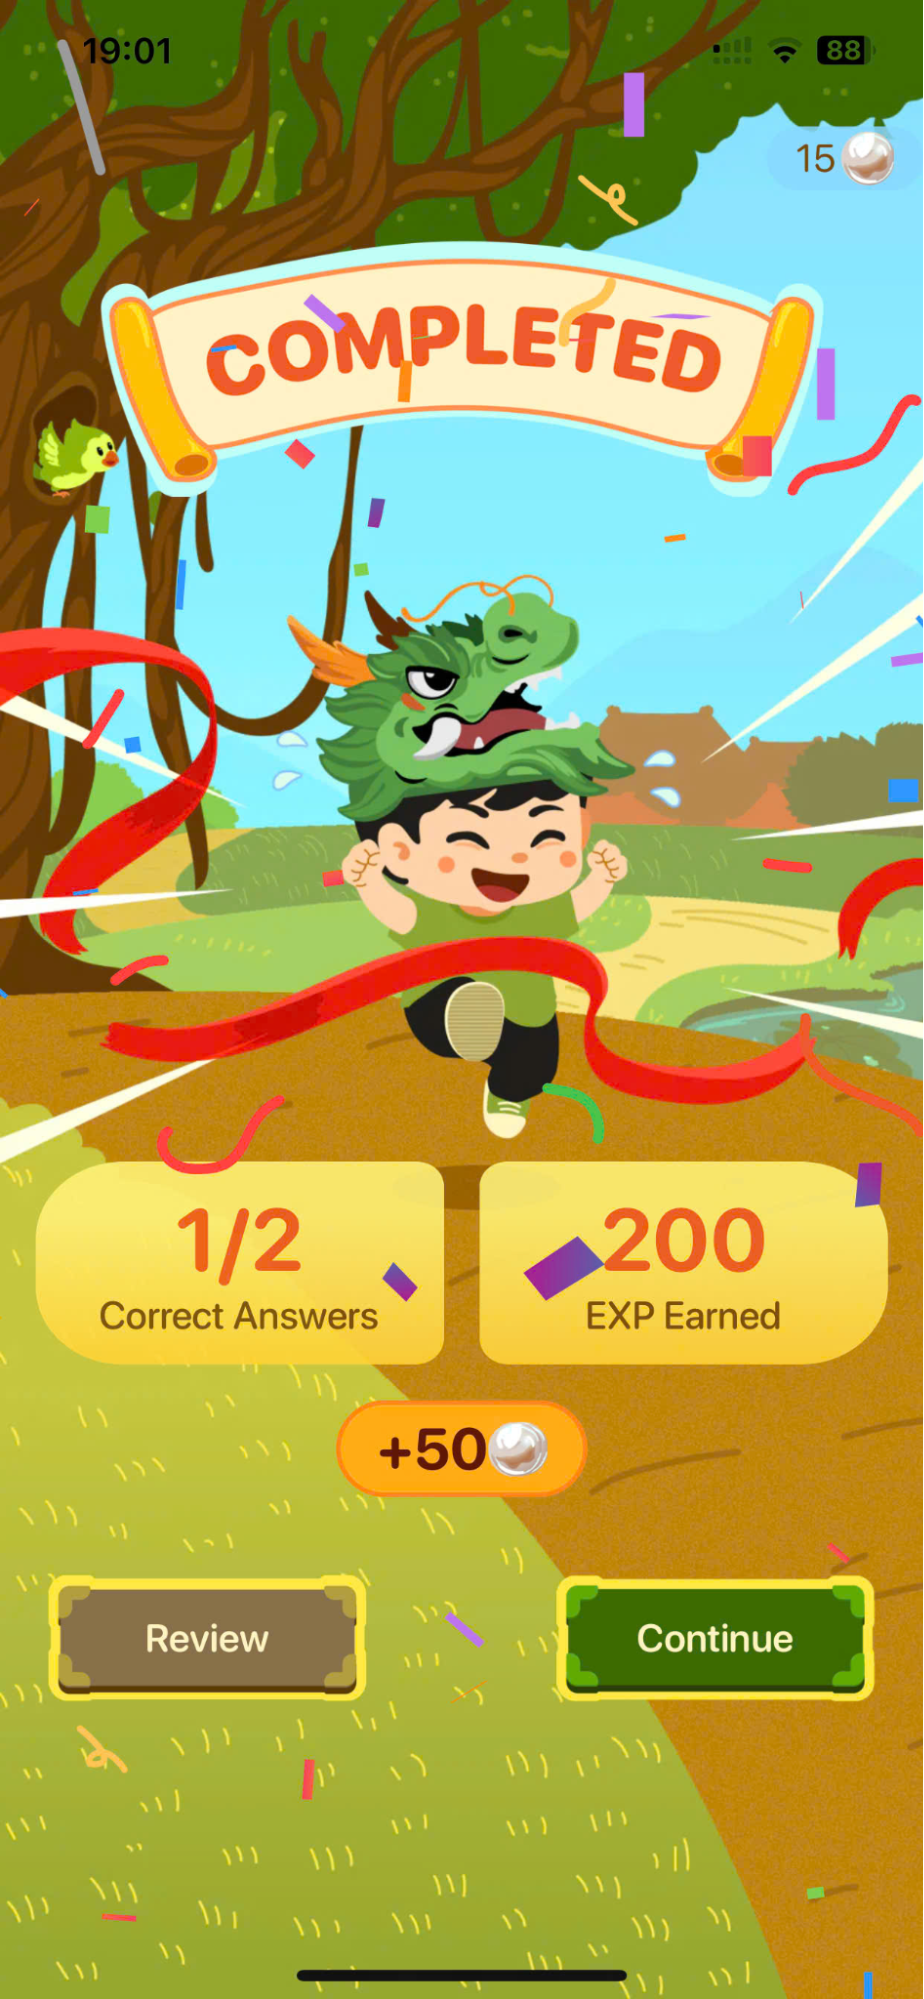
Step 6:After completing the exercise, the system displays a "Completed" screen containing the necessary information.
- Correct answers: The number of correct answers out of the total number of questions.
- EXP: Experience Points
- Jade reward.
Note: For each completed Stage, the system will record a different reward.
In the case of the first attempt,the system awards points based on the number of correct answers.
In the case of subsequent attempts,the system awards points based on the results achieved. If a user answers a question correctly that they answered incorrectly in the previous round, they will receive additional bonus points for that question.
If the Stage of the class has been reworked,The system only records points and does not calculate rewards.
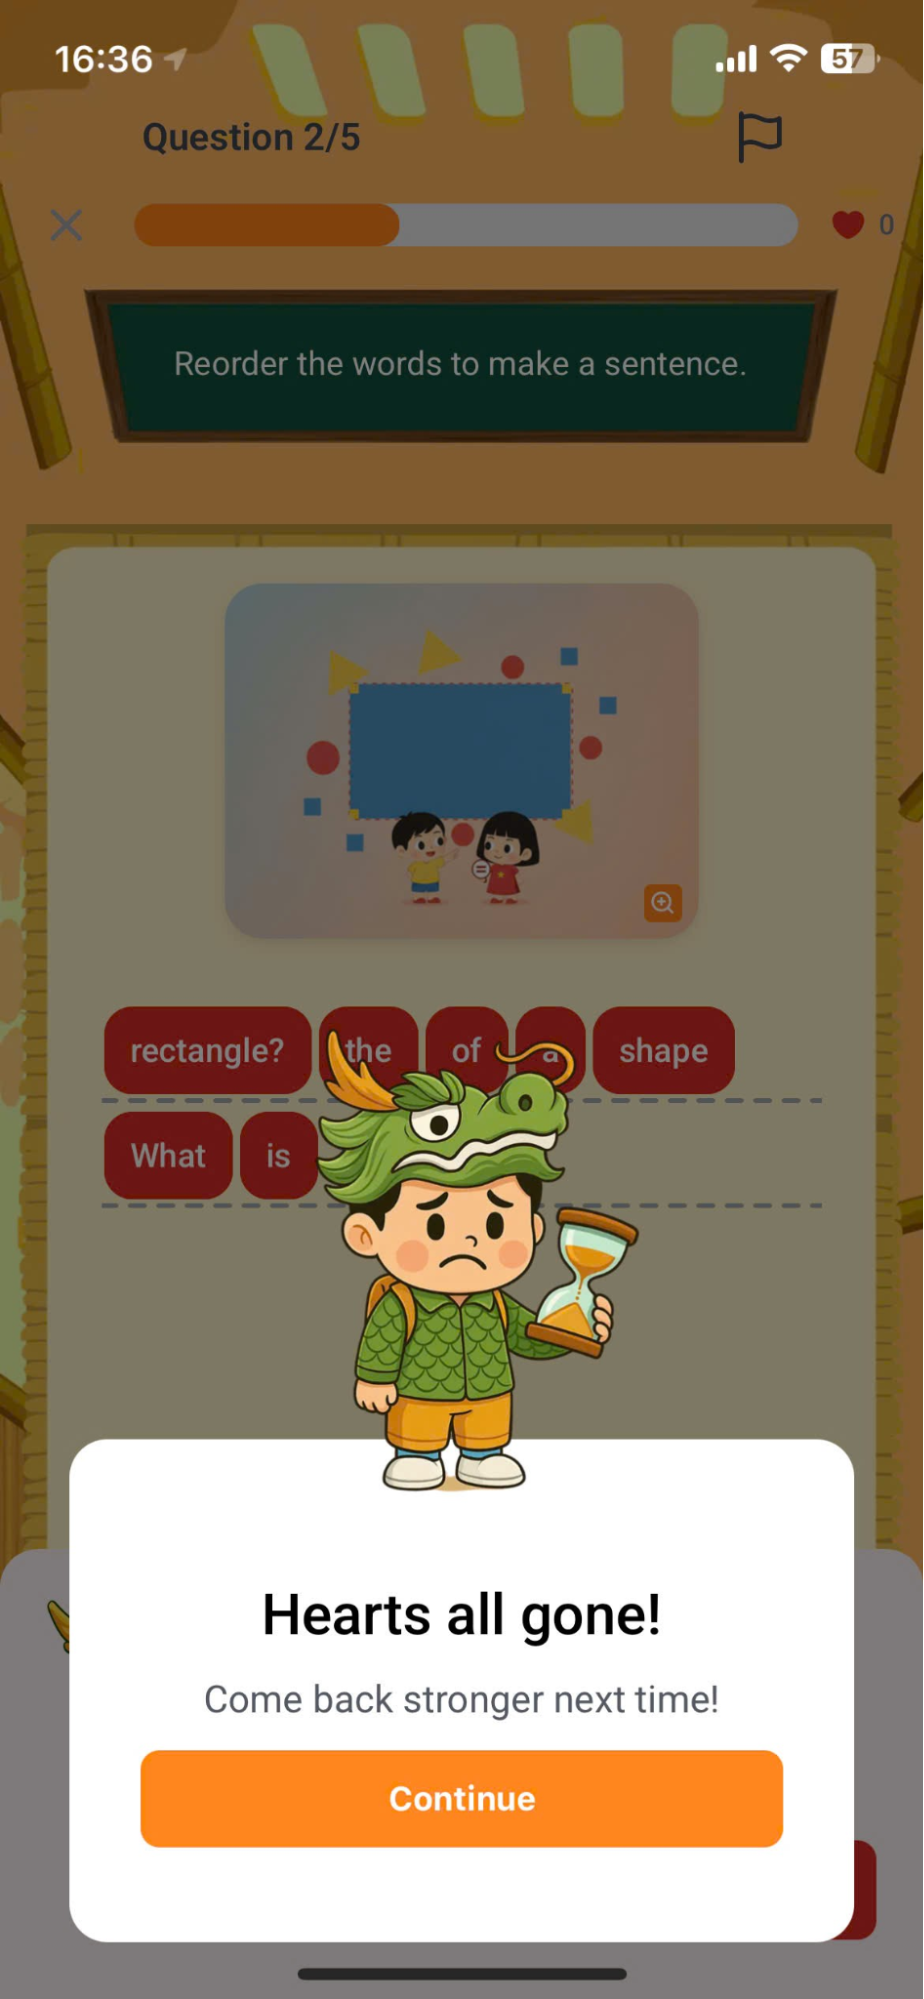
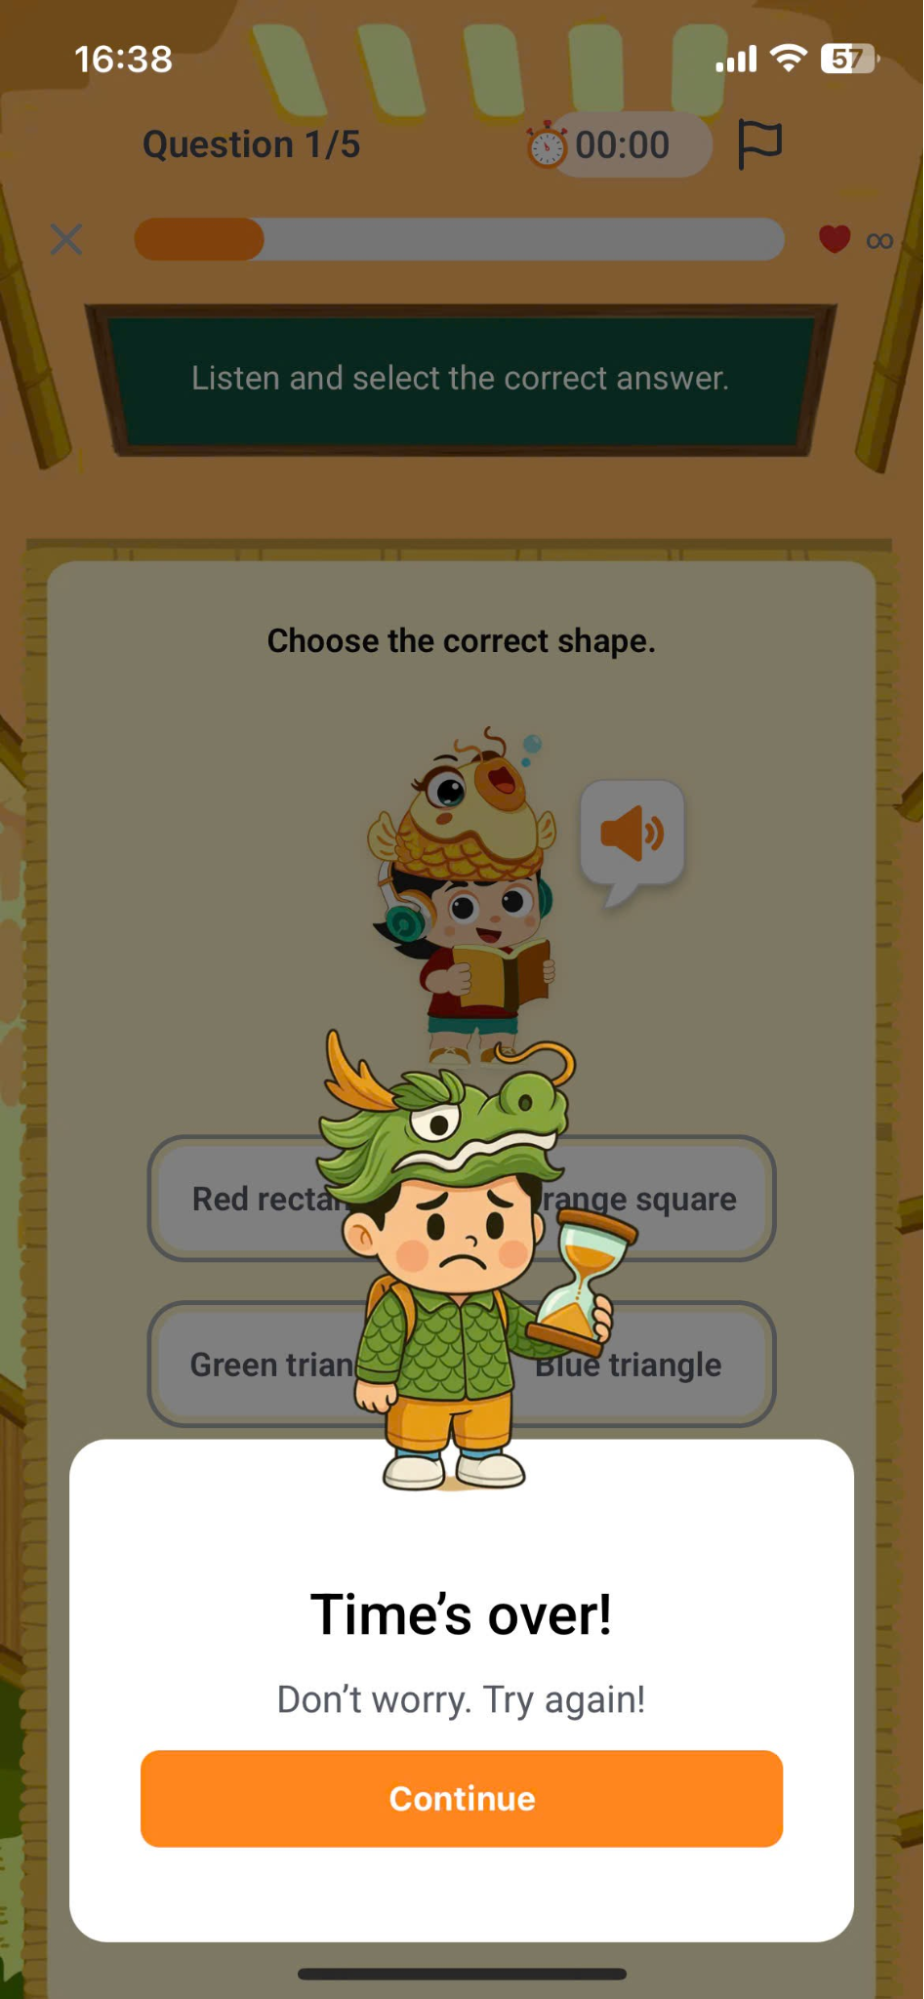
If the time runs out or too many questions are answered incorrectly, the user will not be able to continue the exercise, and the system will record the stage as incomplete with a score of 0. Press the button. to return to the deliveryStage map area.
Step 7:On the Completed screen, the user presses the button. To watch and recreate the stage.
Or press the button to complete the next stages.
9.2. PRONUNCIATION EXERCISES
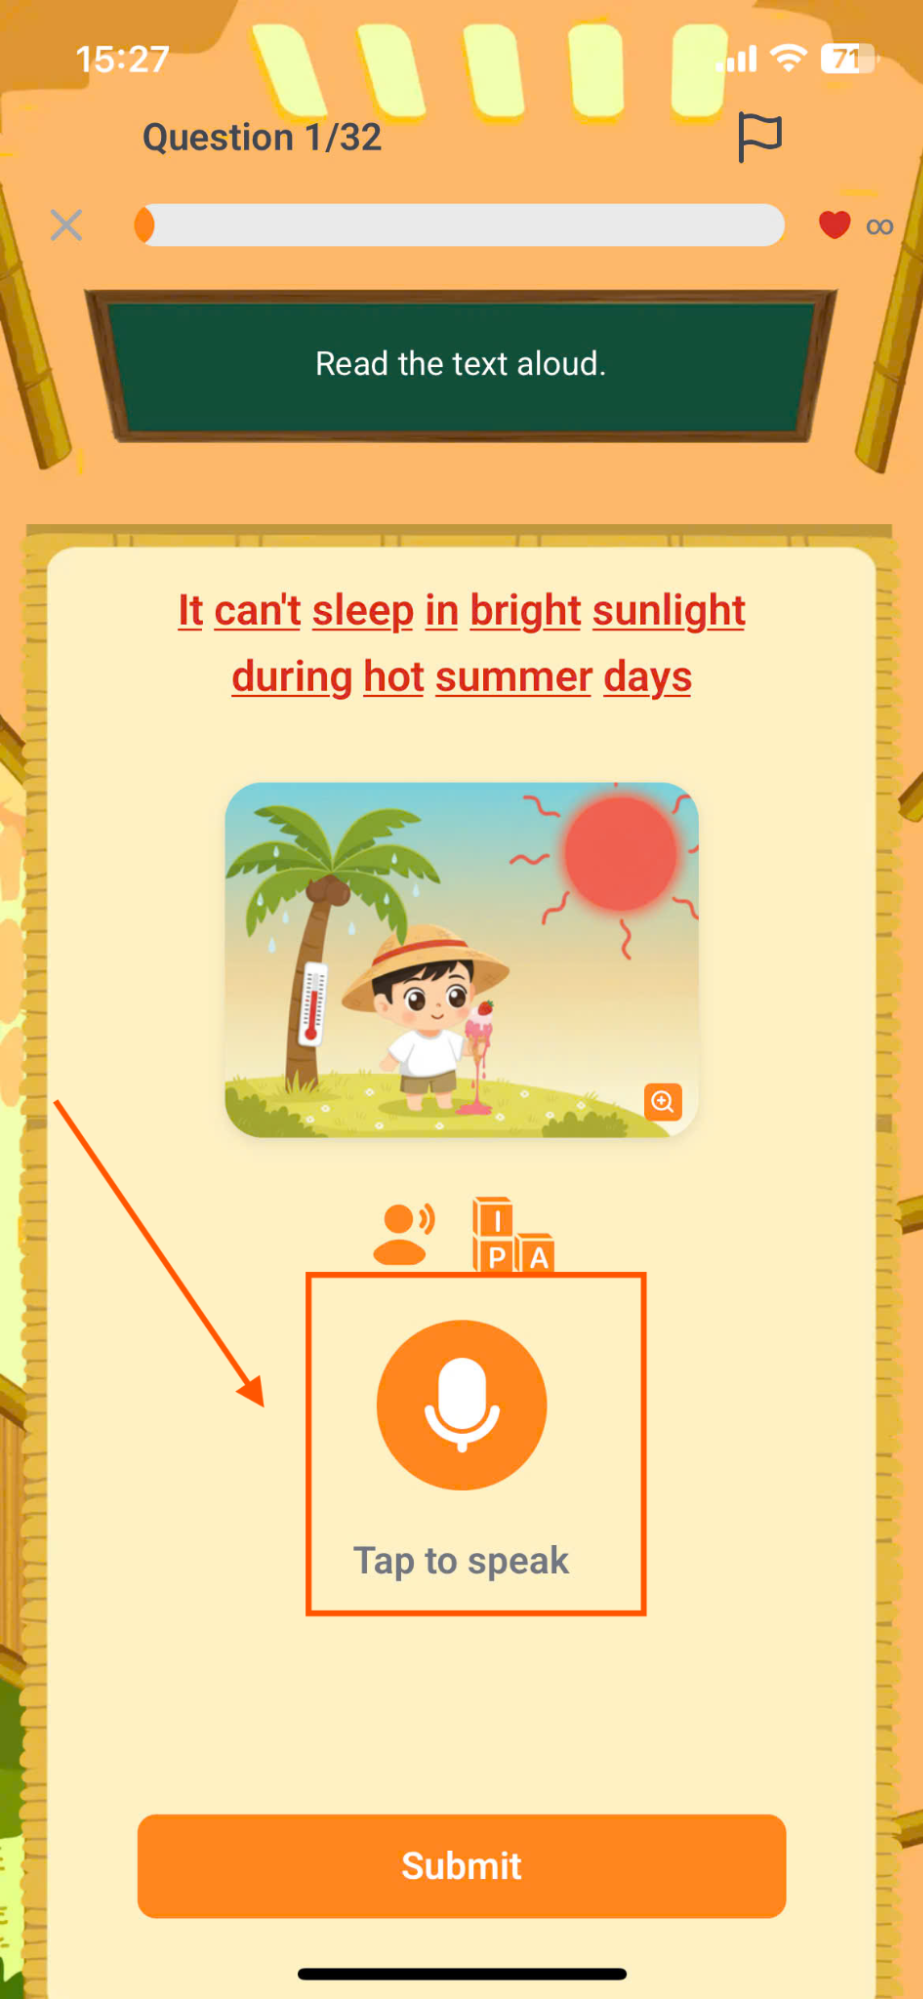
Step 1: Follow the instructions for the corresponding question type.
Image format:Observe the sentence content and the image on the screen.
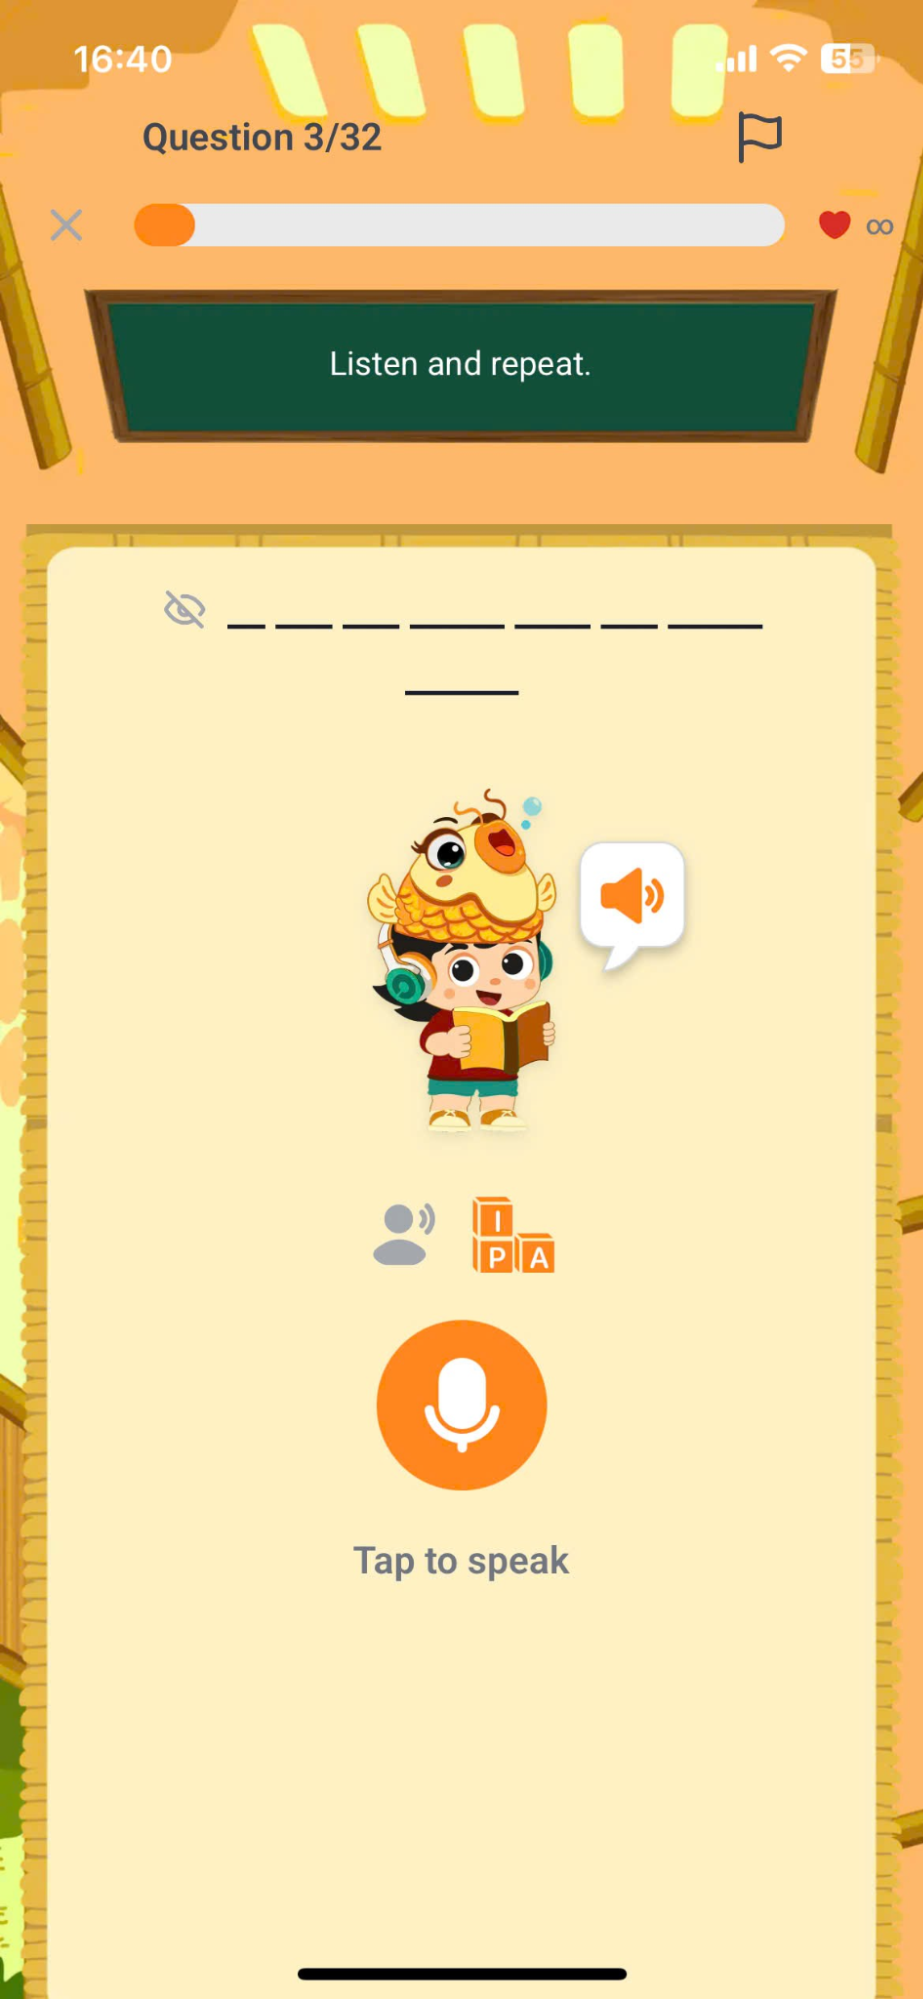
Audio Format:Press the button Listen to the sample audio file.
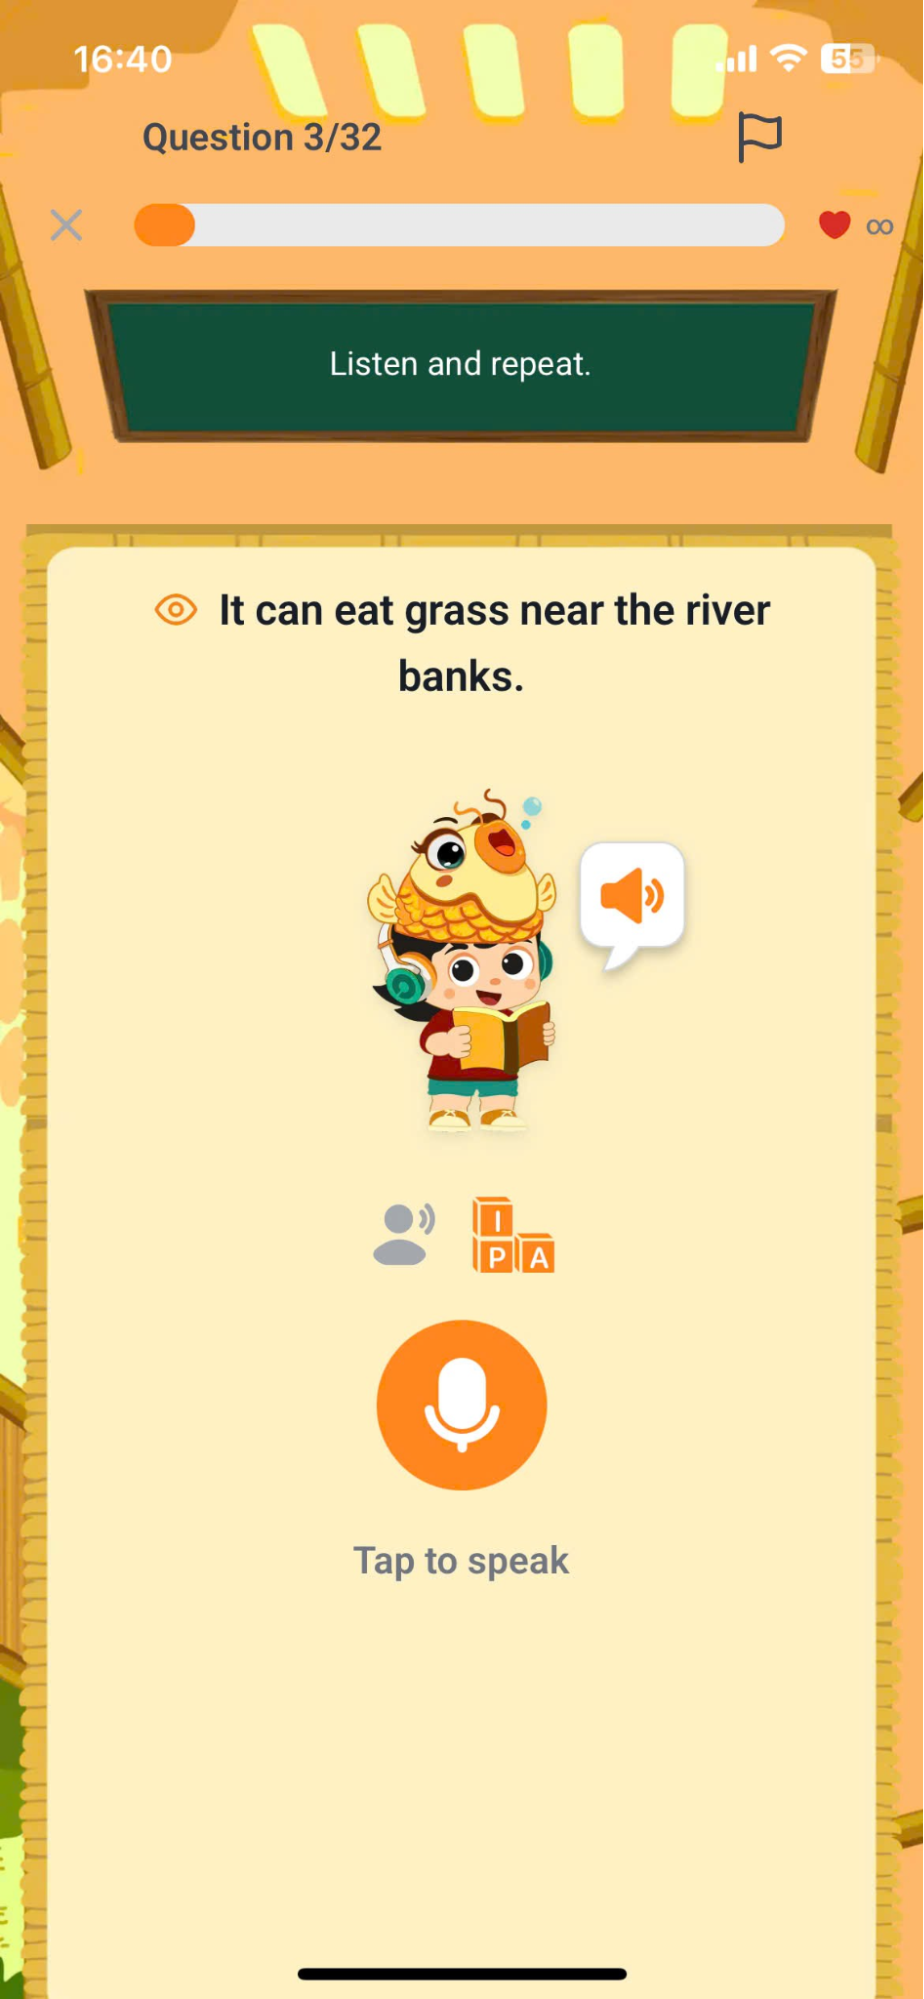
Note: Users can view the sentence they need to pronounce by clicking on the icon.![]()
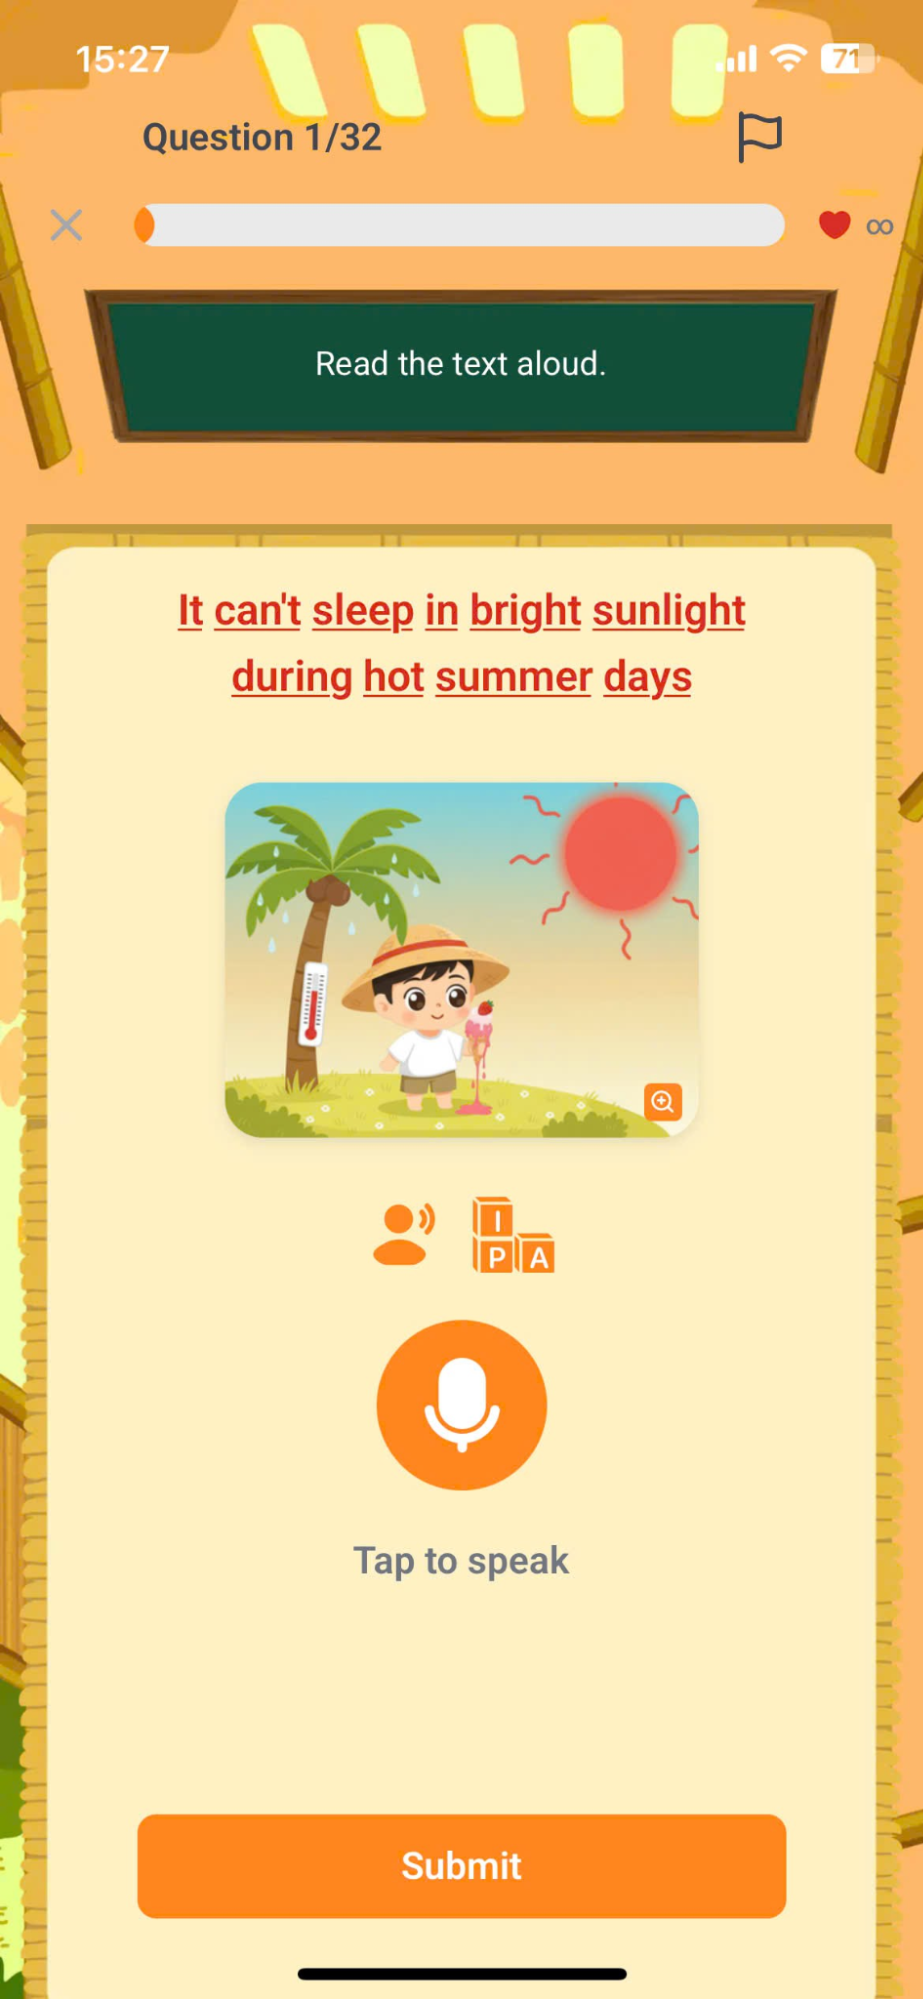
Step 2:Press the button To begin recording.
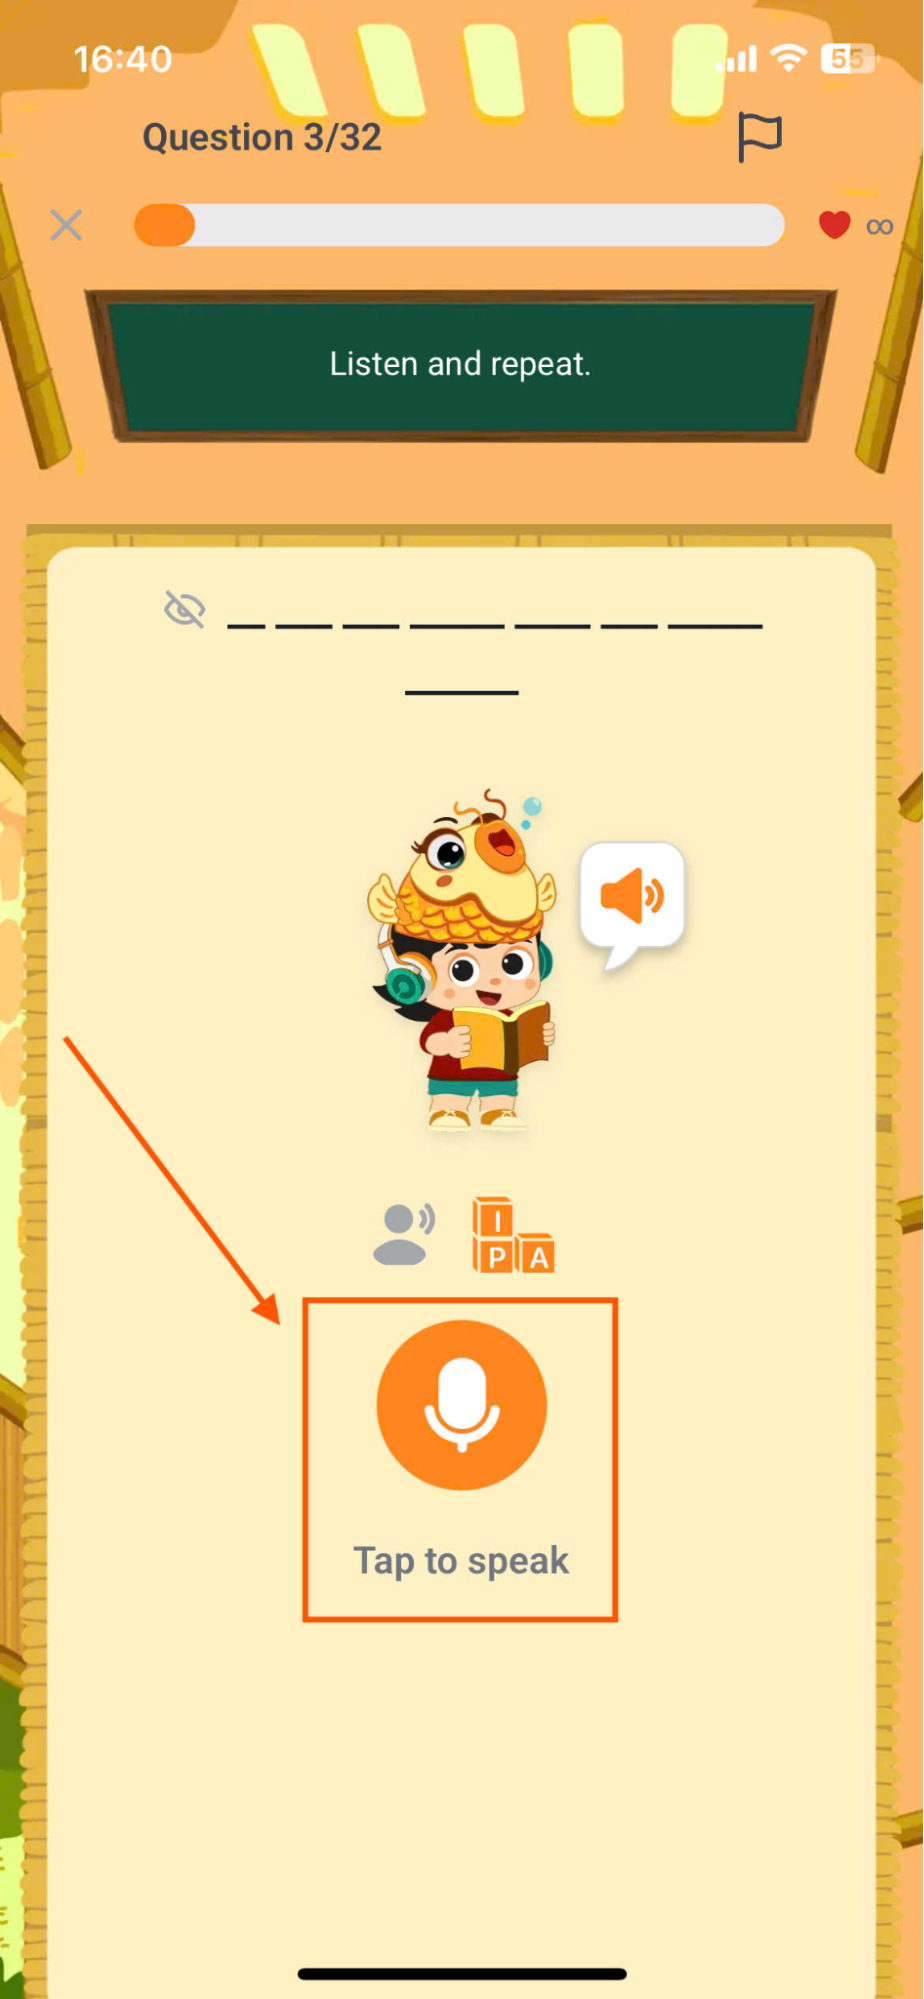
Step 3:Press the button to stop recording.
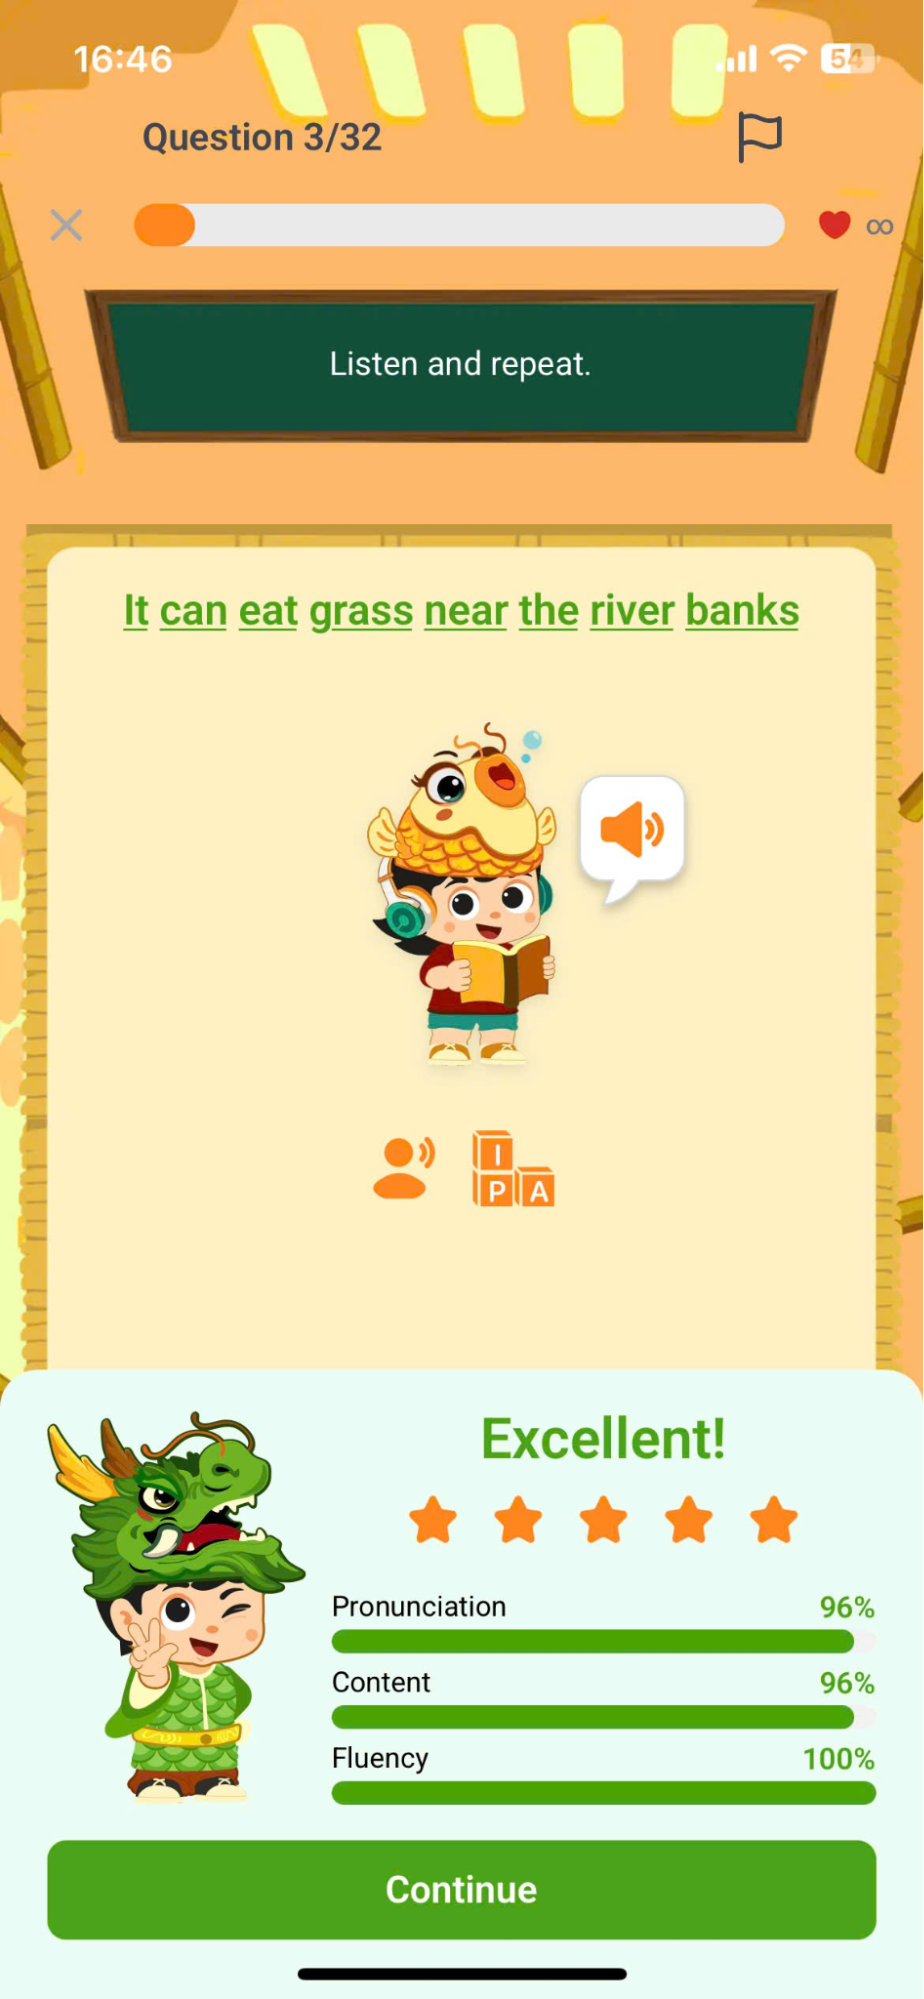
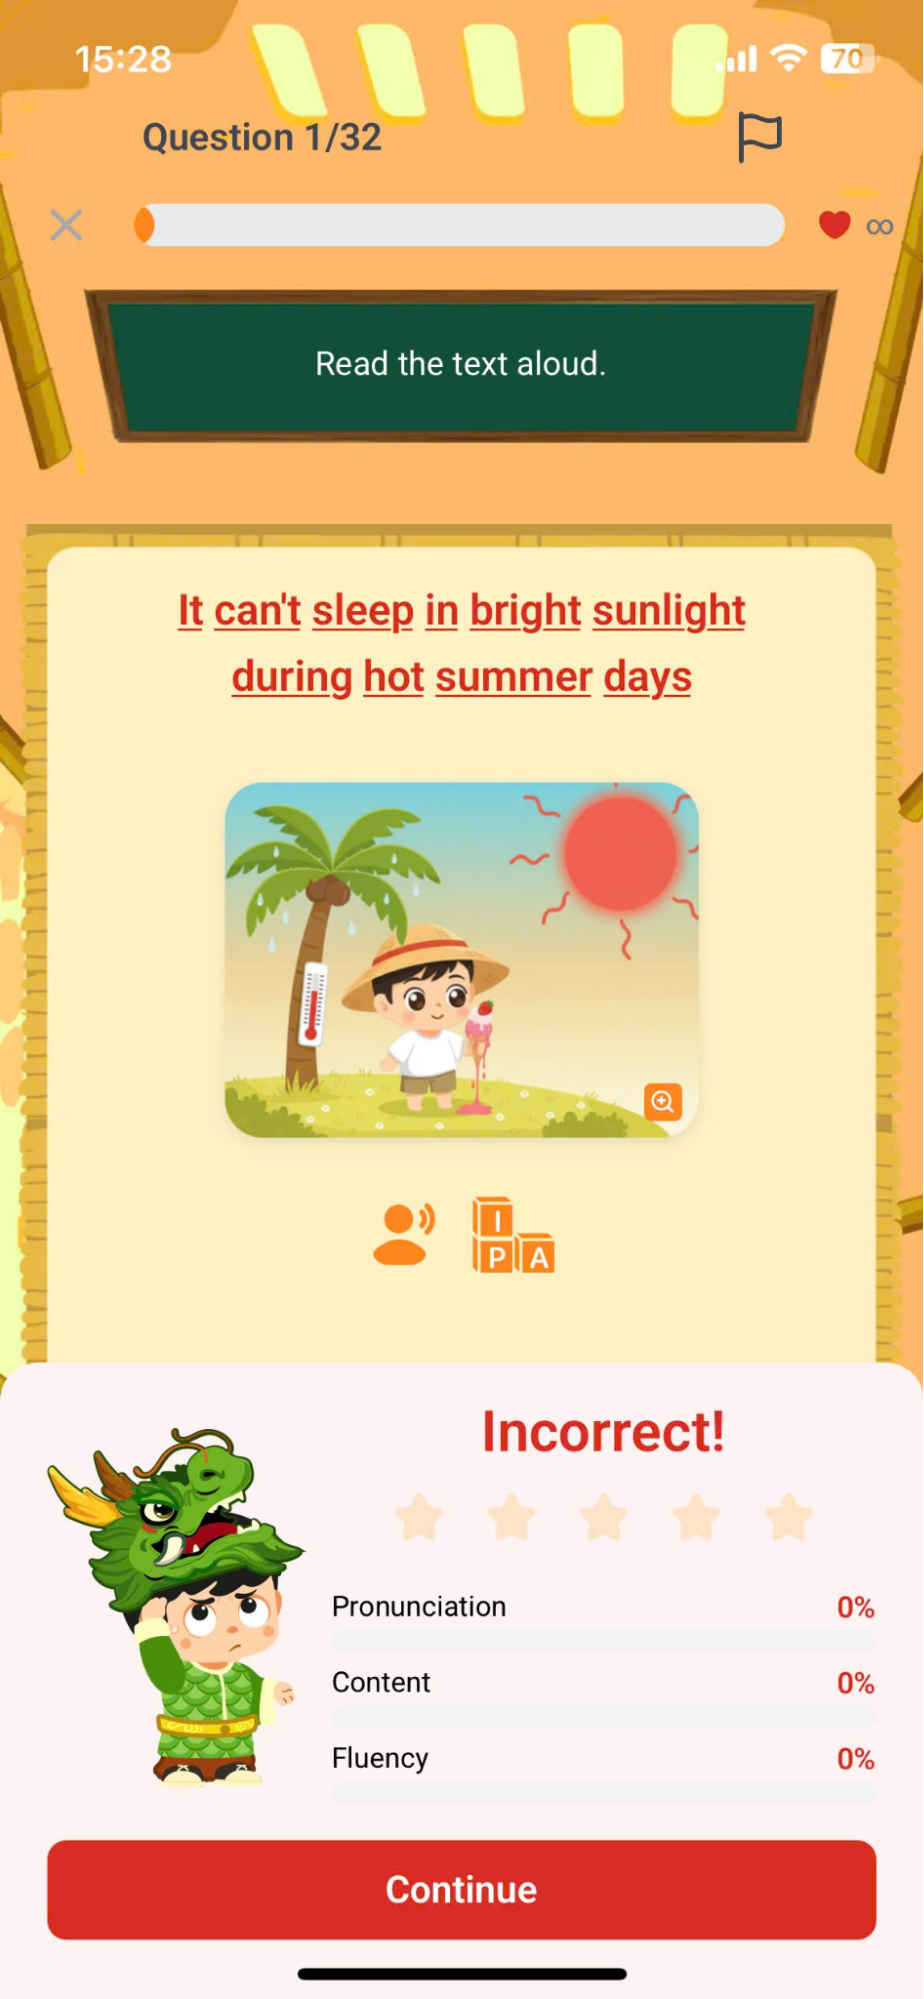
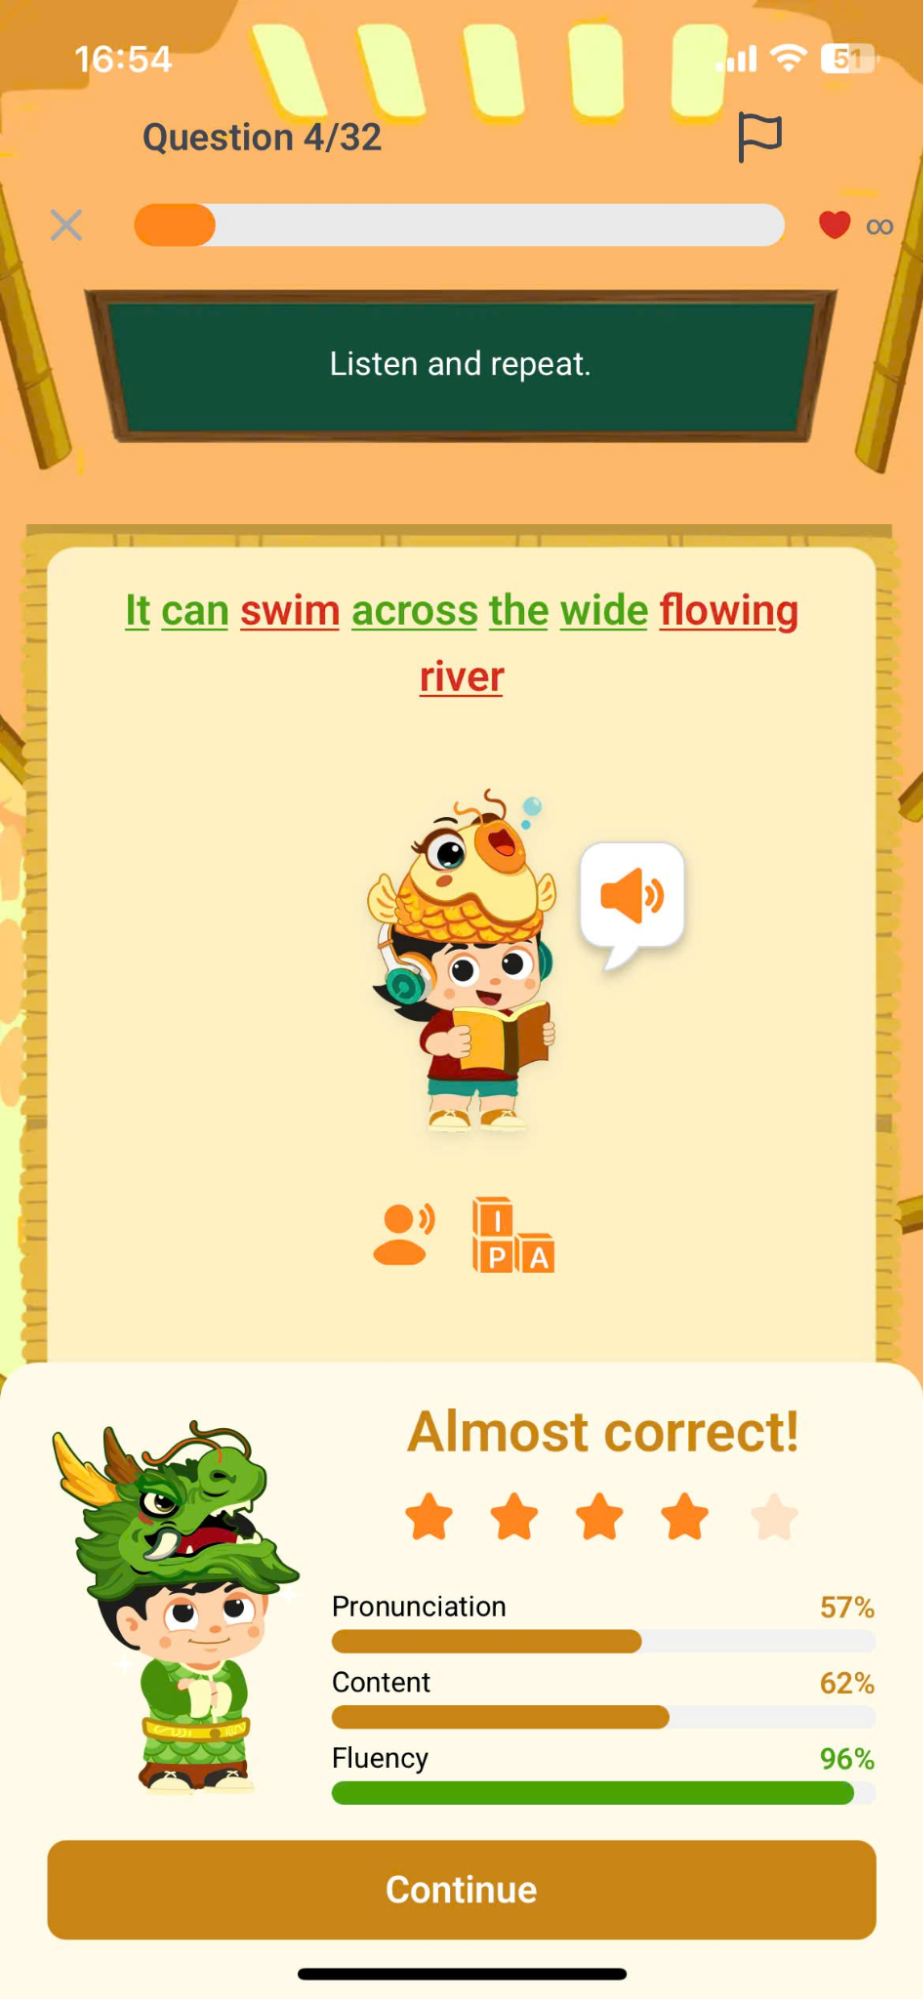
Step 4:Once finished, press the button. To confirm the answer, the system will record the answer and provide feedback using different colors to help learners practice their pronunciation skills.
- Green 🟢: Correct pronunciation.
- Yellow 🟡: Nearly correct.
- Red 🔴: Needs further improvement.
Step 5: Click on a word in a sentence to display a tooltip that helps users correct pronunciation errors.
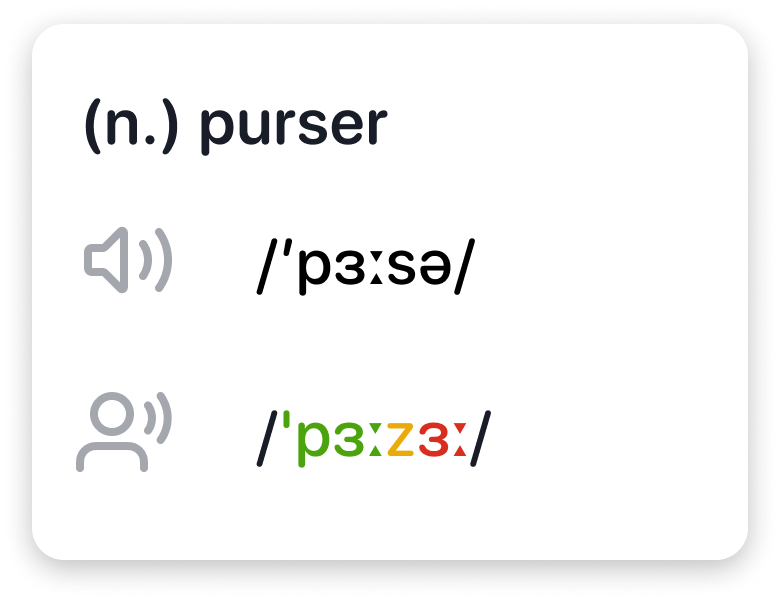
Note: Users can view detailed information including:
- Part of speech: Word type.
- IPA (International Phonetic Alphabet): International Phonetic Alphabet.
- Press the button
 to hear the correct pronunciation of the word.
 - Press the button
 to listen to the user's pronunciation.
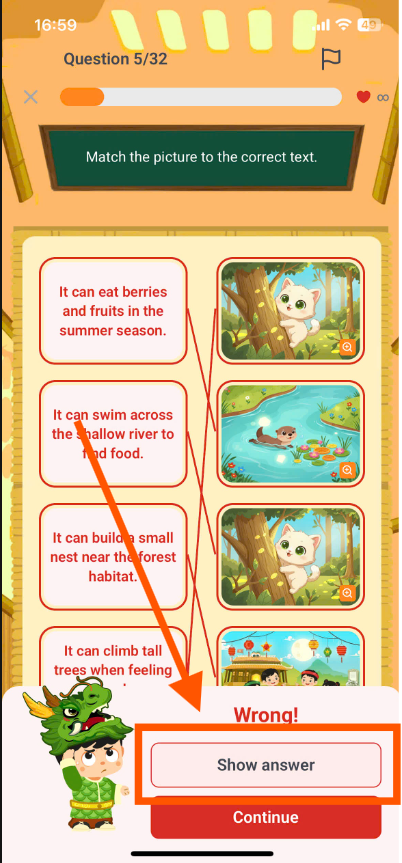
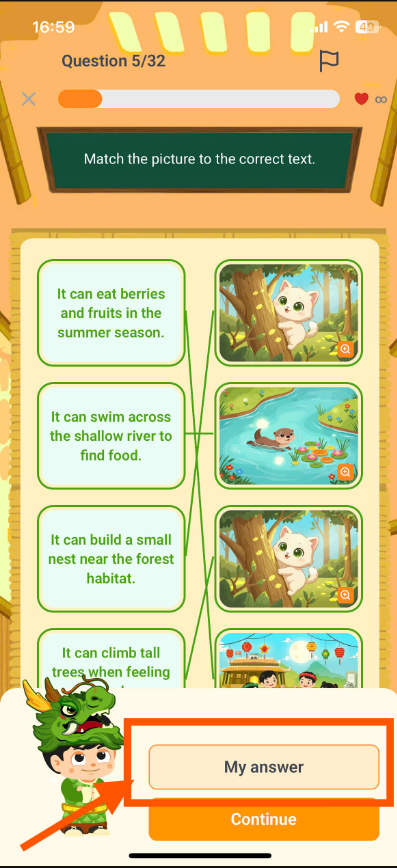
9.3. MATCHING PAIR (MATCHING EXERCISE)
Step 1: Follow the instructions for the corresponding question type.
Text-Image Format:Match the word or sentence with the corresponding image.
Text-Audio Format:Match words or sentences with their corresponding sounds.
Audio – Image format:Match the audio with the corresponding image.

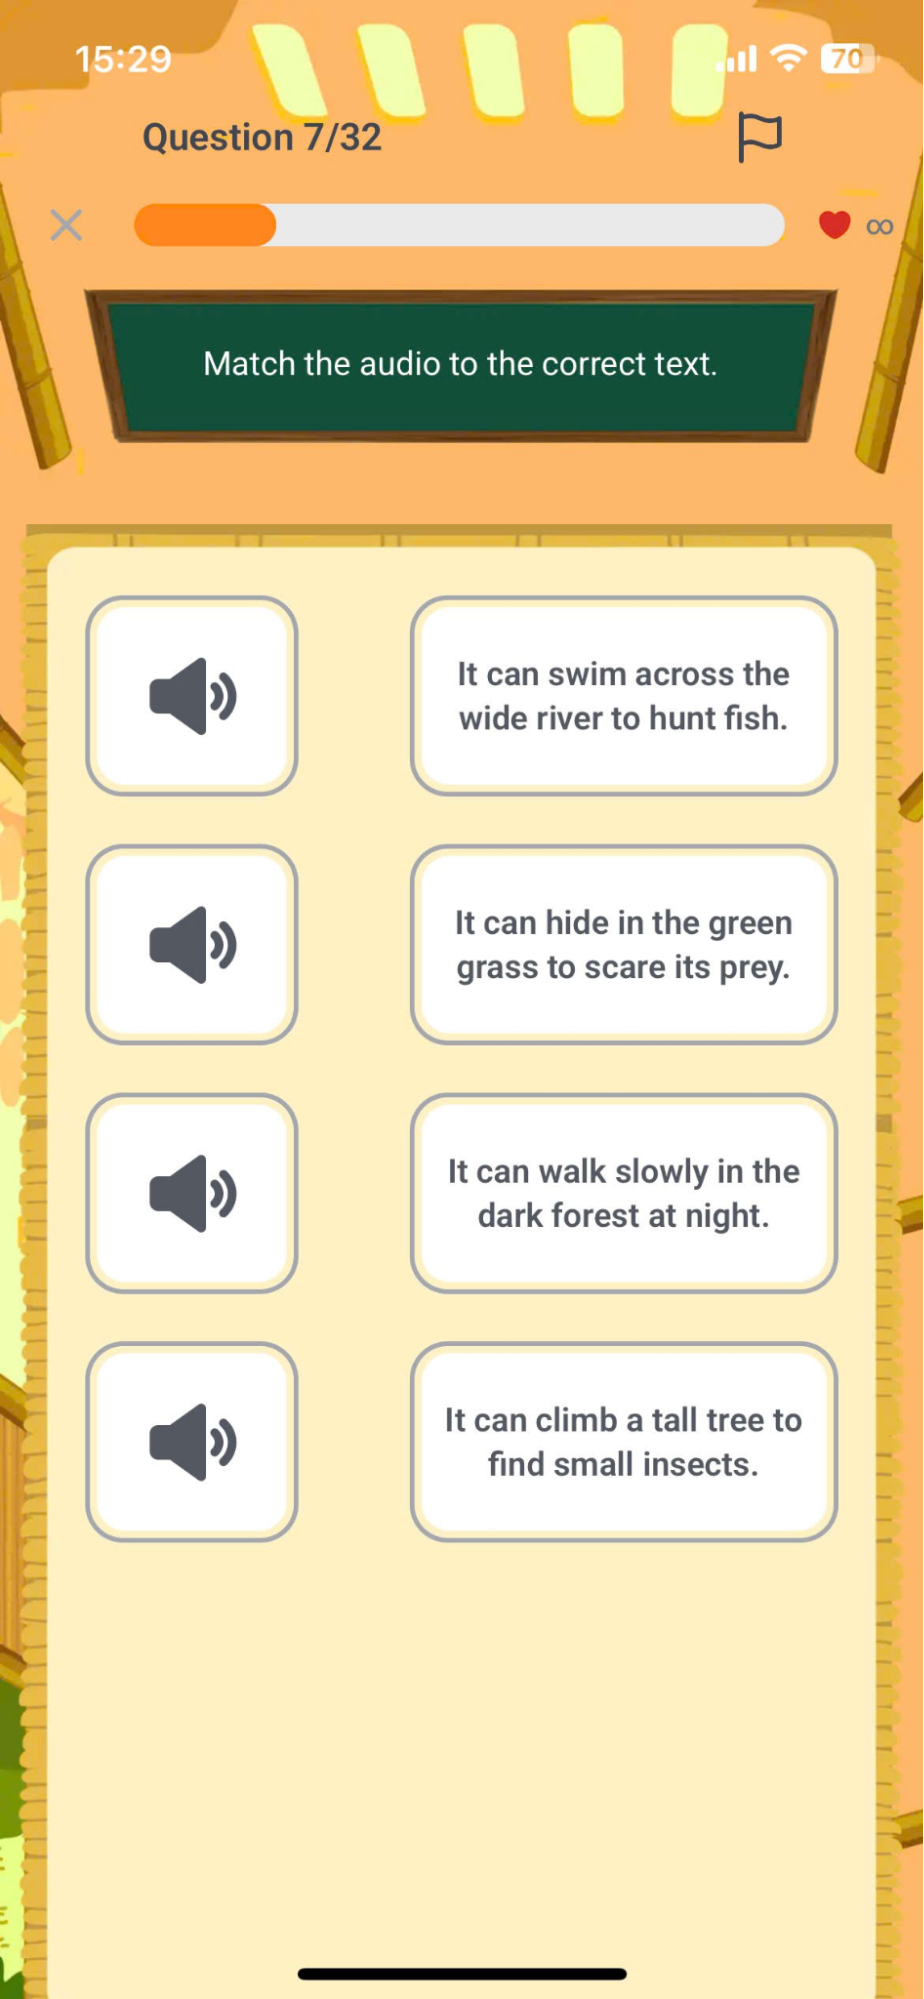
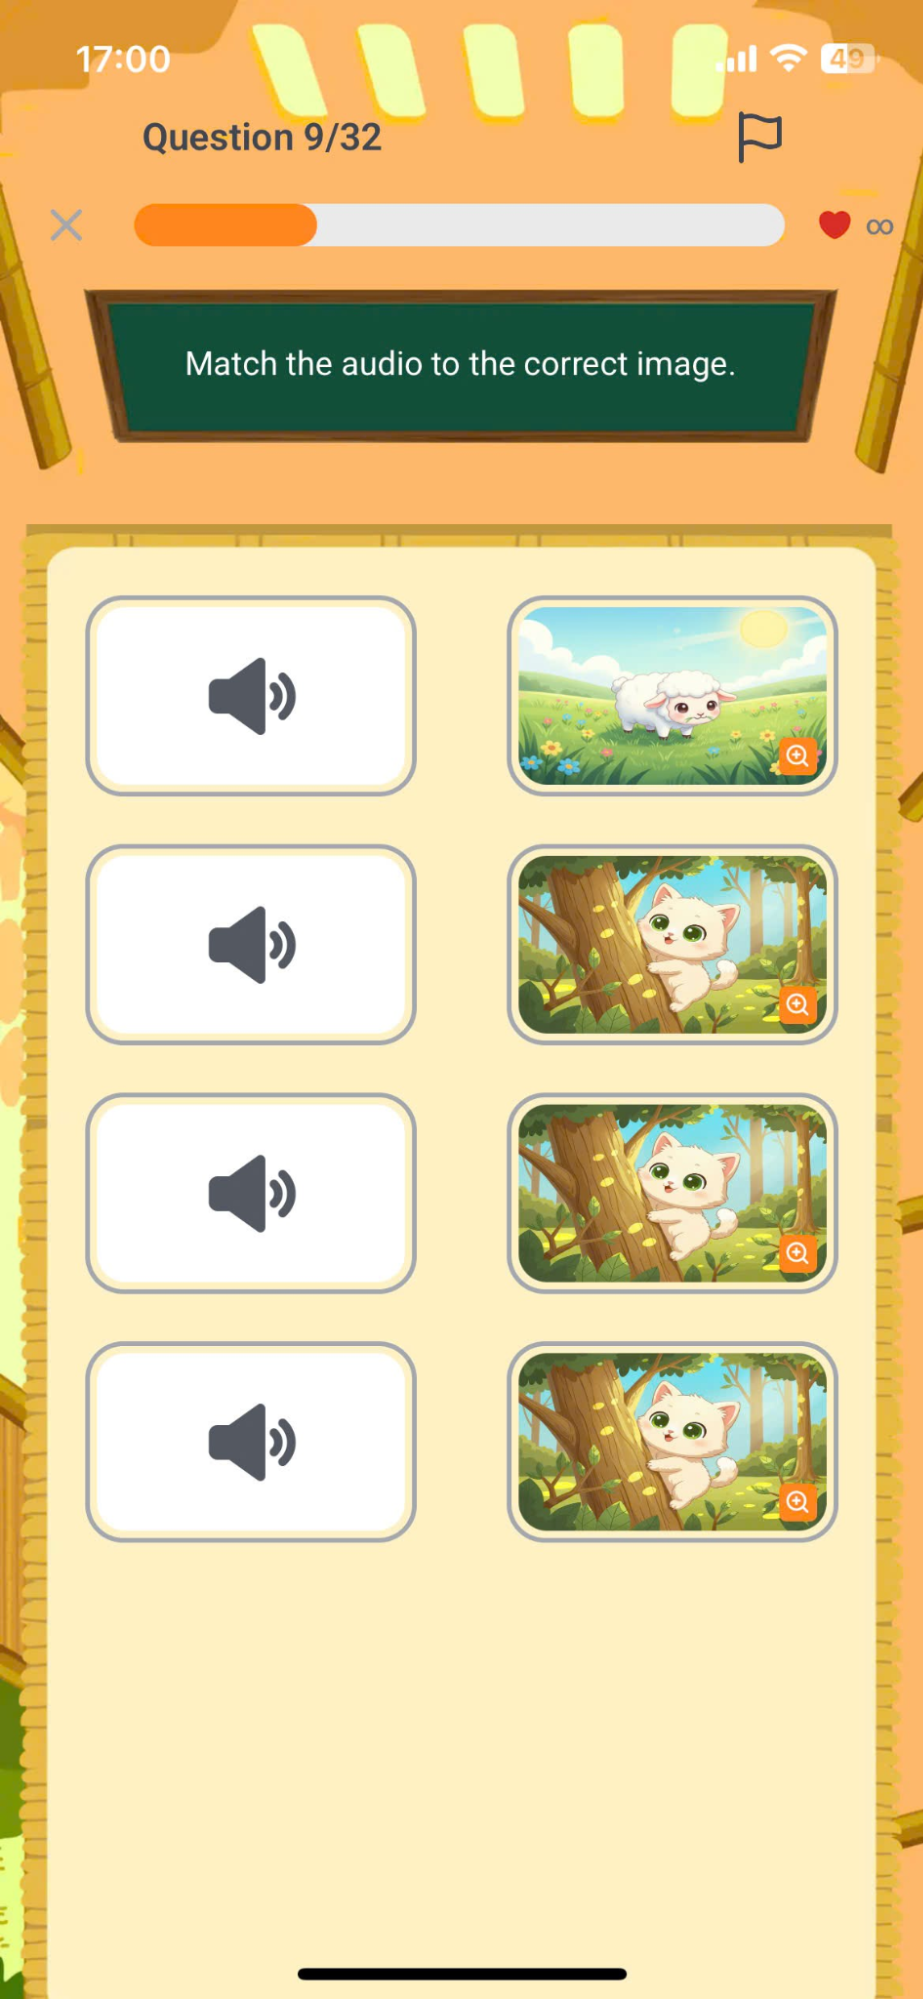
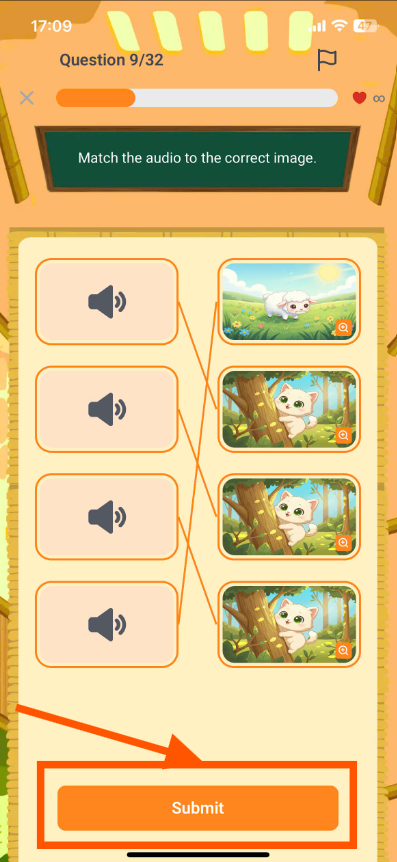
Step 2:Click on the box containing the word/sentence, image, or sound in either column to match them into a suitable pair.

Note: If you wish to select a different connector pair, please click on the selected pair.
Step 3:Once finished, press the button.
to confirm the answer.
Note:
- If incorrect, nThe user can press
 To display the teacher's answer, press [button/button].
 to compare with your own results.
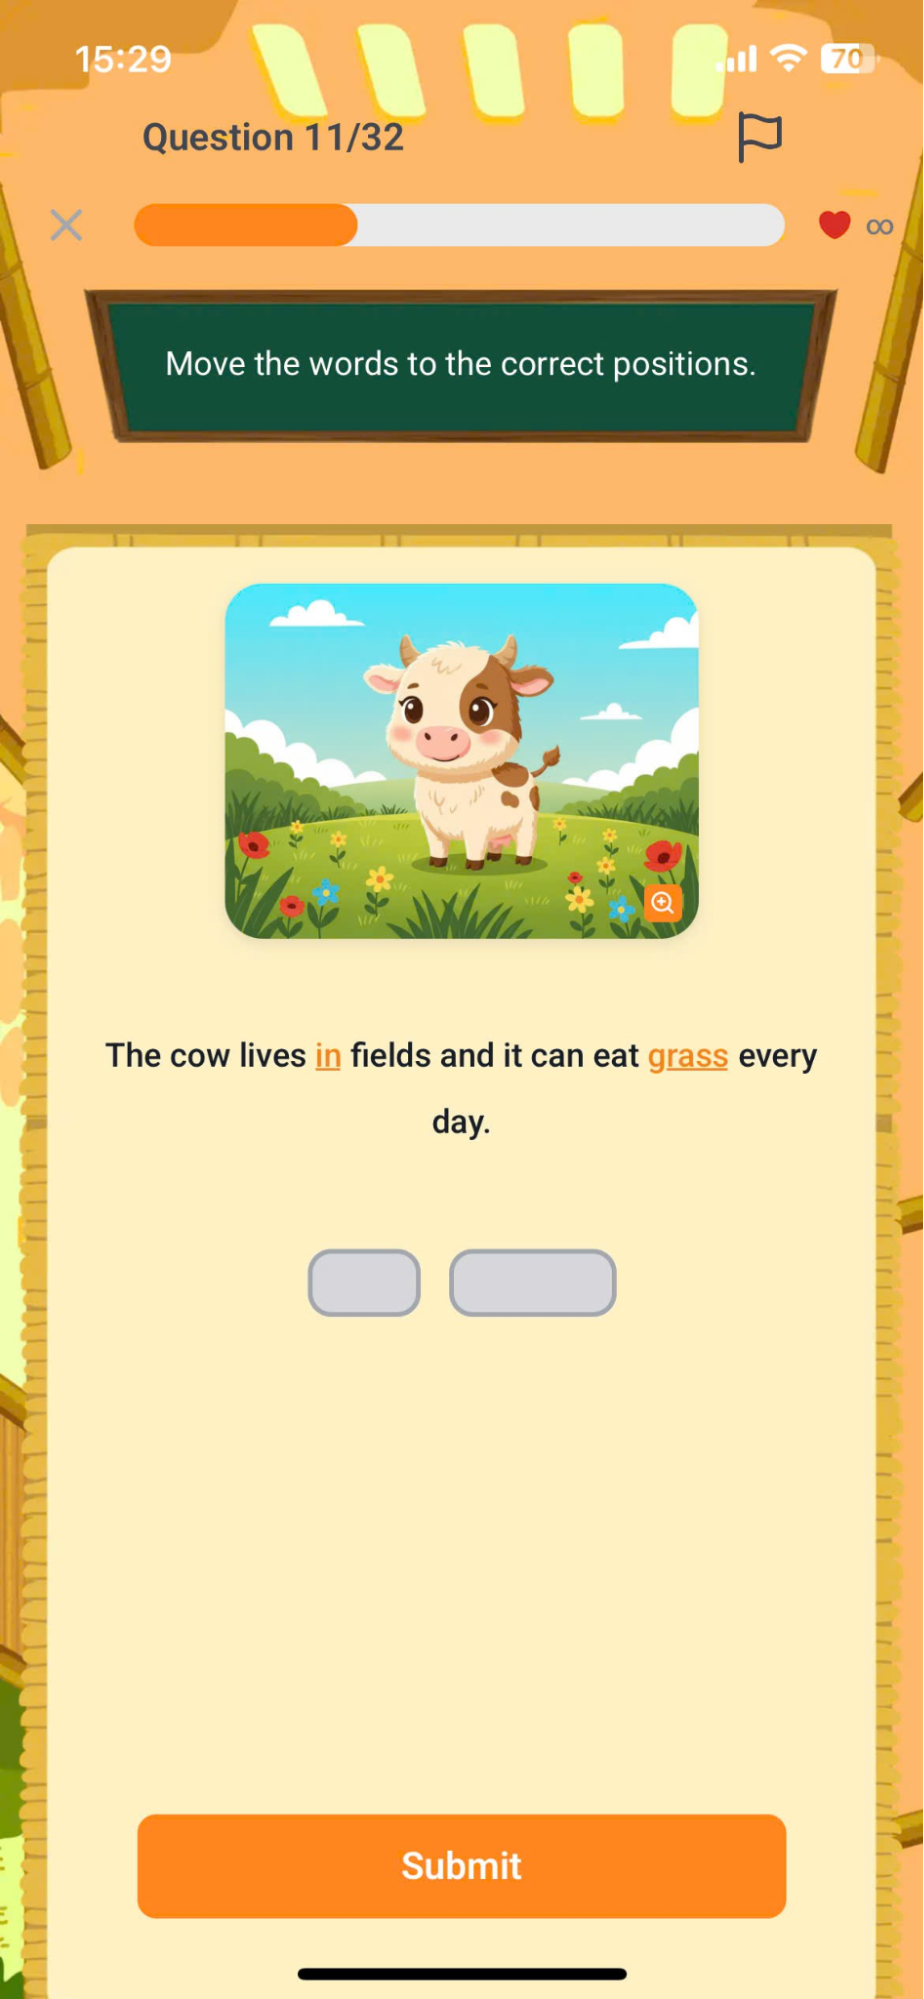
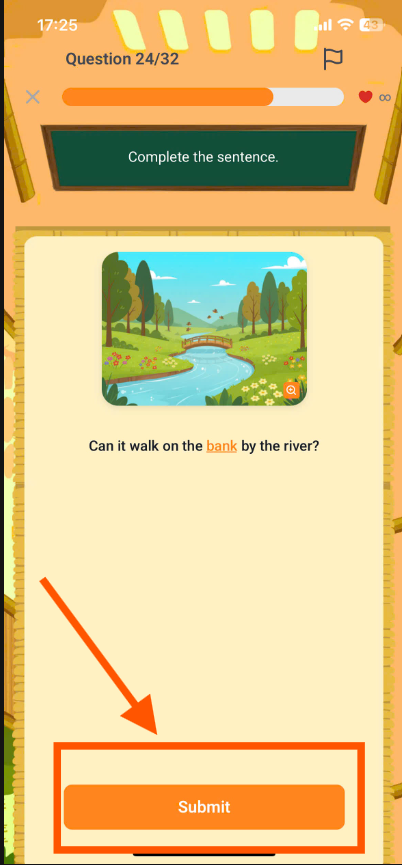
9.4. DRAG AND DROP
Step 1: Follow the instructions for the corresponding question type.
Text-Image Format:Complete the sentence based on the image displayed on the screen.
Text-Audio Format:Click on the icon to listen to the entire sentence.
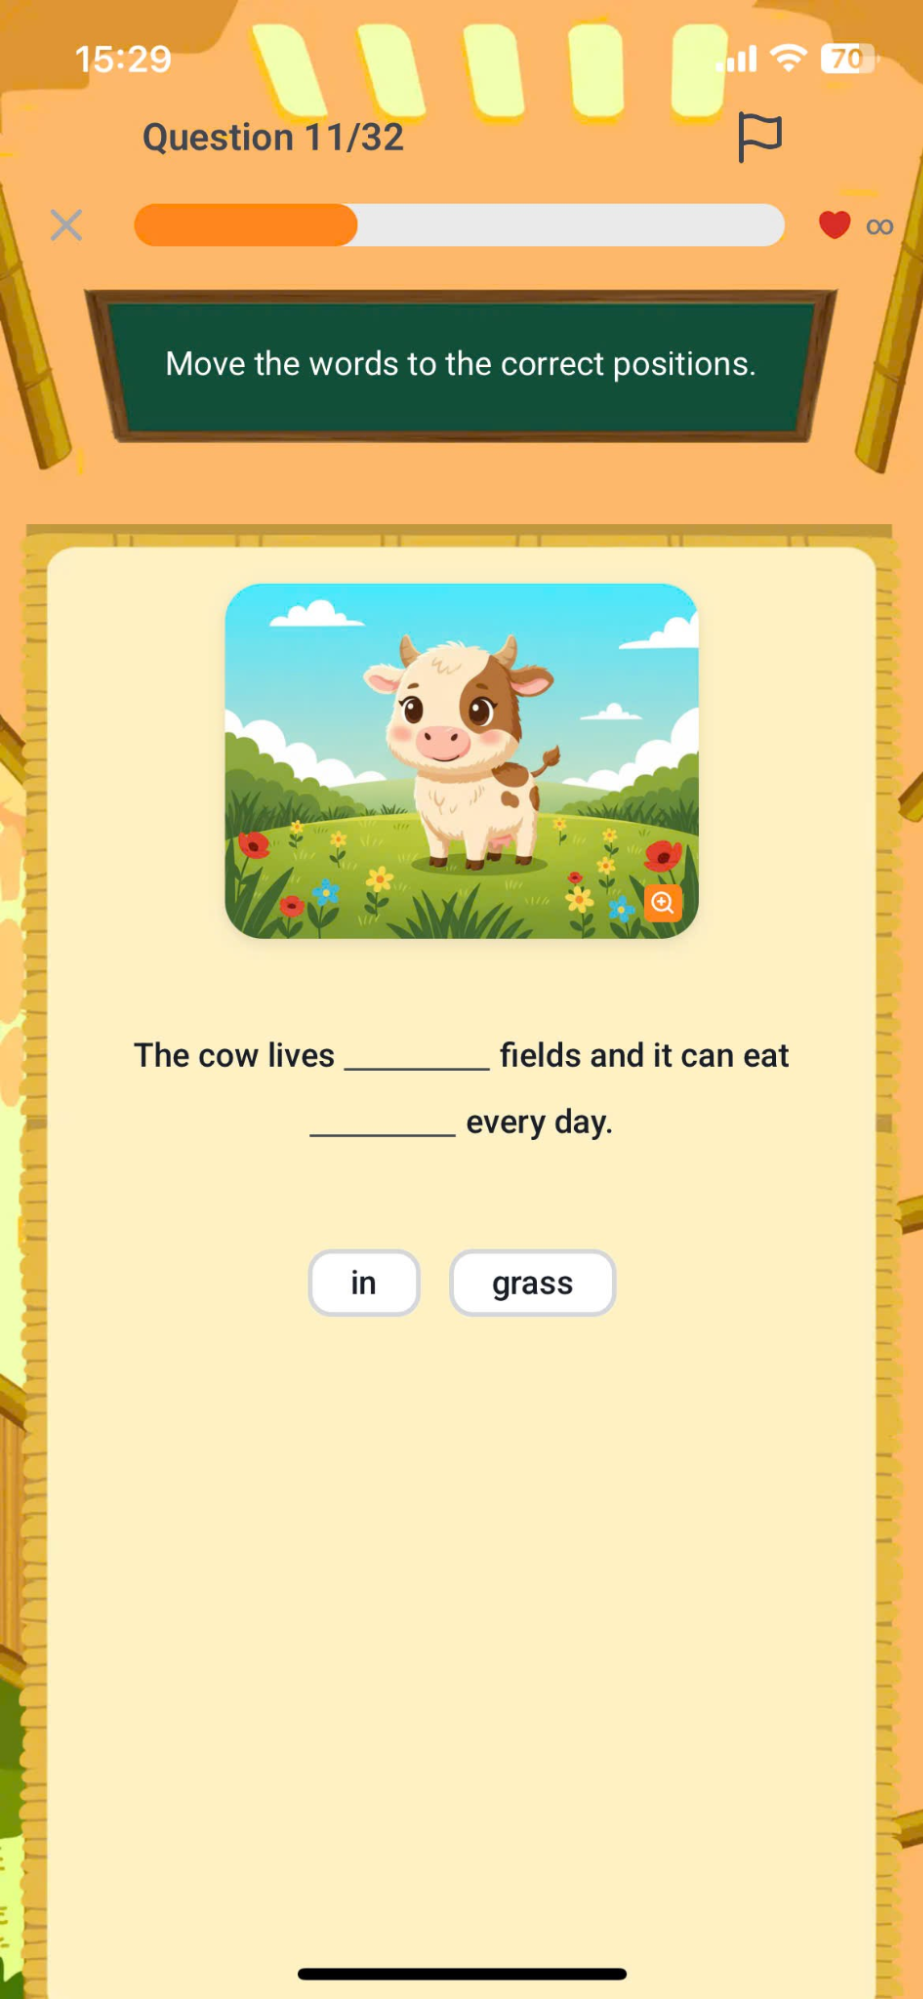
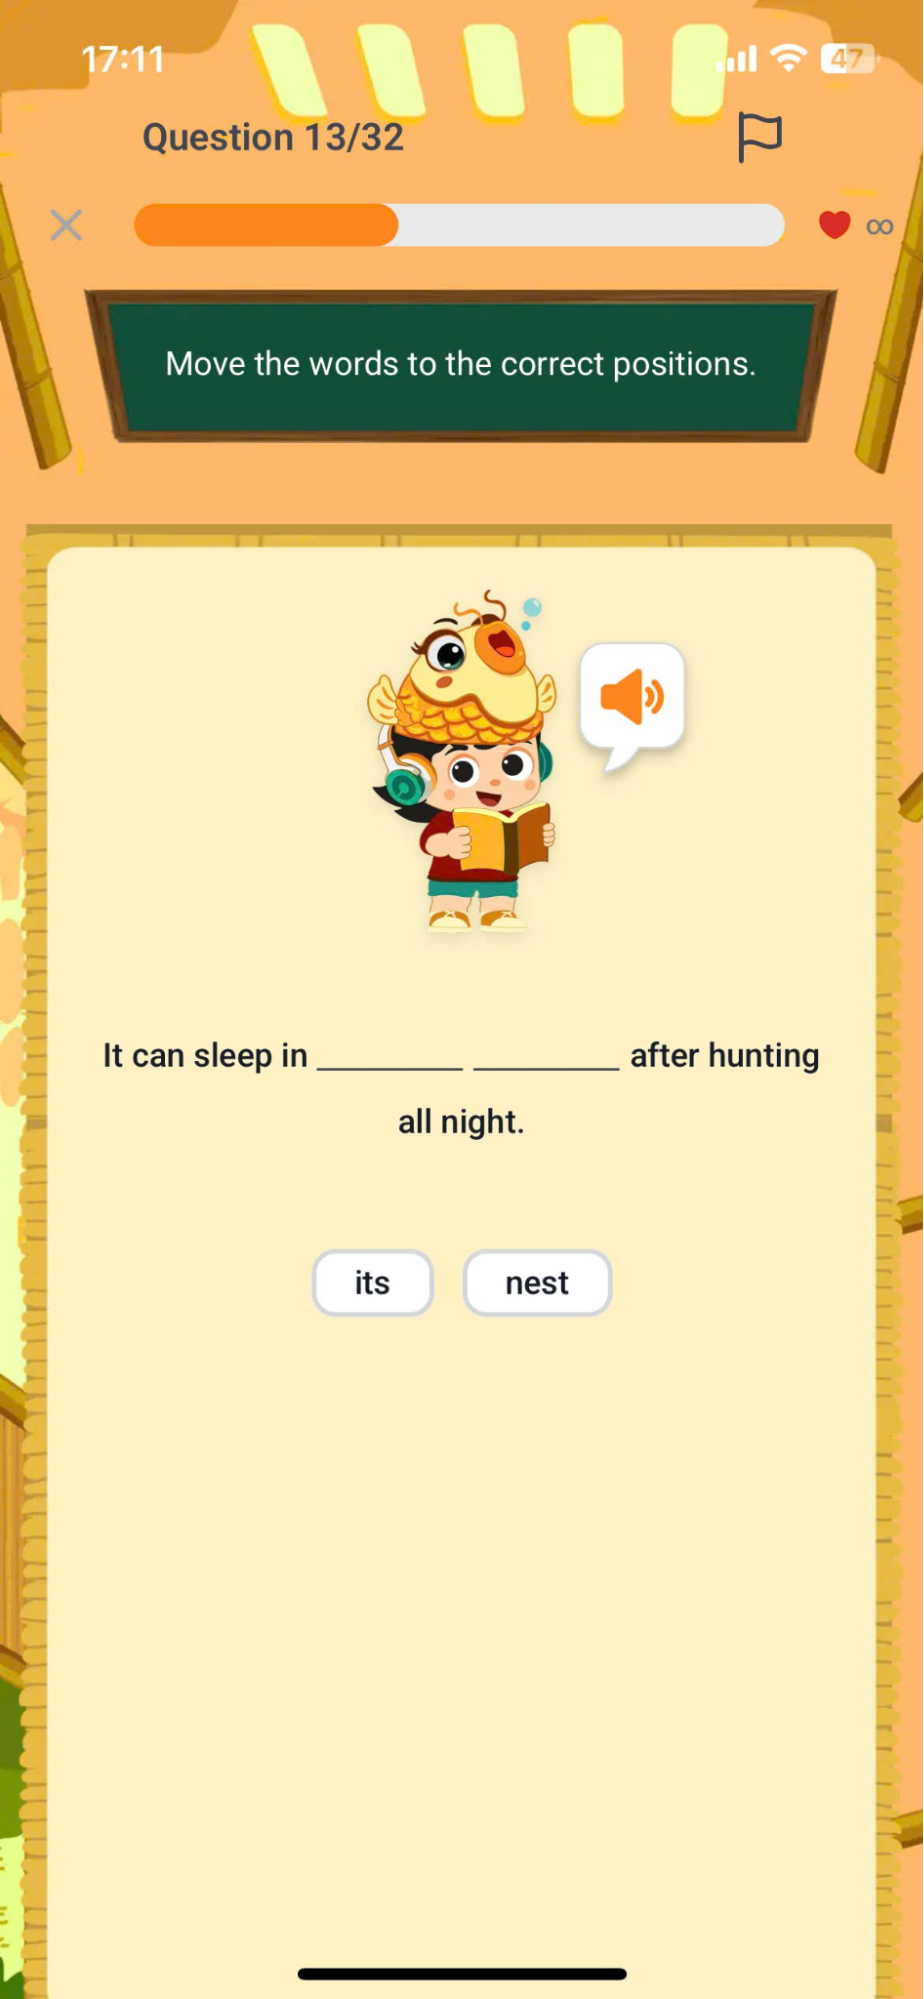
Step 2:Click on the word in the list that appears below the audio or image file.
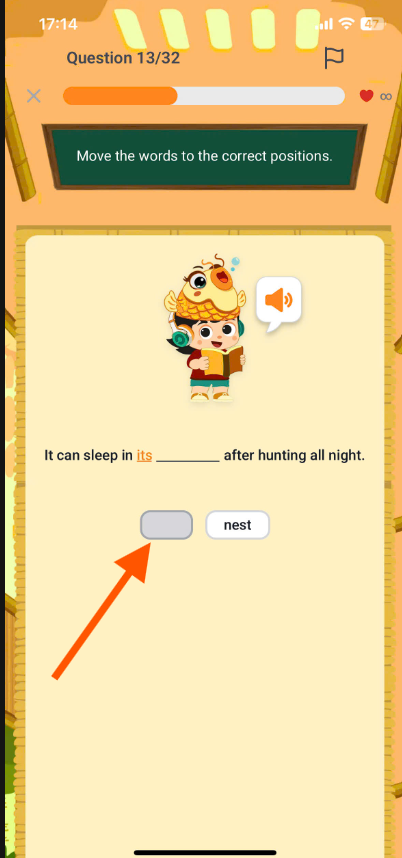
Note:If the position changes, please click on the selected word to discard the answer, then select a different word from the list.
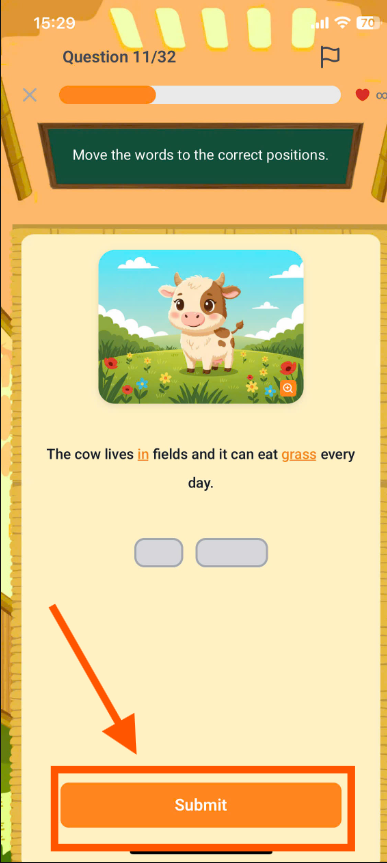
Step 3:Once finished, press the button.
to confirm the answer.
9.5. DROP DOWN (CHOOSE THE WORD)
Step 1: Follow the instructions for the corresponding question type.
Image format:Observe the sentence content and the image on the screen.
Audio Format:Press the button
Listen to the sample audio file.
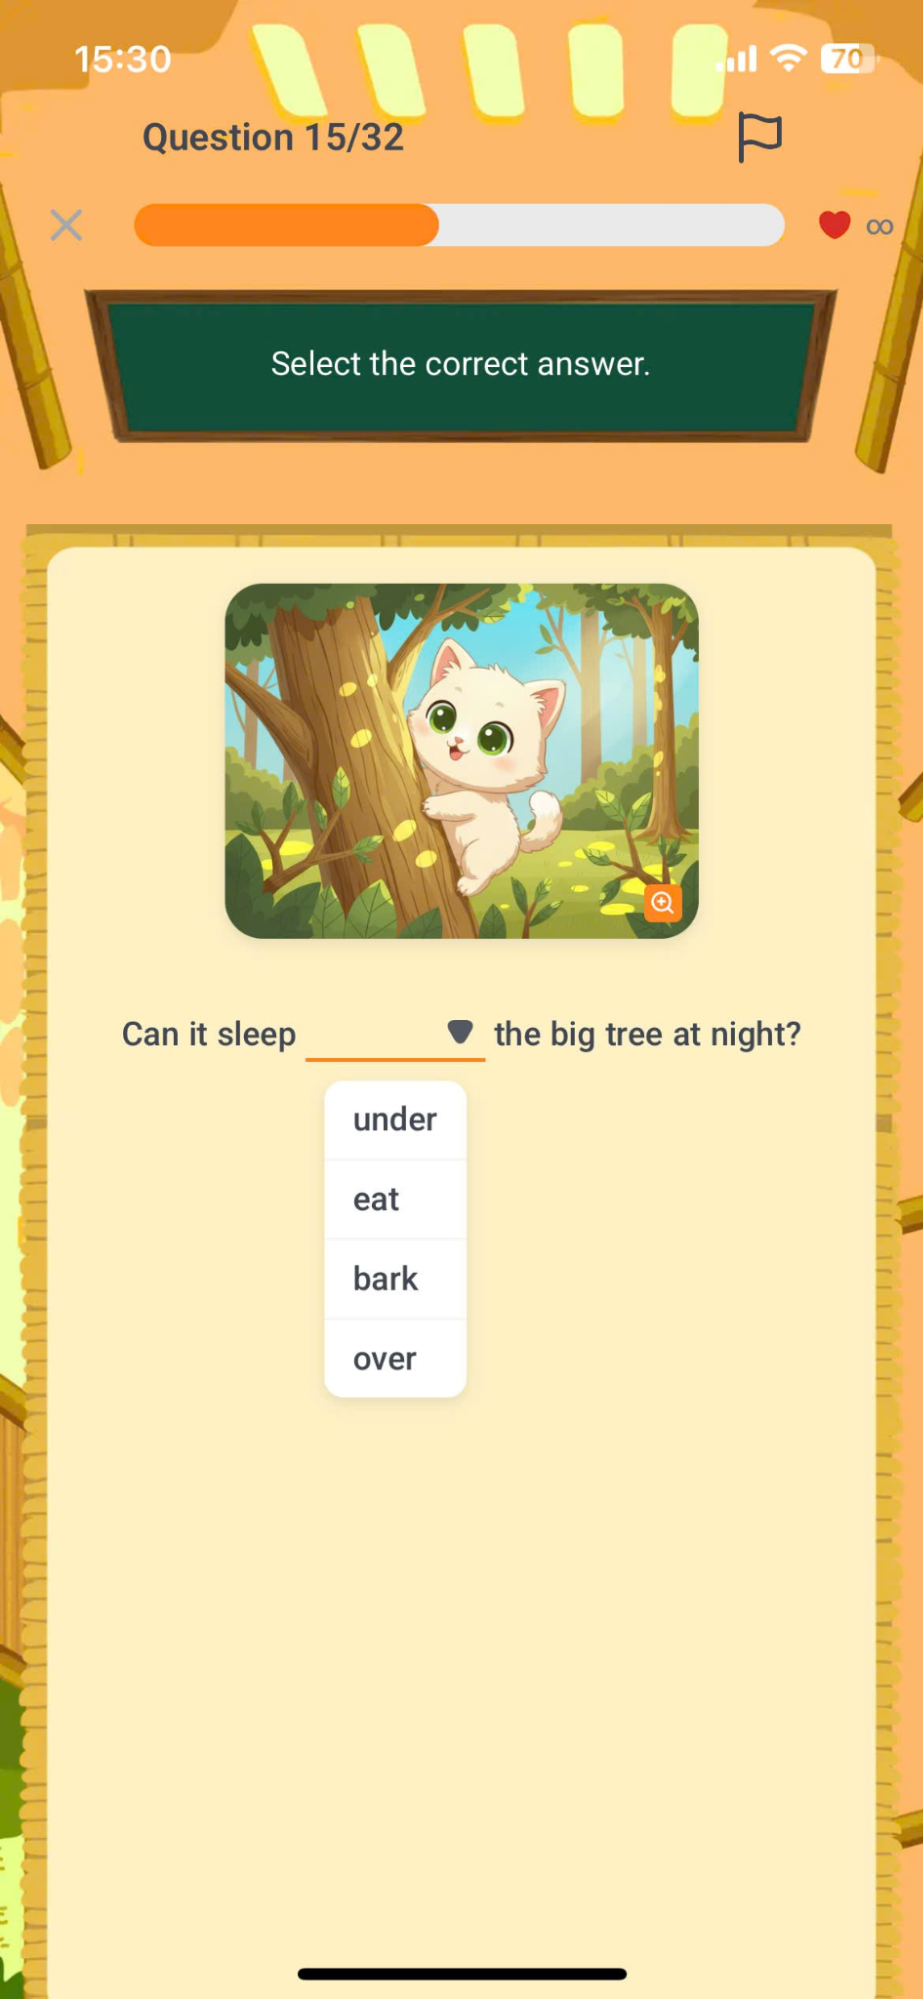
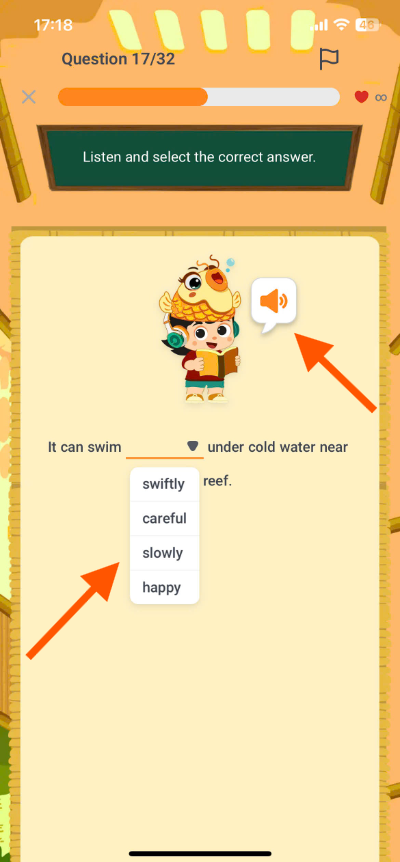
Step 2: Click on the box To choose the appropriate word from the list.
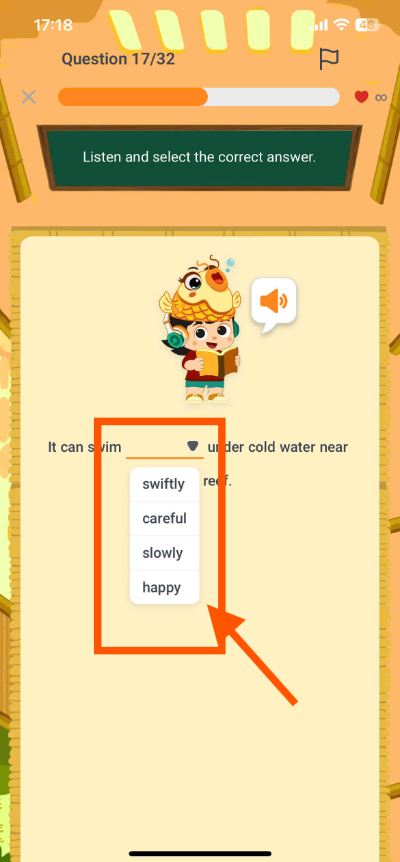
Note:If you wish to change your selection, please click the box to choose a different word from the list.
Step 3:Once finished, press the button.
to confirm the answer.

9.6. MULTIPLE CHOICE (MULTIPLE CHOICE)
Step 1: Follow the instructions for the corresponding question type.
Image format:Observe the sentence content and the image on the screen.
Audio Format:Press the button
Listen to the sample audio file.
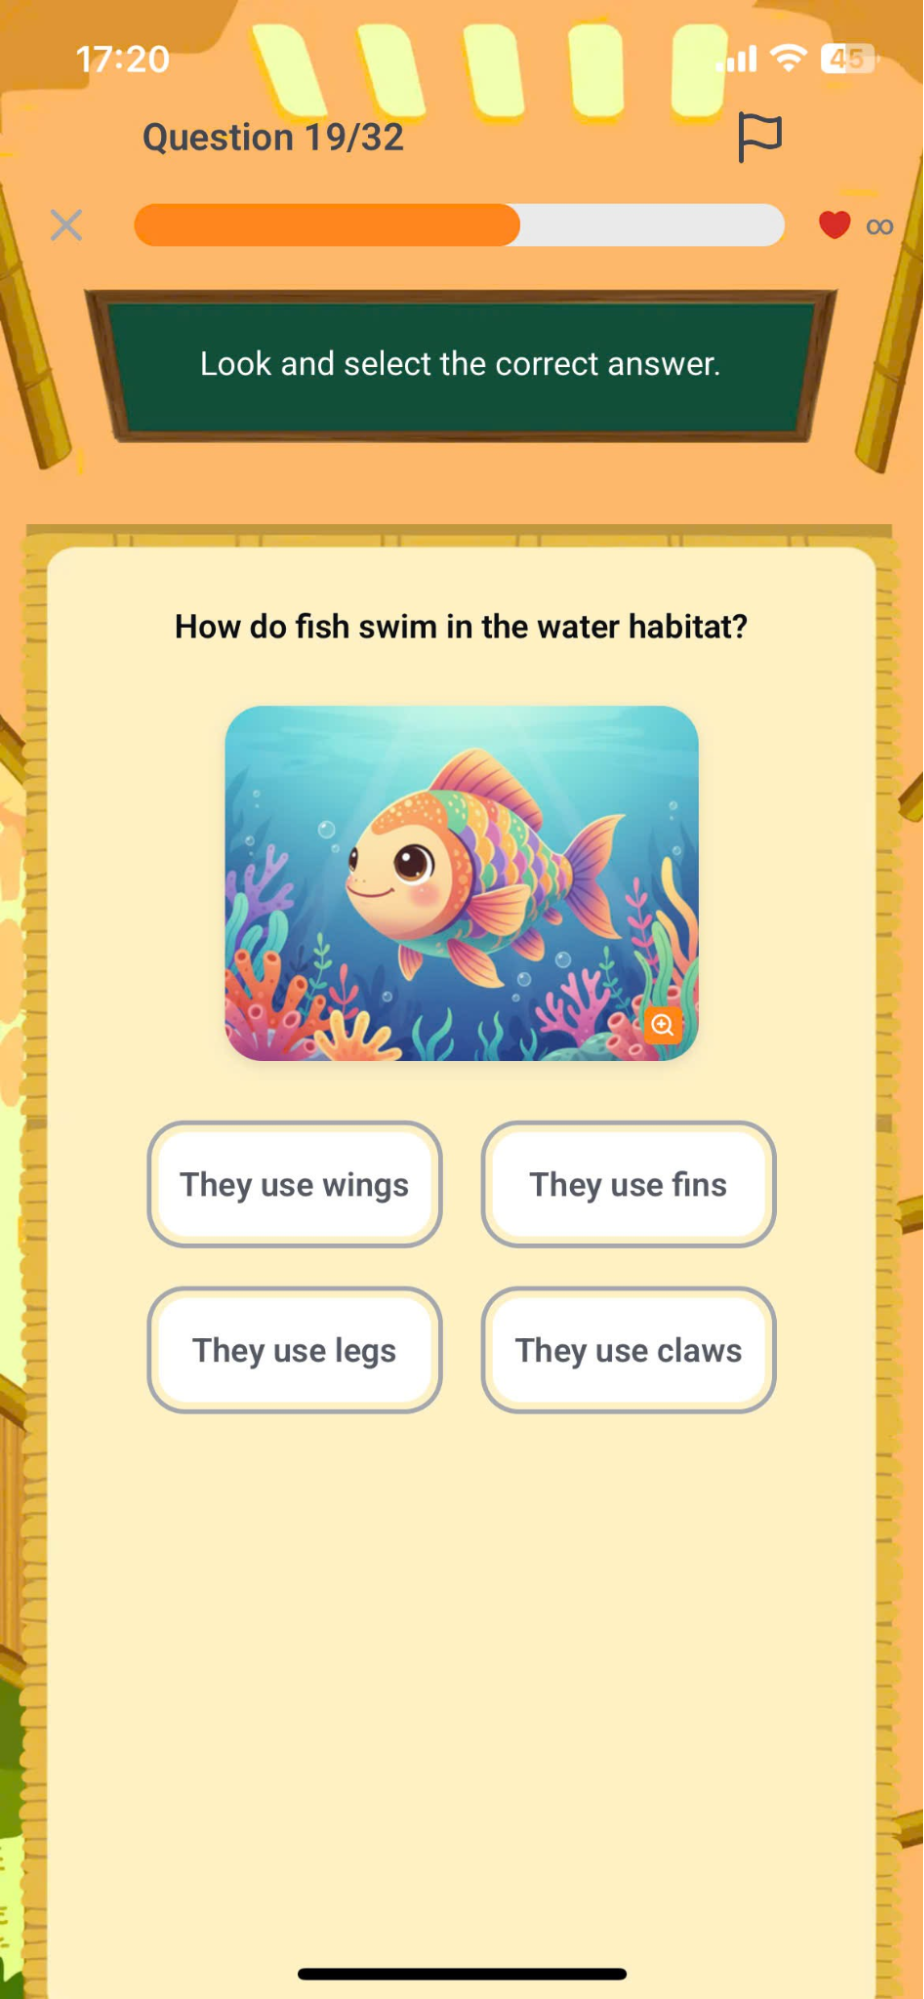
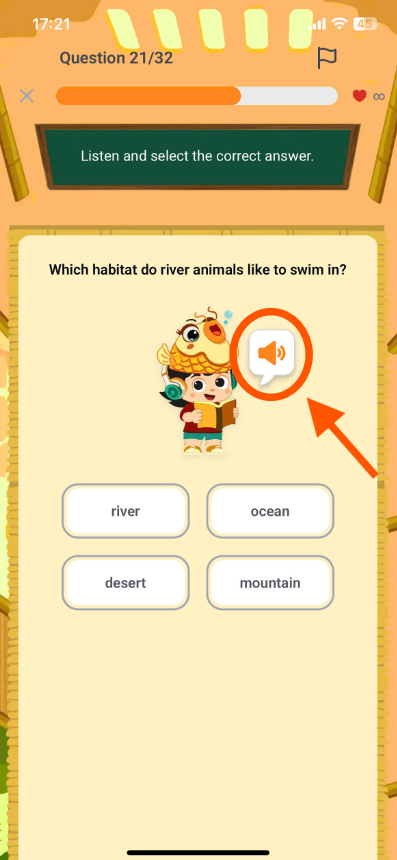
Step 2: Click on the box to make the right choice.
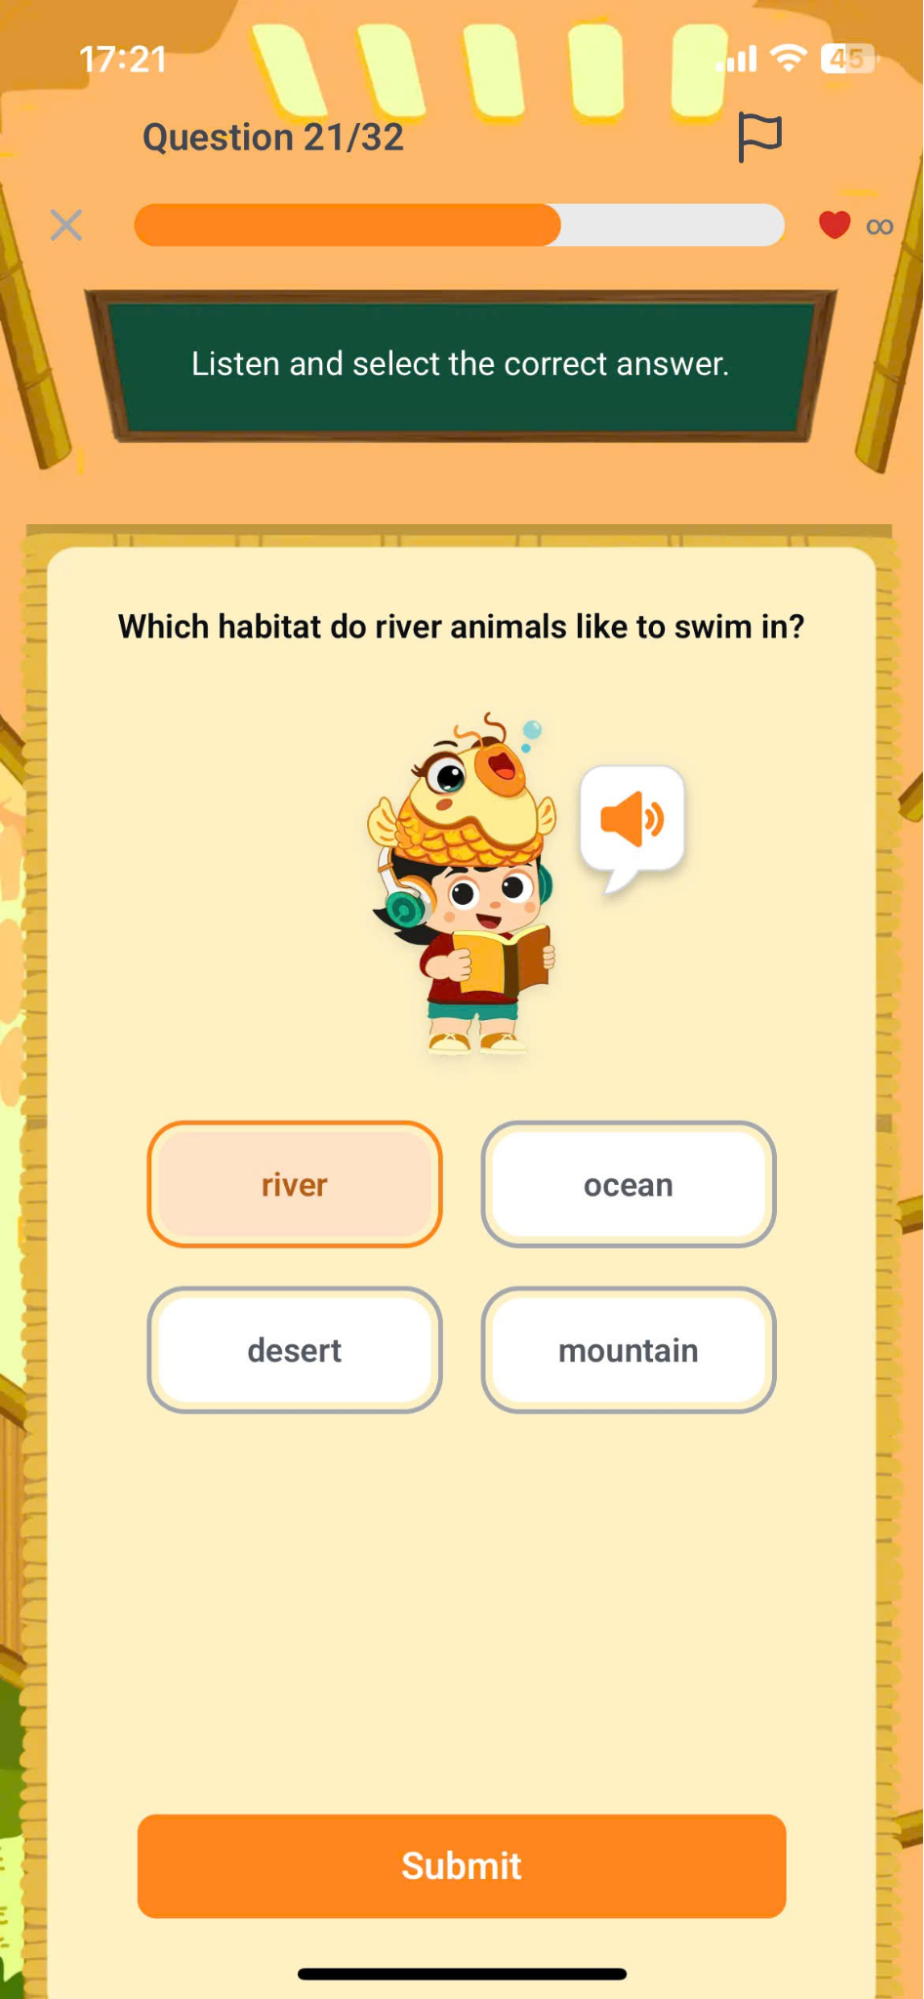
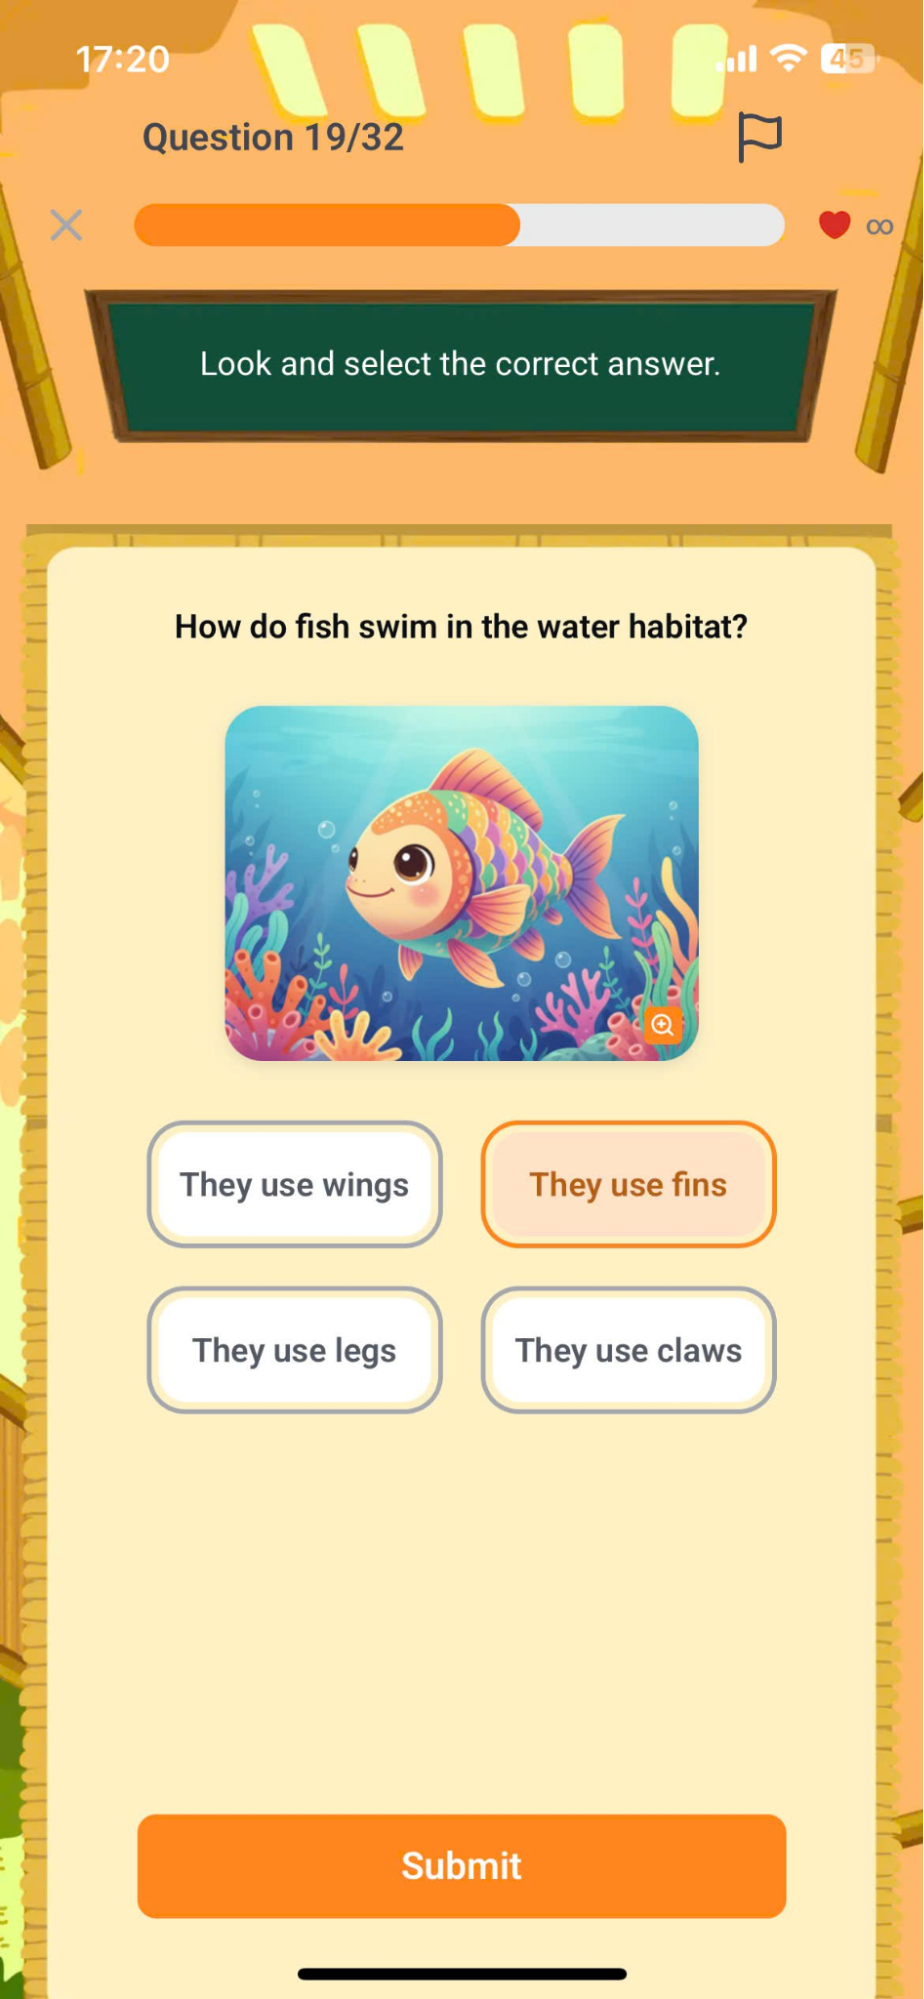
Note:If you wish to change your selection, please click the box to choose a different word.
Step 3:Once finished, press the button.to confirm the answer.
9.7. FILL IN THE BLANK
Step 1: Follow the instructions for the corresponding question type.
Image format:Observe the sentence content and the image on the screen.
Audio Format:Press the buttonListen to the sample audio file.
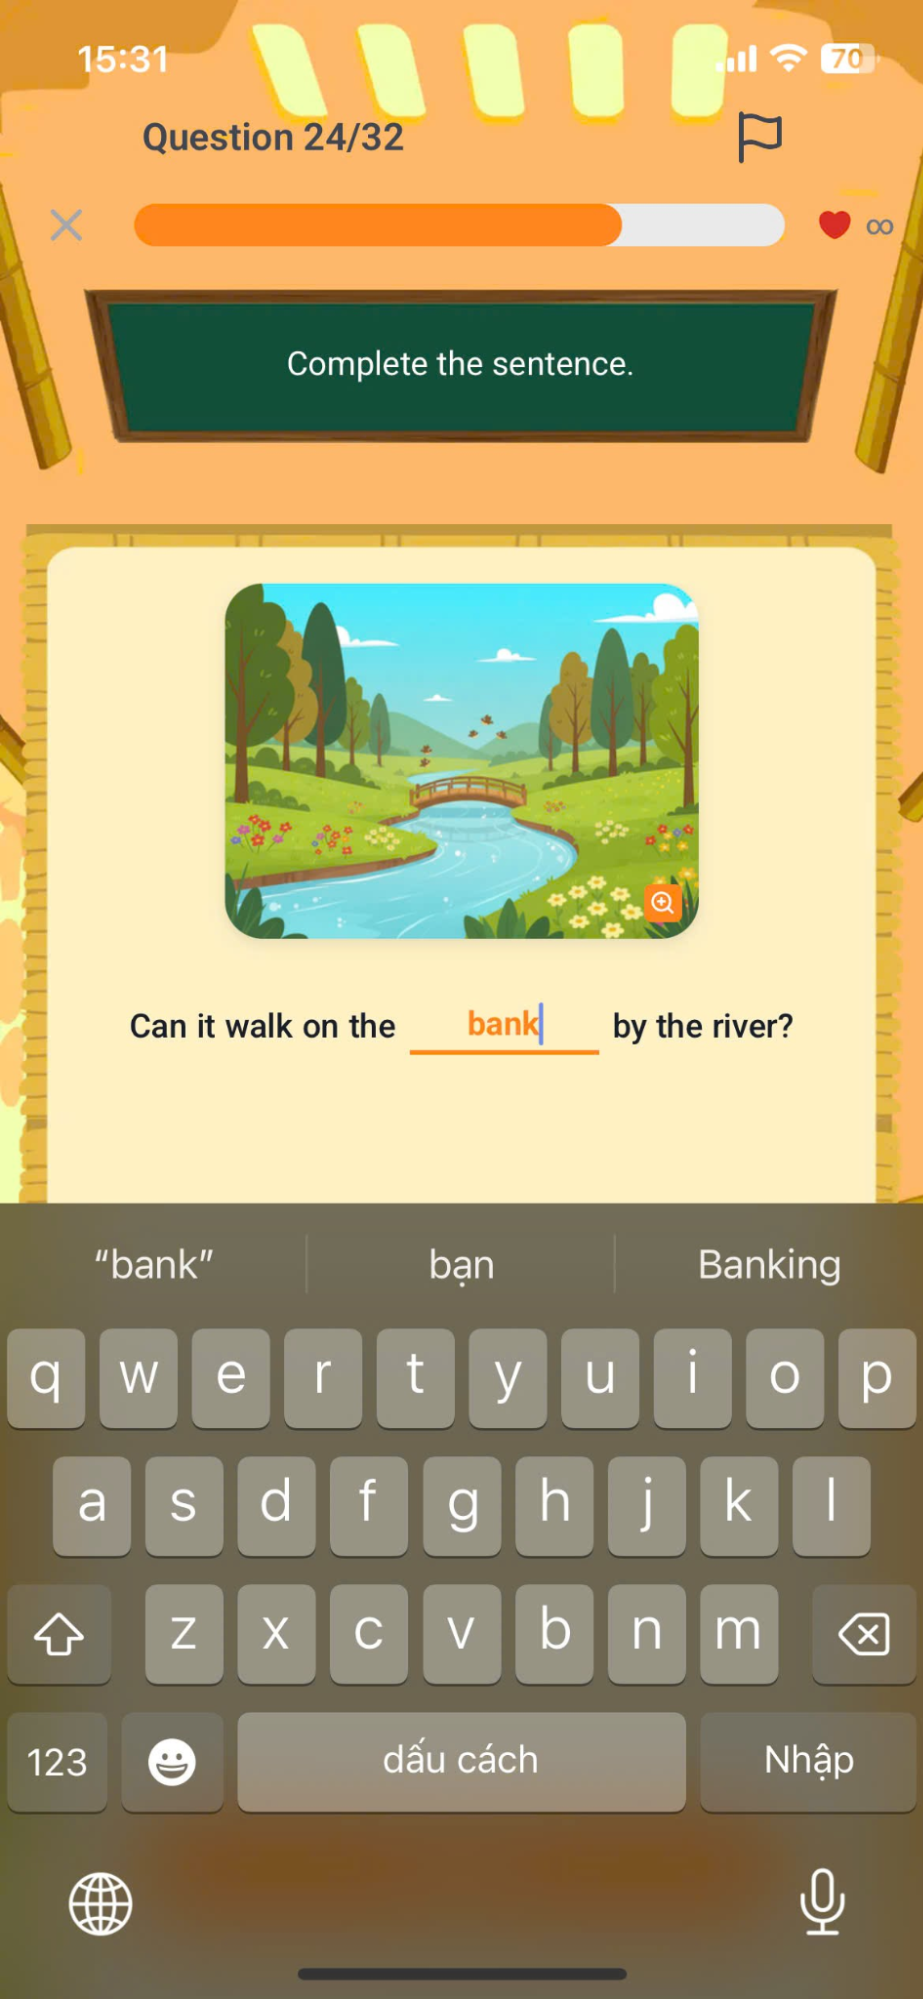
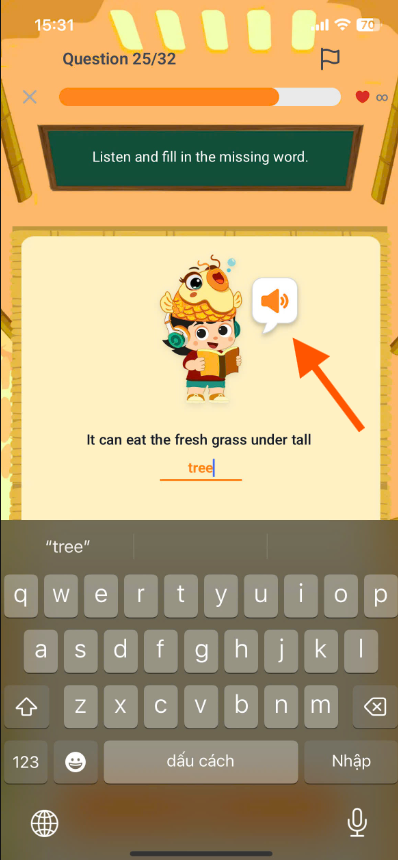
Step 2: Click on the boxand the act of entering characters on the keyboard.
Note:If you wish to change your selection, please click the box to re-enter a different word.
Step 3:Once finished, press the button.to confirm the answer.
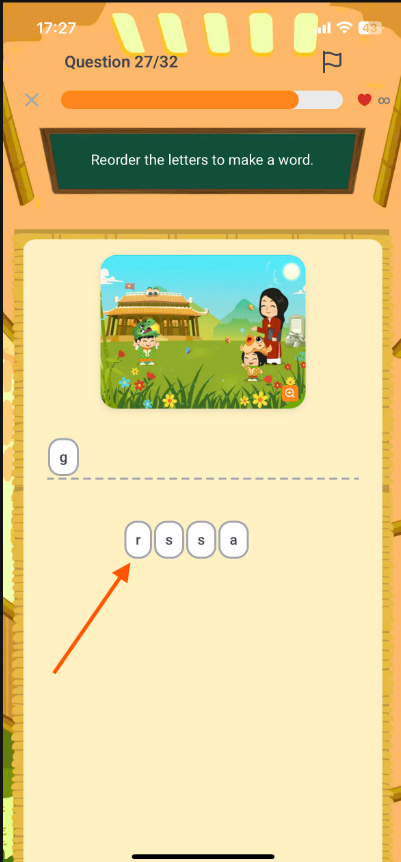
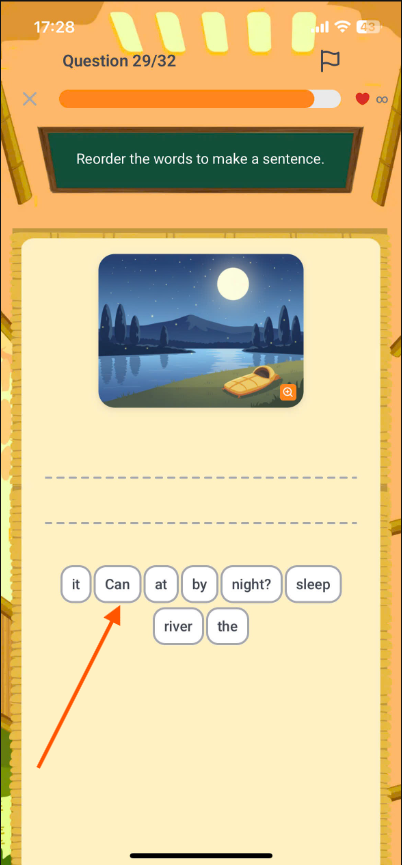
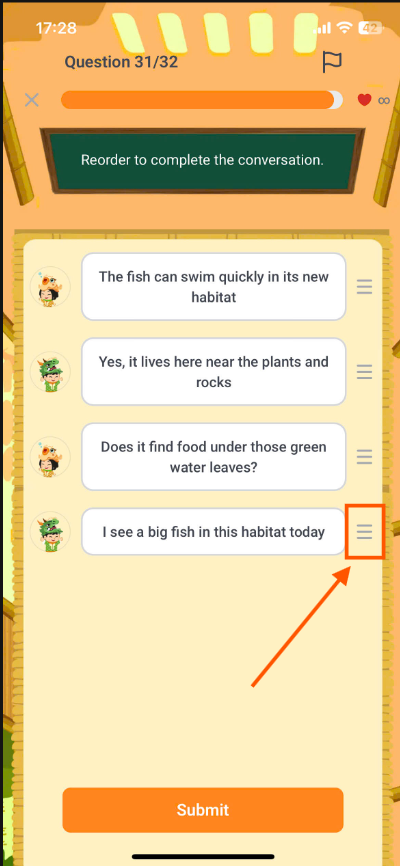
9.8. ARRANGEMENT
Step 1: Follow the instructions for the corresponding question type.
Character Type:Arrange the characters to form a complete word.
Word format:Arrange the words into a complete sentence.
Sentence format:Arrange the sentences into a complete dialogue.
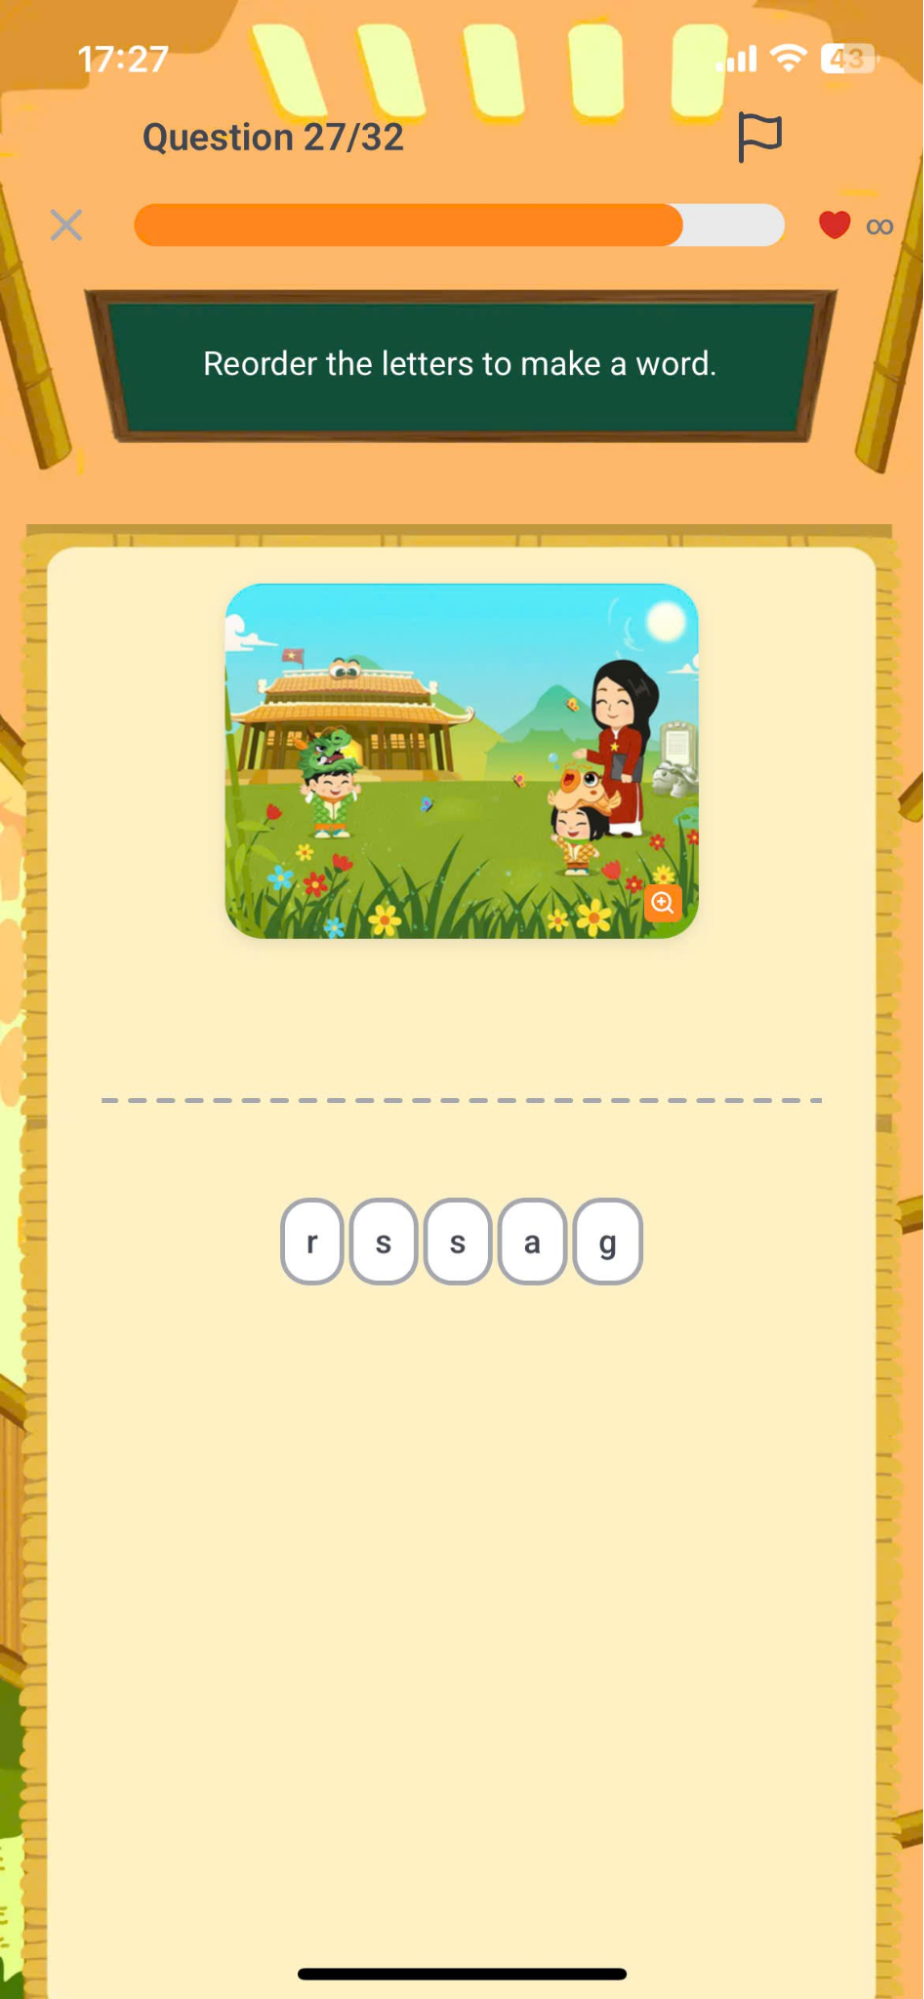
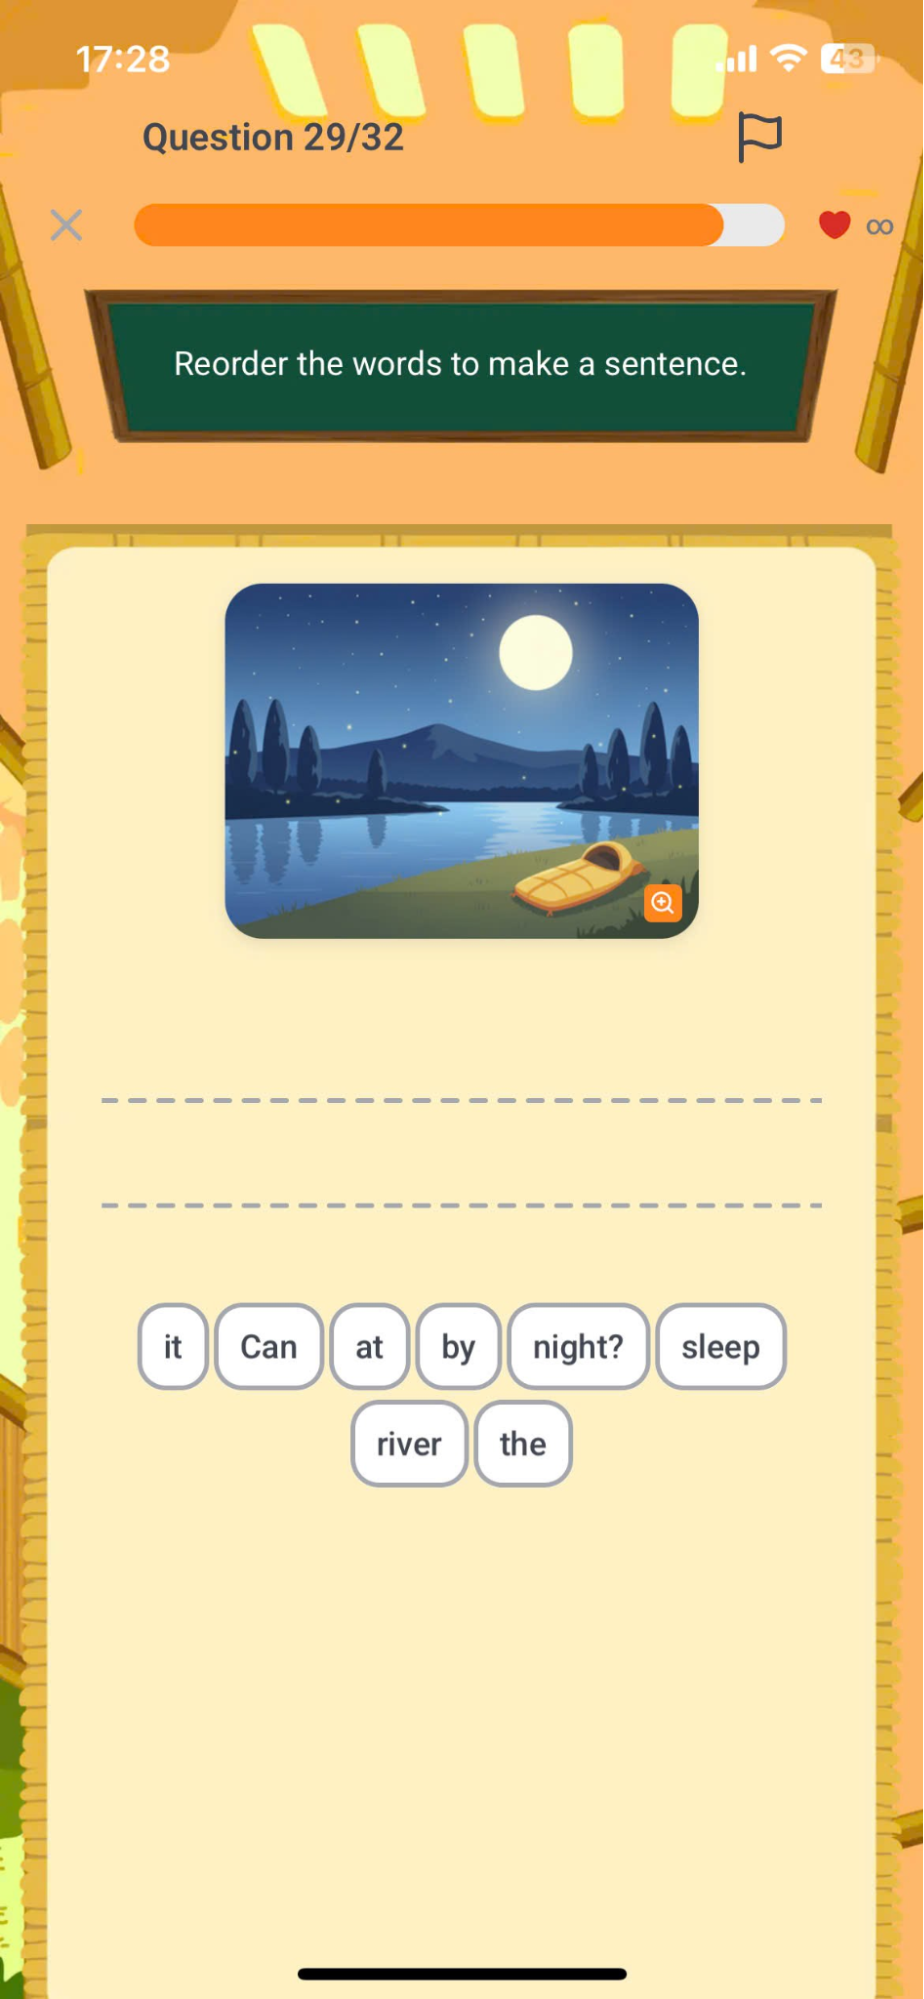
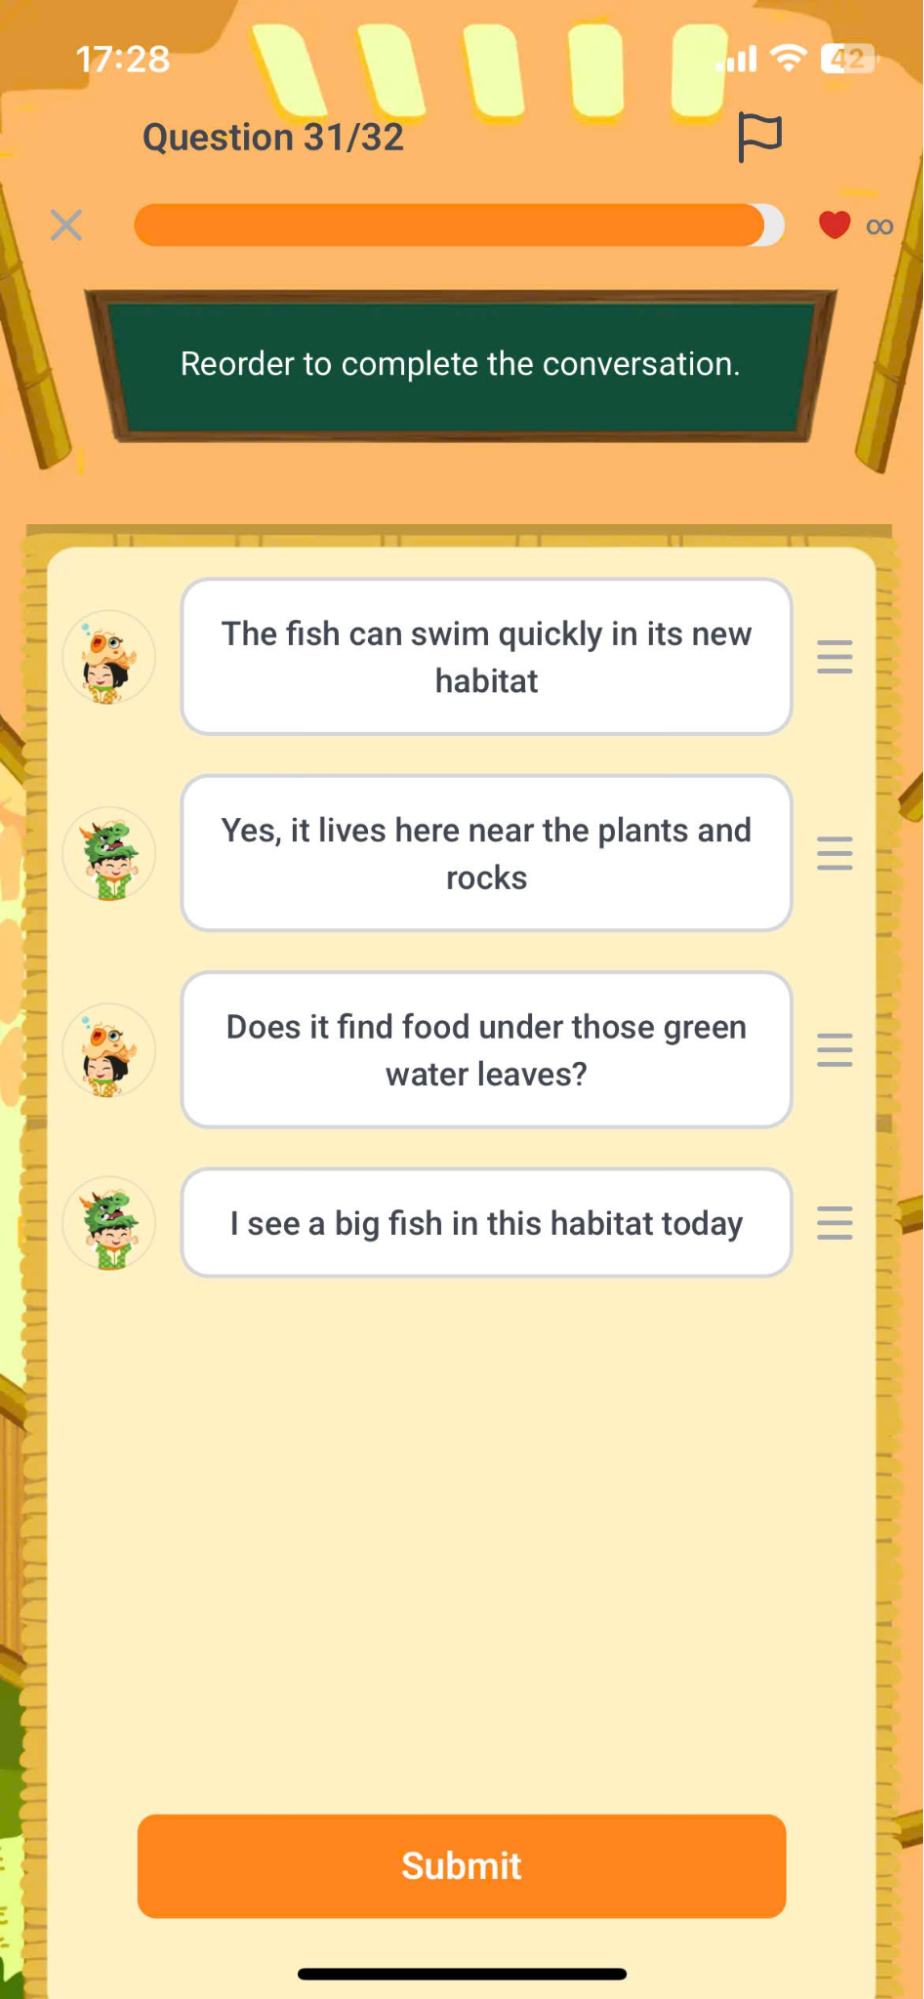
Step 2: Tap on a character or word to sort it. For sorting sentences into a correct conversation, the user needs to press and hold.![]() , move and drop at the desired location.
, move and drop at the desired location.
Note:If you need to change your selection, please click on the selected box to remove the answer, then select it again to complete the sorting.
Step 3:Once finished, press the button.to confirm the answer.
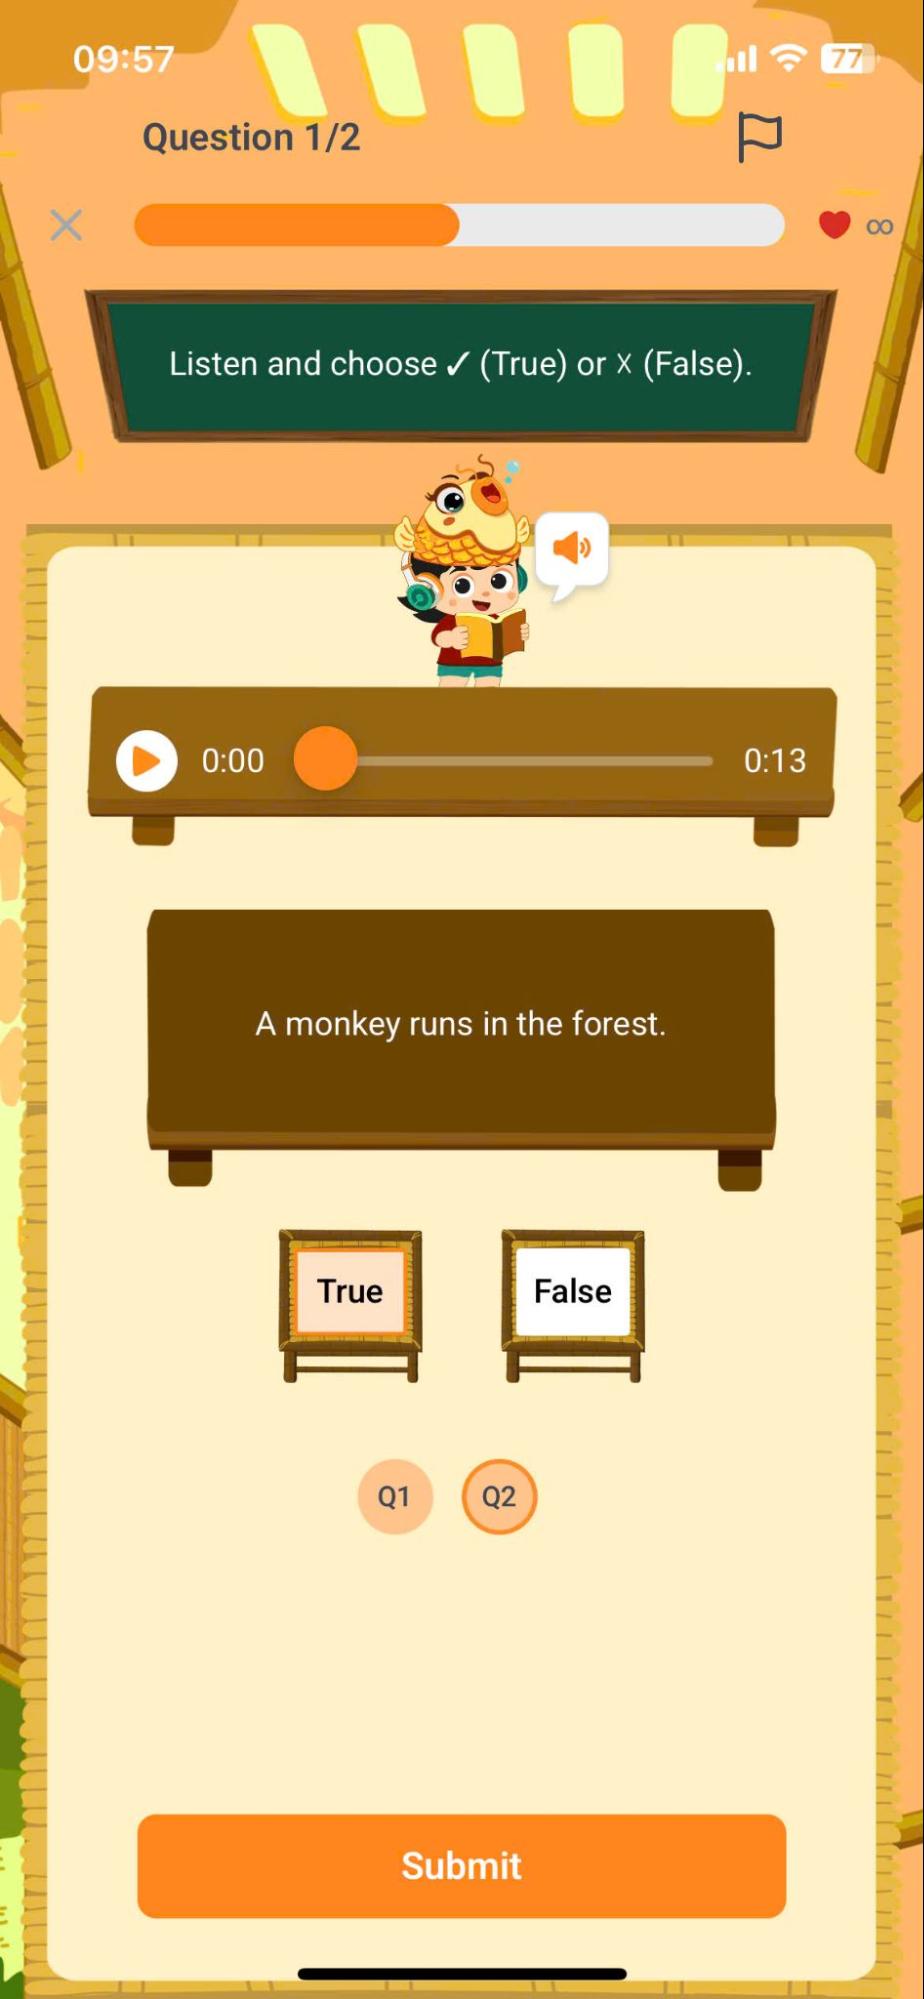
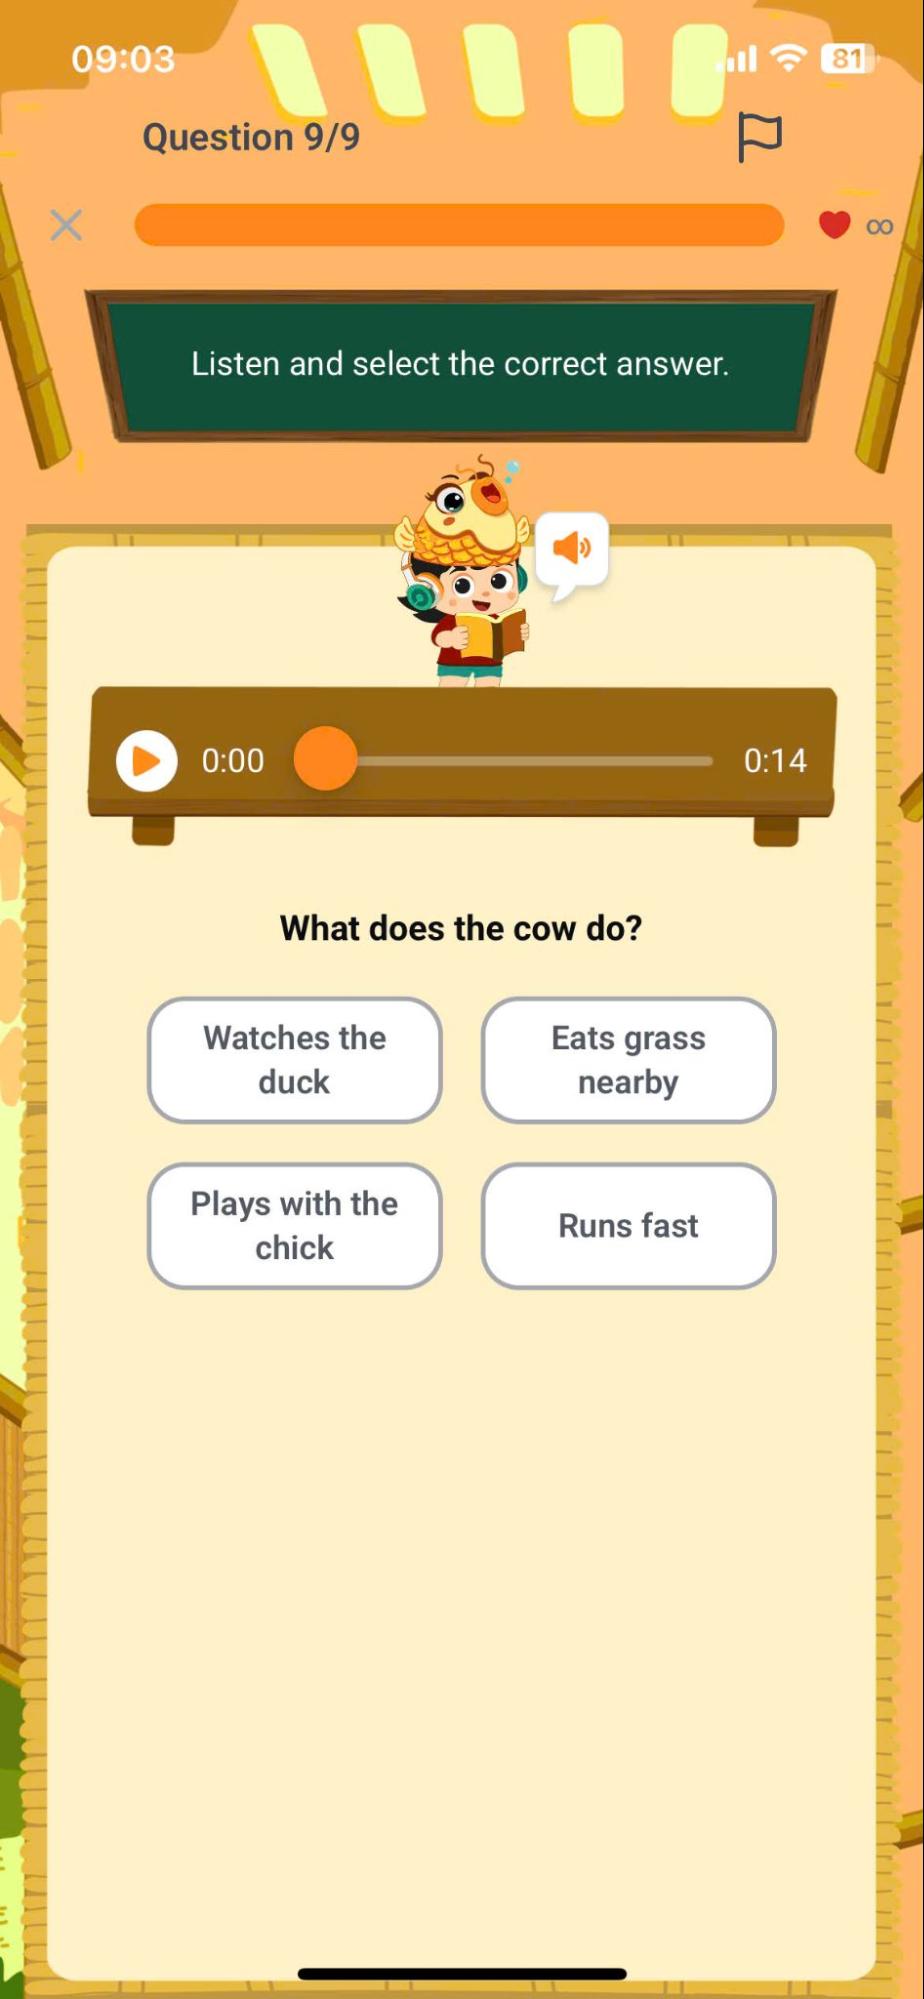
9.9. COMPREHENSION (LISTENING/READING COMPREHENSION)
Step 1: Follow the instructions for the corresponding question type.
Dạng Reading_Multiple choice/Fill in the blank/Drag and drop:Read the passage and the questions on the screen.
Dạng Reading_True Or False: Read the passage and the questions on the screen.
Dạng Listening_Multiple choice/Fill in the blank/Drag and drop:Press the button![]() Listen to the sample audio file.
Listen to the sample audio file.
Dạng Listening_True Or False: Read the passage and the questions on the screen.


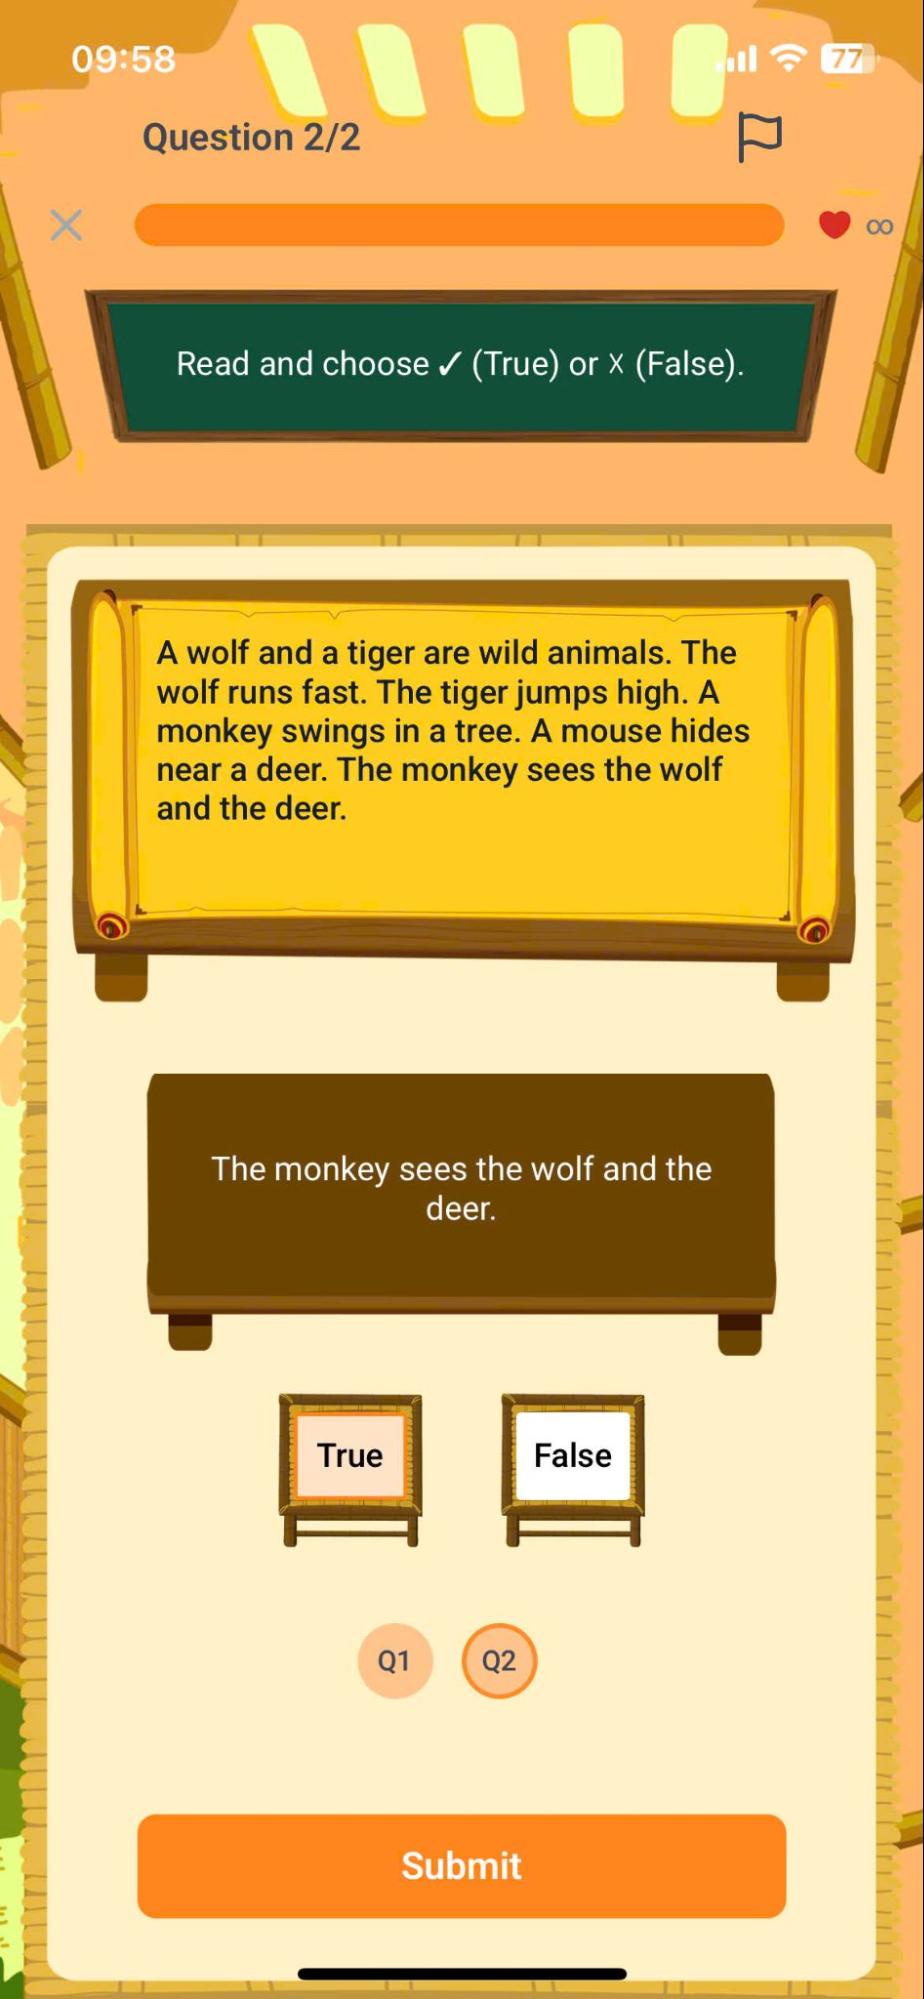
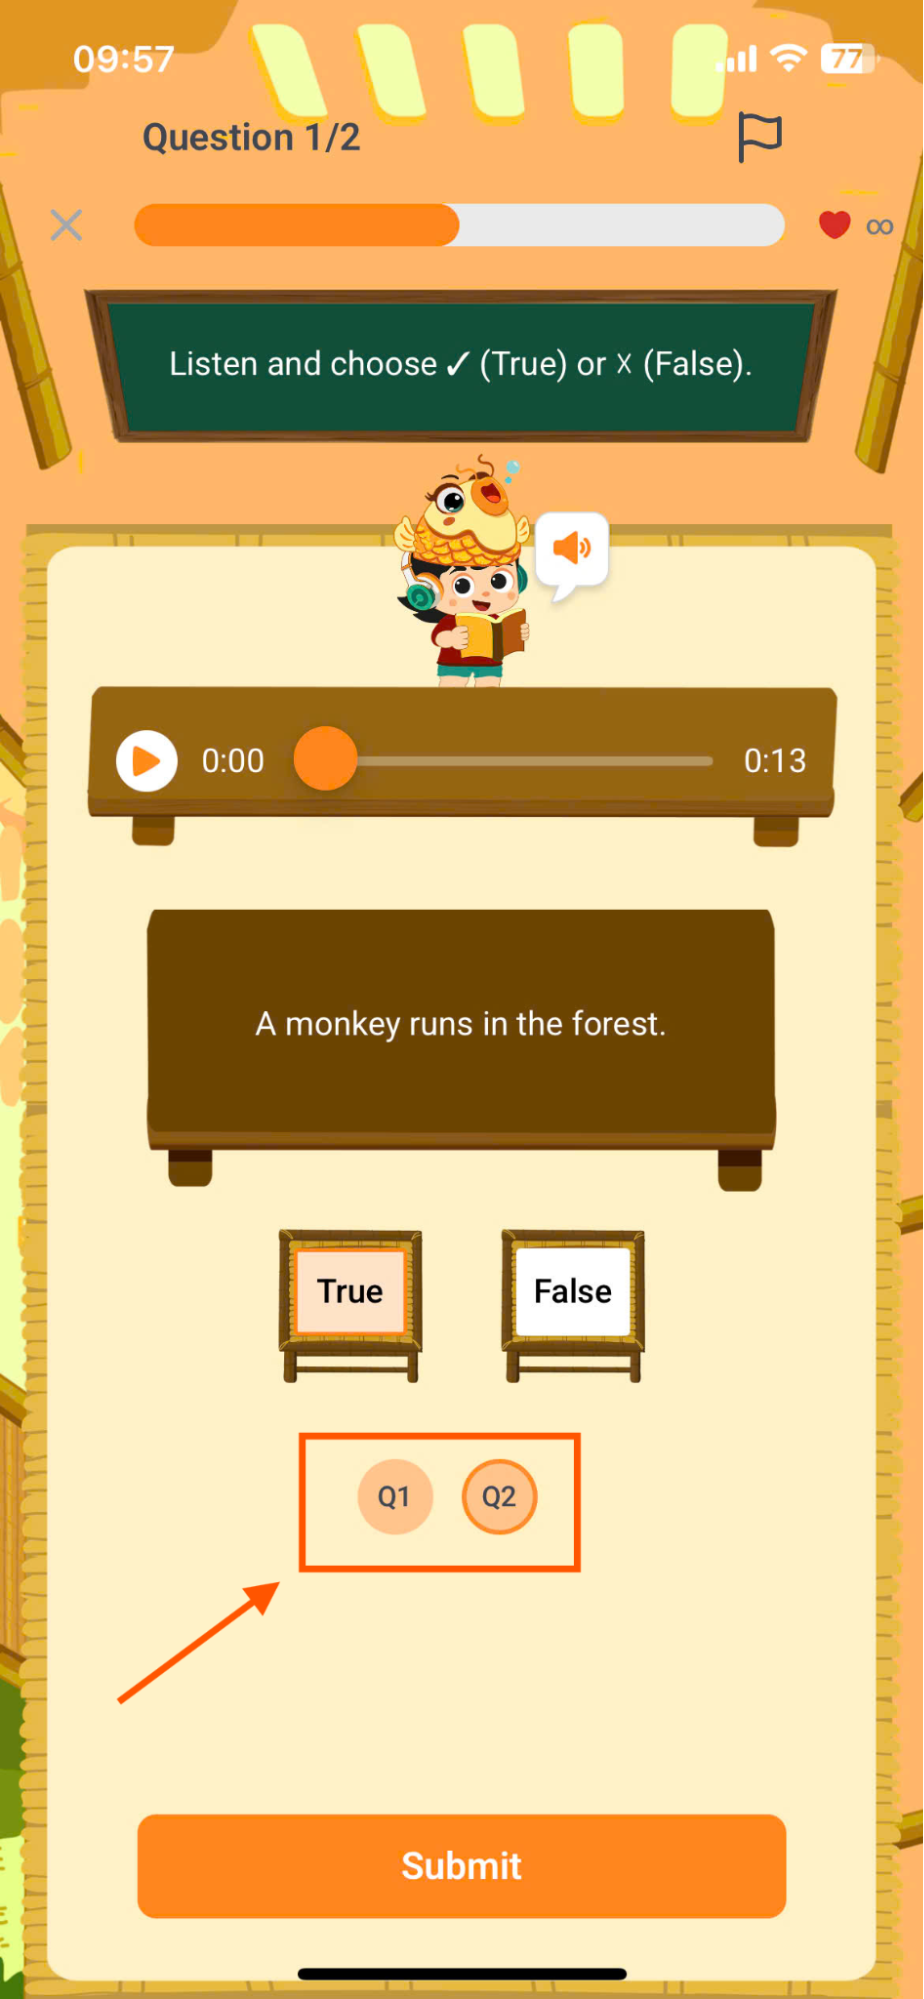
Step 2: For True/False questions, users read/listen to a passage and select True/False for the statement.
Note:
- If you need to change your selection, please swipe right to return to the previous question, tap the selected box to remove the answer, and then select again to complete the sorting.
- If a question has more than one answer, please swipe left/right to select an answer for all options. You can press [button/click].
 to move to a different viewpoint.
Step 3:Once finished, press the button.to confirm the answer.
Reading Format:Read the passage and the questions on the screen.
Listening Format:Press the button![]() Listen to the sample audio file.
Listen to the sample audio file.
Step 2: Click on the boxto make the right choice.
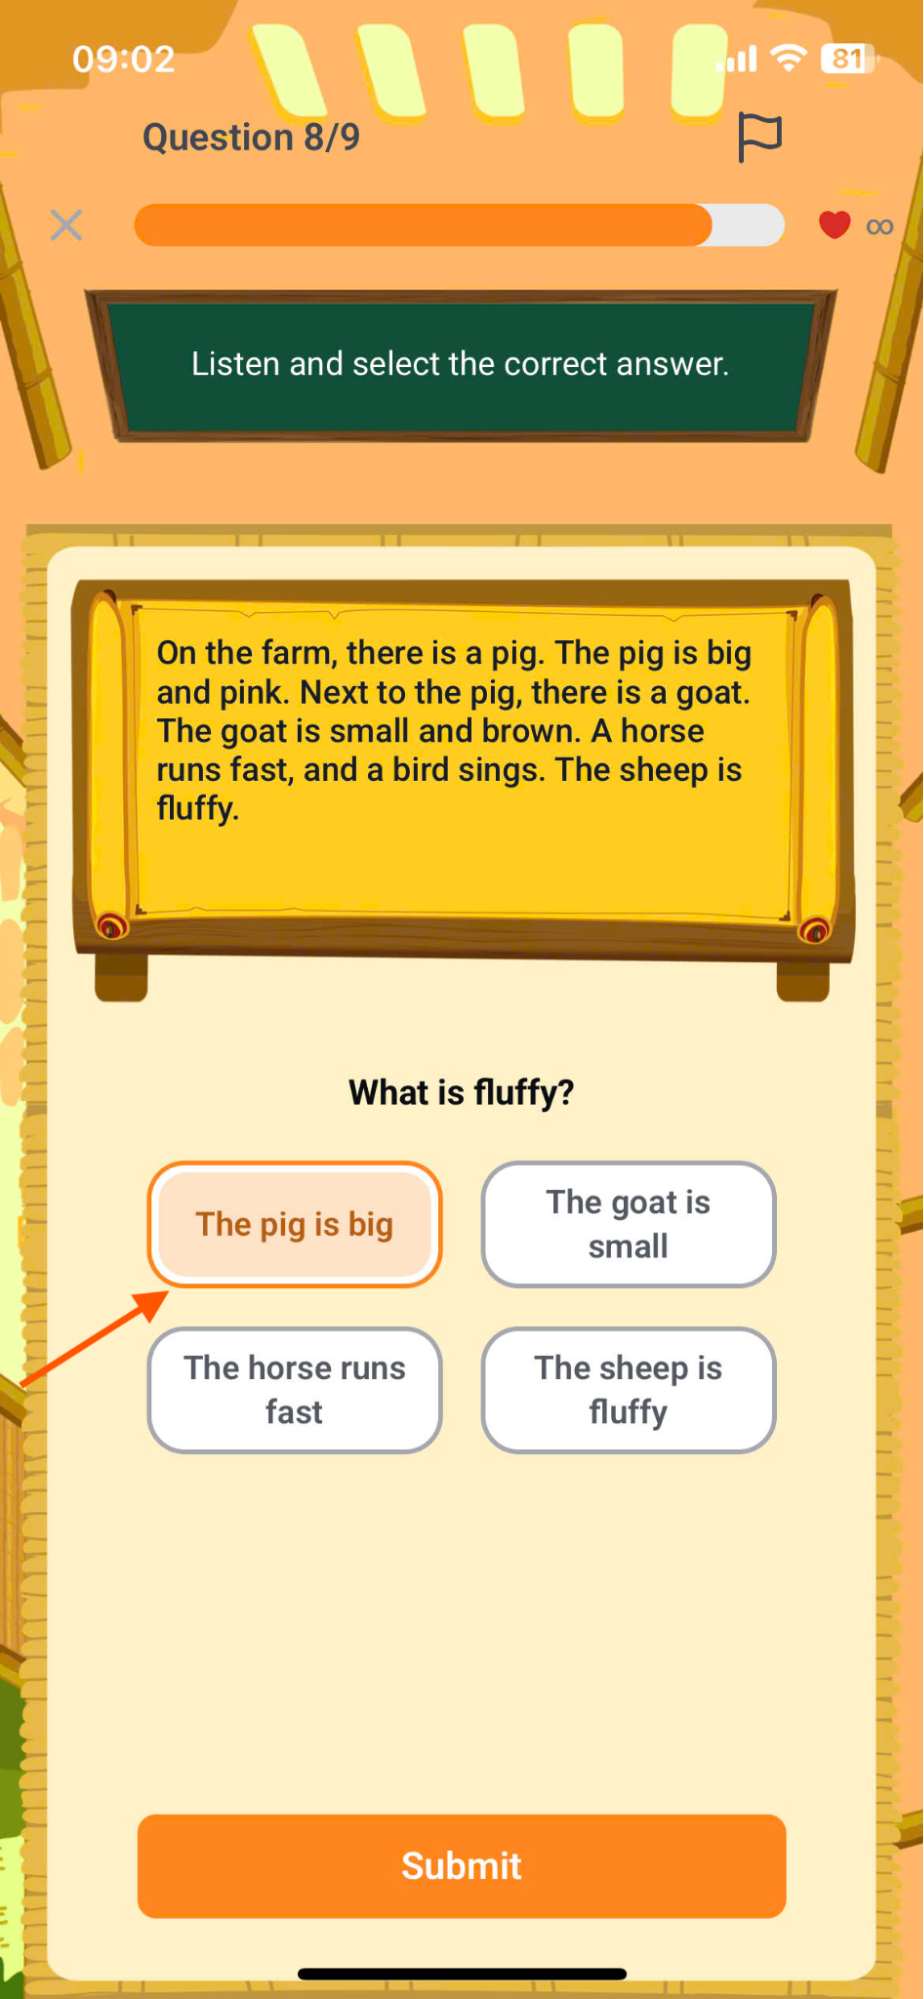
Note:If you need to change your selection, please click on the selected box to remove the answer, then select it again to complete the sorting.
Step 3:Once finished, press the button.to confirm the answer.
10. PRACTICE
Step 1: On the main screen, click the Practice area icon.
Step 2:In the Practice screen, users select the learning area they wish to participate in.
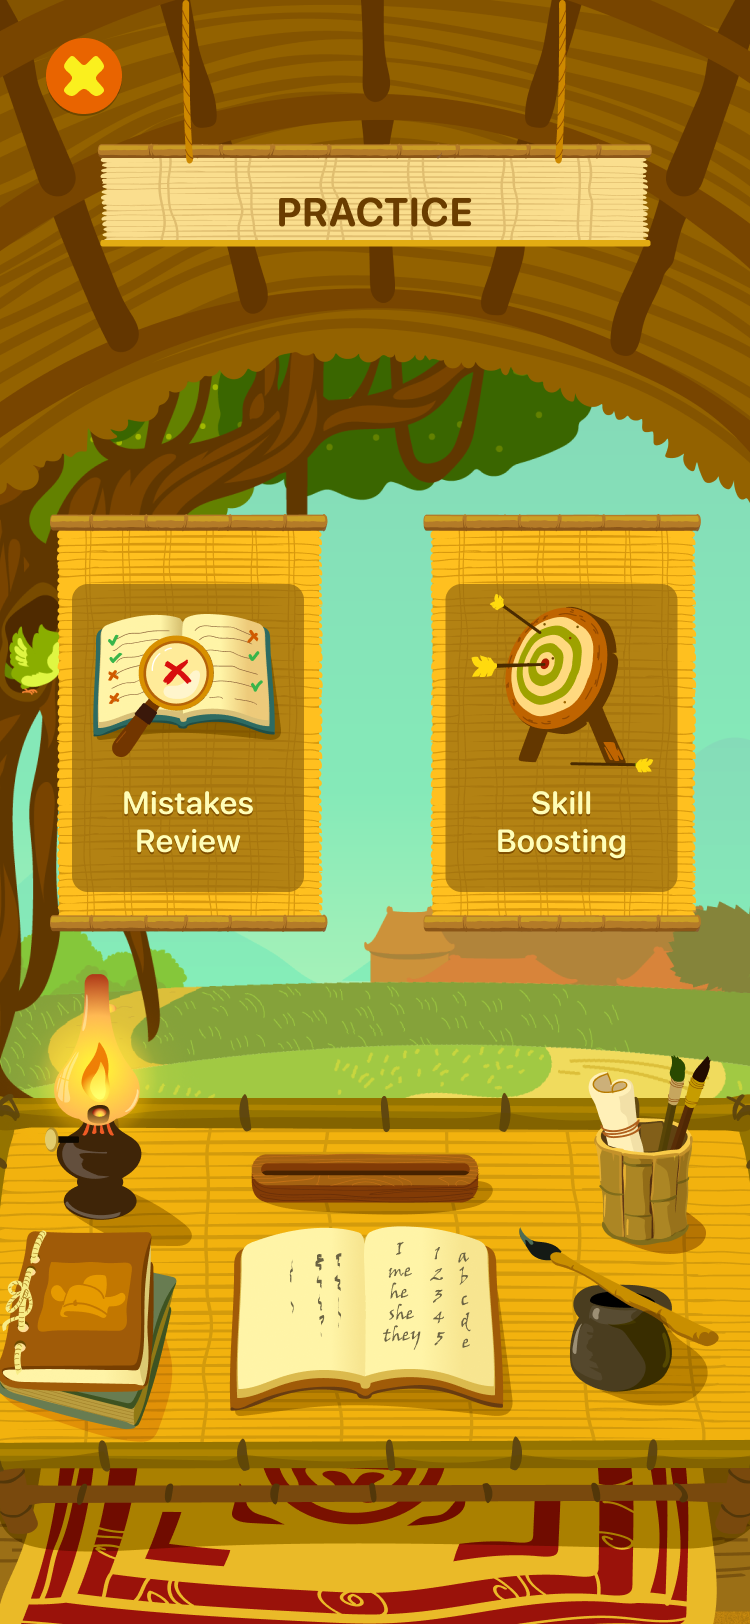
10.1. MISTAKES REVIEW
Step 1: Click on the icon Mistakes Review area.
Step 2:In the Mistakes Review screen, users answer questions they previously answered incorrectly in the Mission area.
10.2. SKILL BOOSTING
Step 1:Click on the icon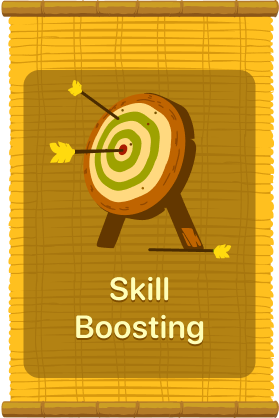 Skill boosting area.
Step 2:In the Skill Boosting screen, the AI system will automatically provide suitable exercises for learners to practice and improve their skills. Users then answer the questions.
11. PLAYGROUND
Step 1: on the main screen, select the region. Playground.
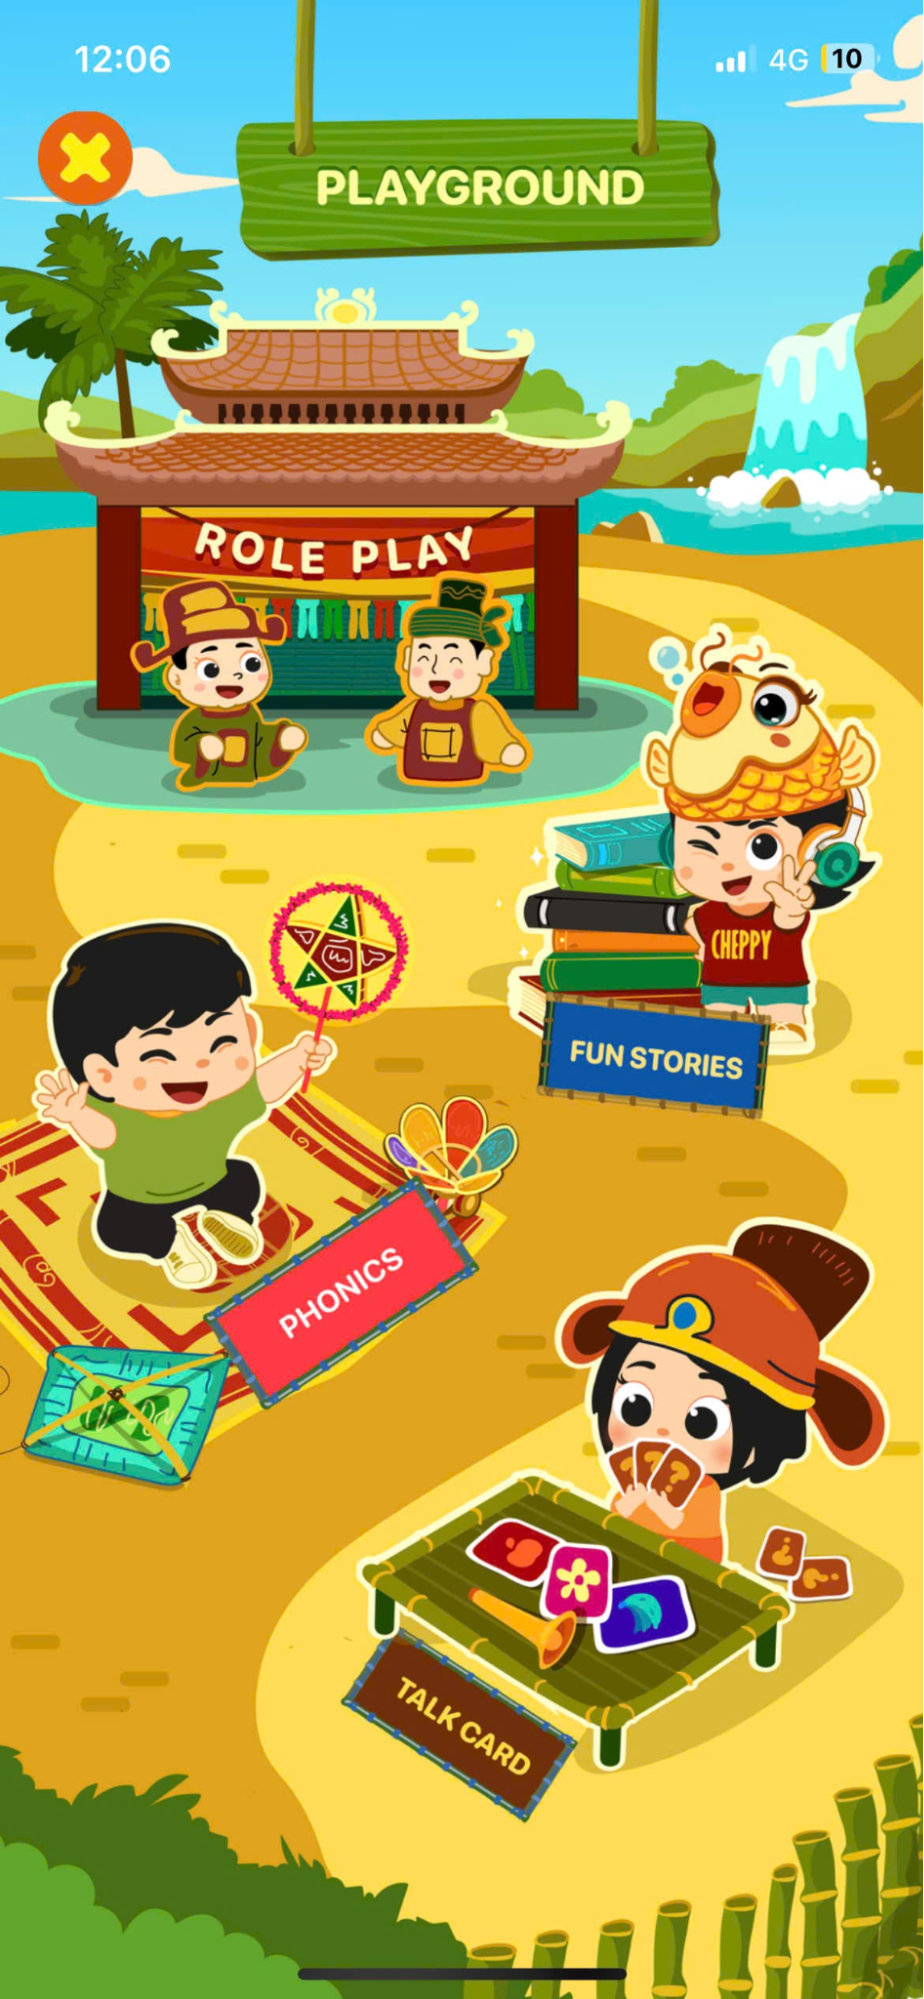
Step 2: The system will display various fun learning activities: Role Play, Fun Story, Phonics, Talk Card. Then, the user can choose one.Activities I want to participate in.
11.1. ROLE PLAY
- Purpose: This area helps learners practice communication through simulated scenarios.
Step 1: InIn the Playground screen, select the Role Play area.
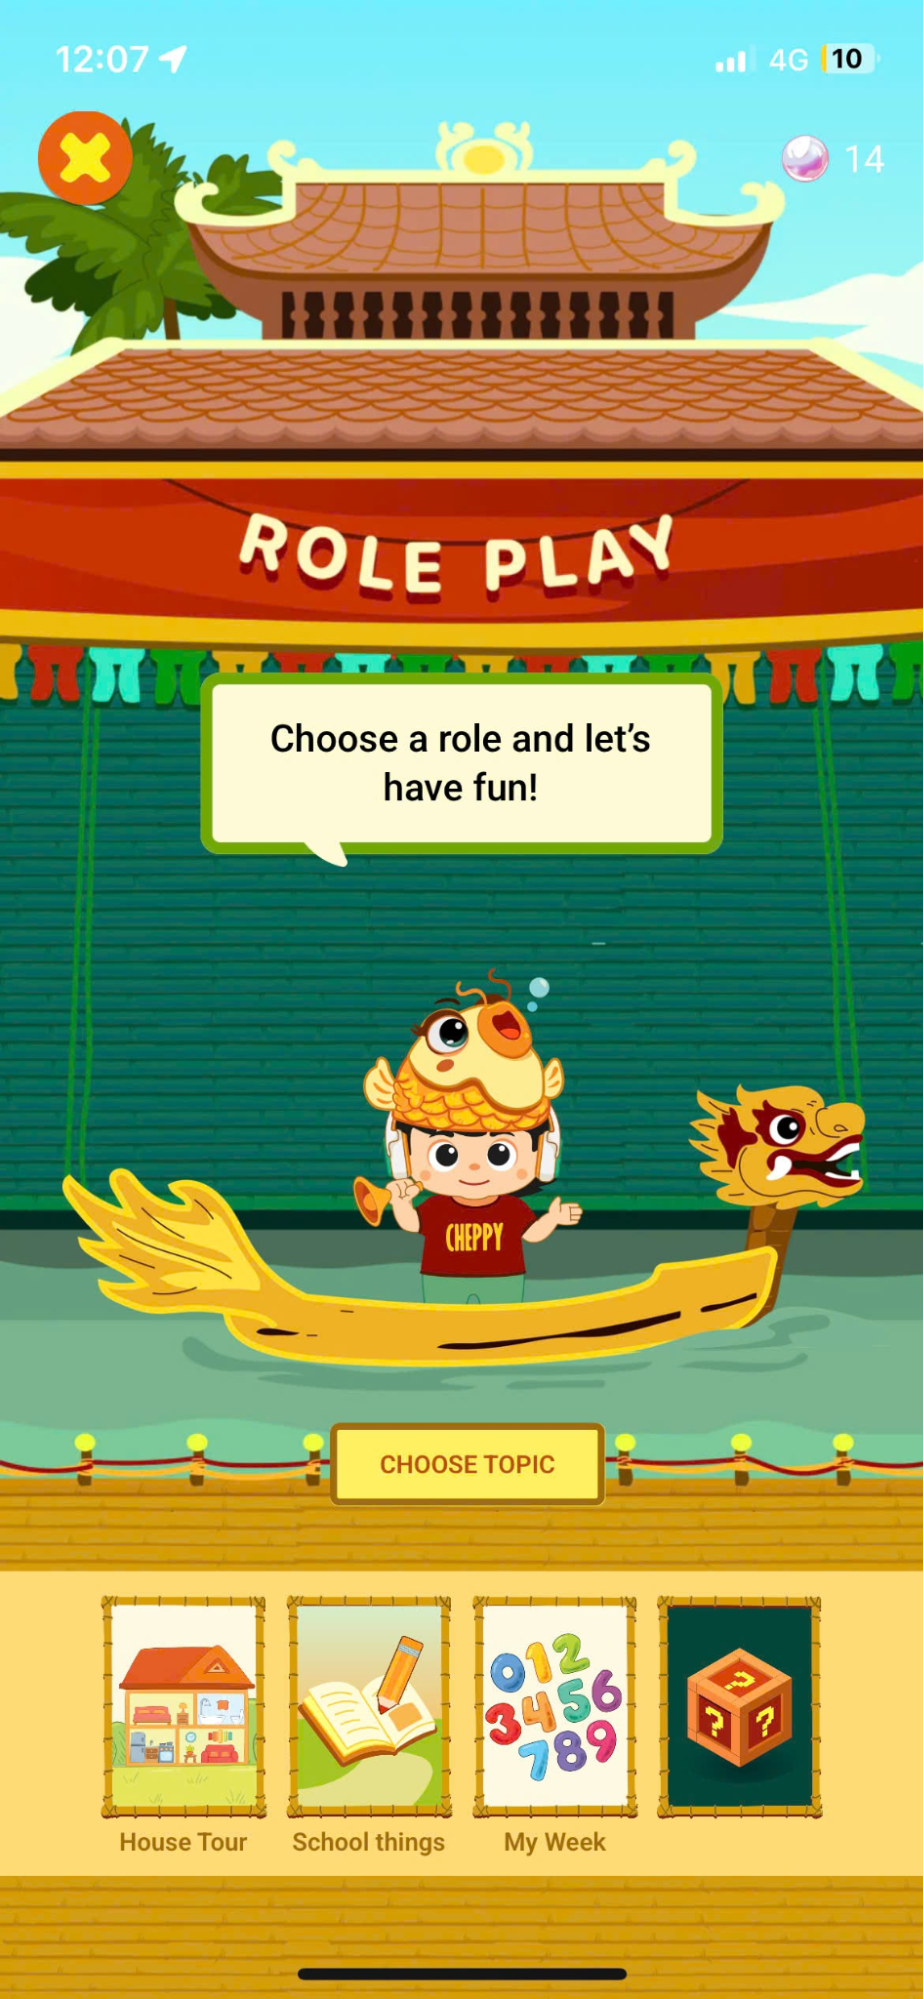
Step 2: In the Role Play area screen, the AI will automatically create it.to various situationsThe communication screen is tailored to the user's level and learning ability.
Click on your favorite theme to join Cheppy in the role-playing game.

Or press the card shuffler button with the icon. To allow the system to display the new theme tabs.
Step 3: View the detailed information on the communication situation card.
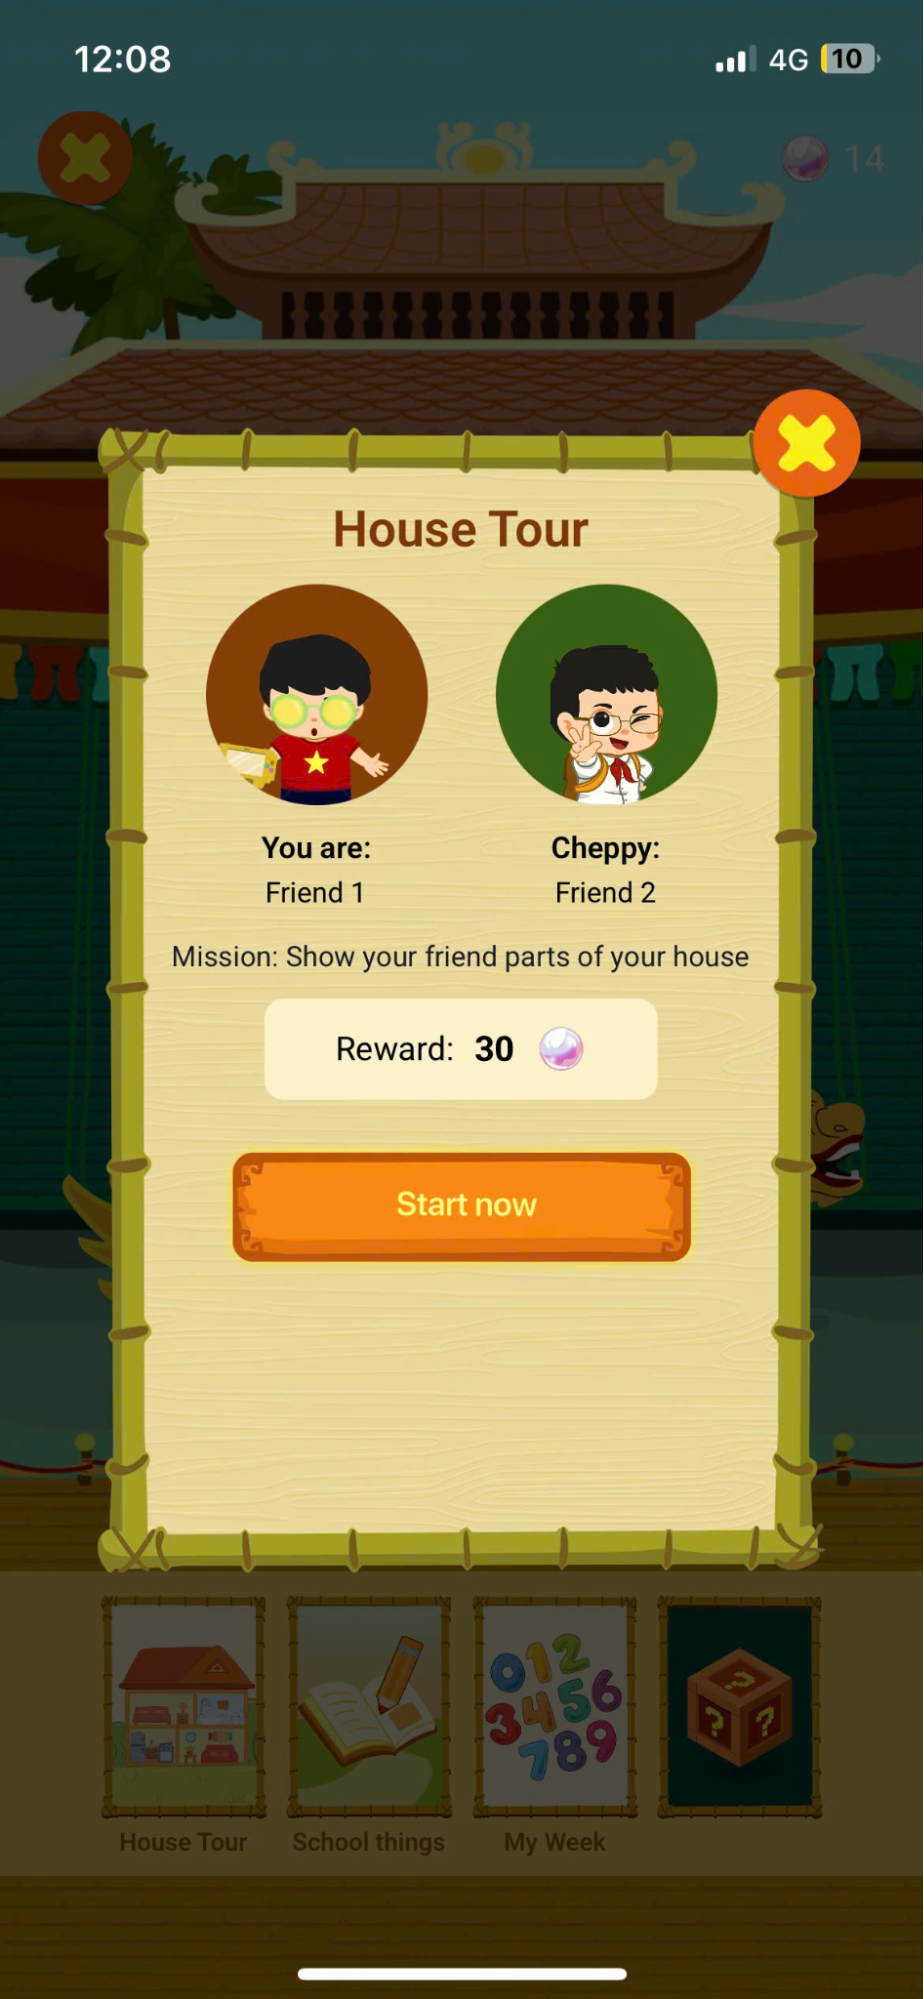
- Card title: Displays the context name of the role-playing situation.
- Character information: Introduces the player's role and the character Cheppy's involvement in the situation.
- Task: Describe the tasks that learners need to perform in the situation.
- Rewards: Displays the gem rewards that players will receive after completing all the scenario's tasks.
Step 4: Press the button![]() to Switch to the interactive role-playing screen corresponding to the selected card.
to Switch to the interactive role-playing screen corresponding to the selected card.
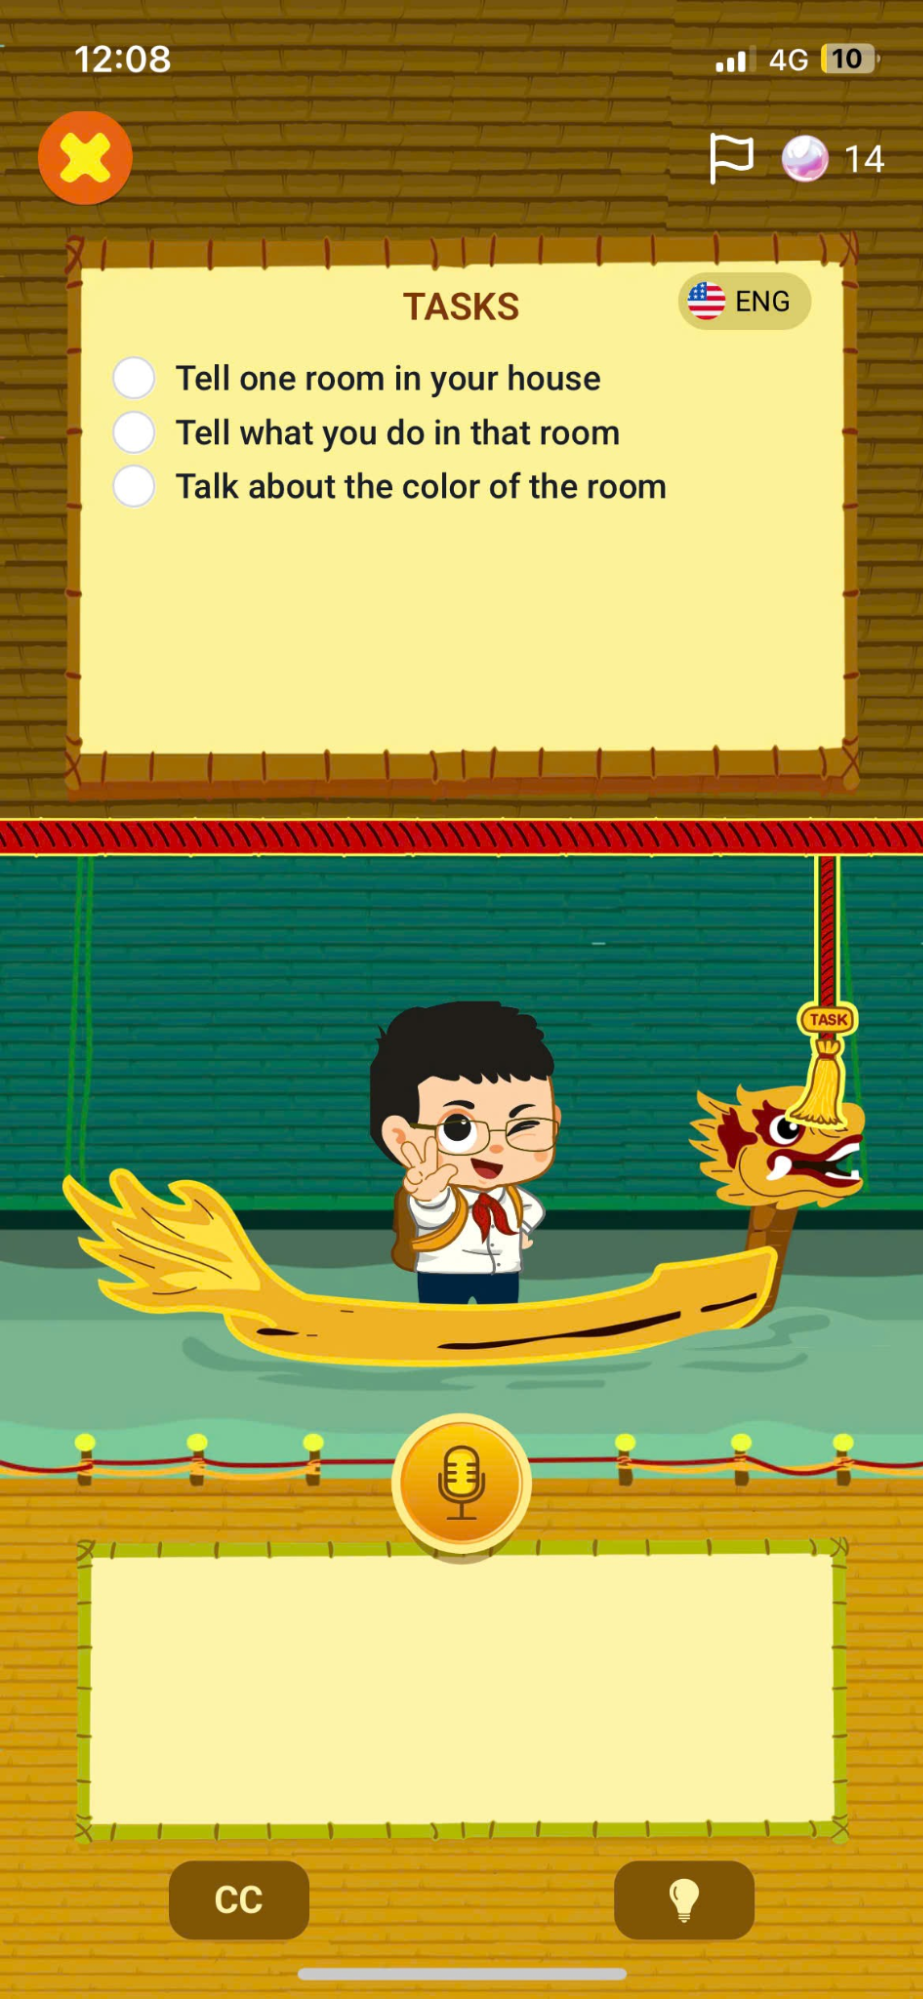
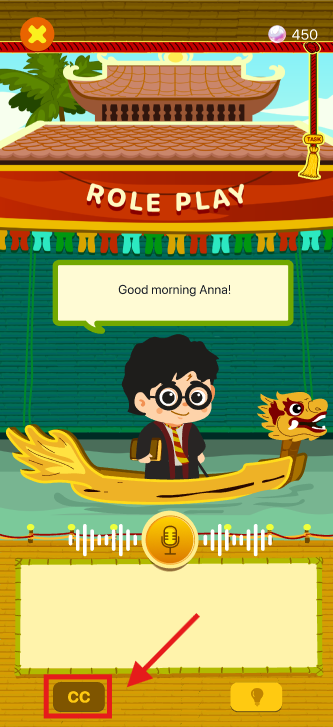
Here, the character played by Cheppy will appear on stage with specific missions to complete.
Step 5: Drag the slider at the top of the screen to view the Tasks.
- When a task is completed, the curtain cord will vibrate and an icon will be displayed.

- In the list, unfinished tasks will be displayed with an icon.


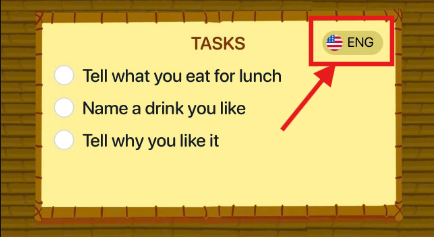
Step 6: Click on the iconTo change the display language between English and Vietnamese.
Step 7: Press the button to record the dialogue.
Step 8: After answering, press the button.To stop recording, the system will record the answer and provide feedback using different colors to help learners practice their pronunciation skills.
- Green 🟢: Correct pronunciation.
- Yellow 🟡: Nearly correct.
- Red 🔴: Needs further improvement.

Step 9: Press the button![]() DTo hear Cheppy's dialogue.
DTo hear Cheppy's dialogue.
After viewing the content, the user presses the button again.![]() To hide the dialogue and continue recording to complete the mission.
To hide the dialogue and continue recording to complete the mission.
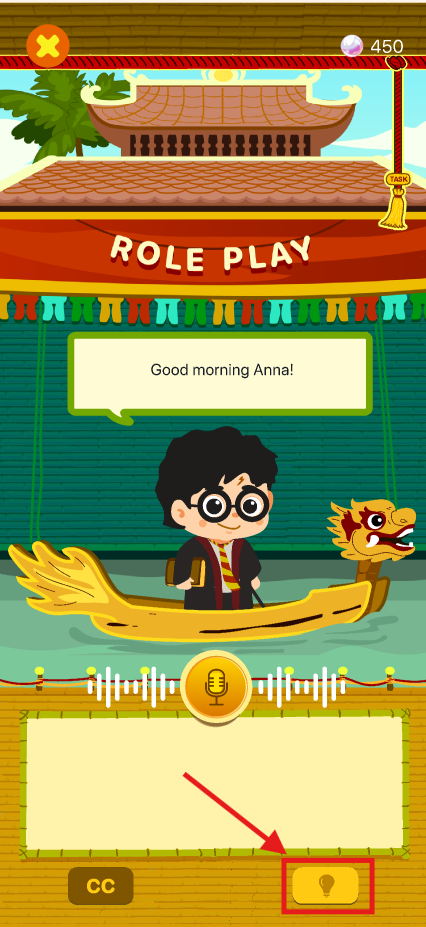
Step 10: Press the button![]() to seeSuggested dialogue.
to seeSuggested dialogue.
After viewing the content, the user presses the button again.![]() To hide the hint and continue recording to complete the task.
To hide the hint and continue recording to complete the task.
Step 11: Press the buttonTo return to the Role Play area screen.
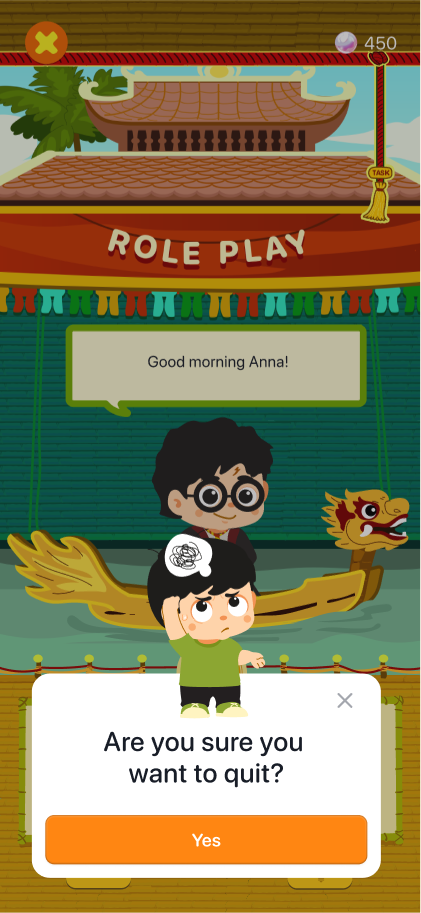
Note: CaseIf the task is not completed, the user will not receive the rewards and EXP points associated with that situation.
Step 12:After completing the missions, the system will display the "Mission Completed!" screen.
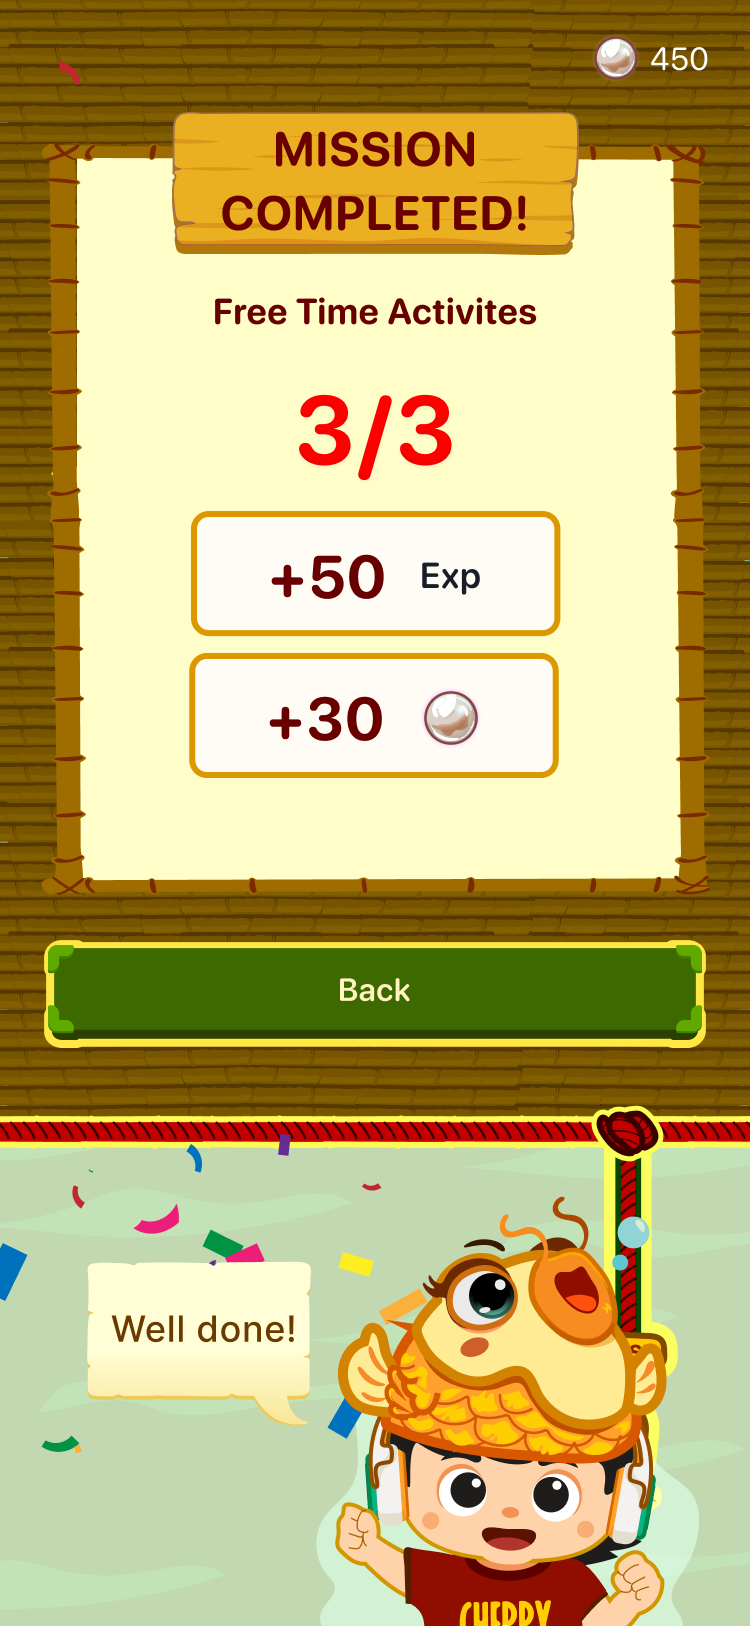
Step 13:Press the button To return to the Role Play area screen.
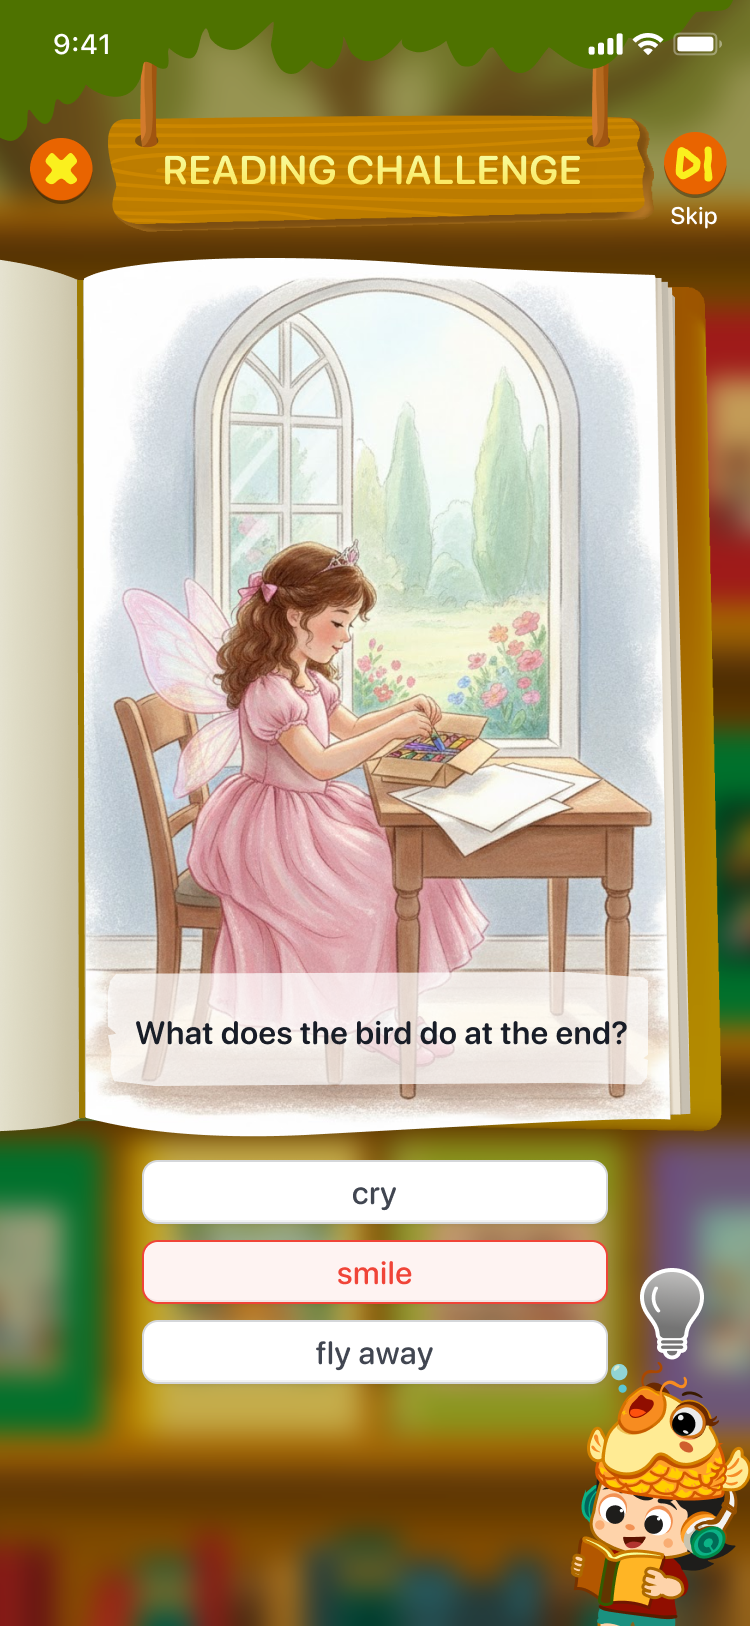
11.2. FUN STORY
- Purpose: This area helps learners practice listening and reading English through interactive stories, listening and reading comprehension exercises, and post-reading challenges.
Step 1: InRole play screen, Select the Fun Story area.

Step 2: In the Fun Story section, select a book you'd like to read from the bookshelf.
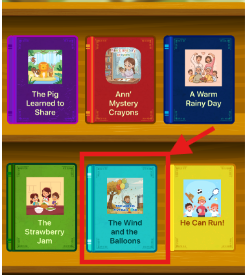
Step 3:On the book screen, users can view detailed information about the story, including:
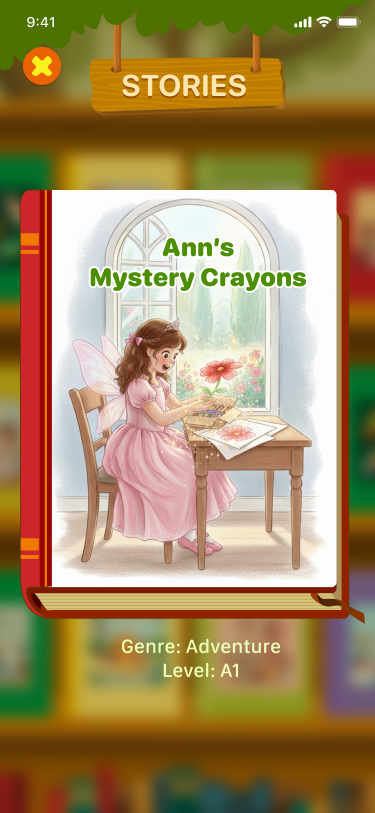
- Title of the story.
- Genre.
- Level according to the European CEFR framework.
Step 4: Select a story to start reading; the AI tutor will automatically read each page.
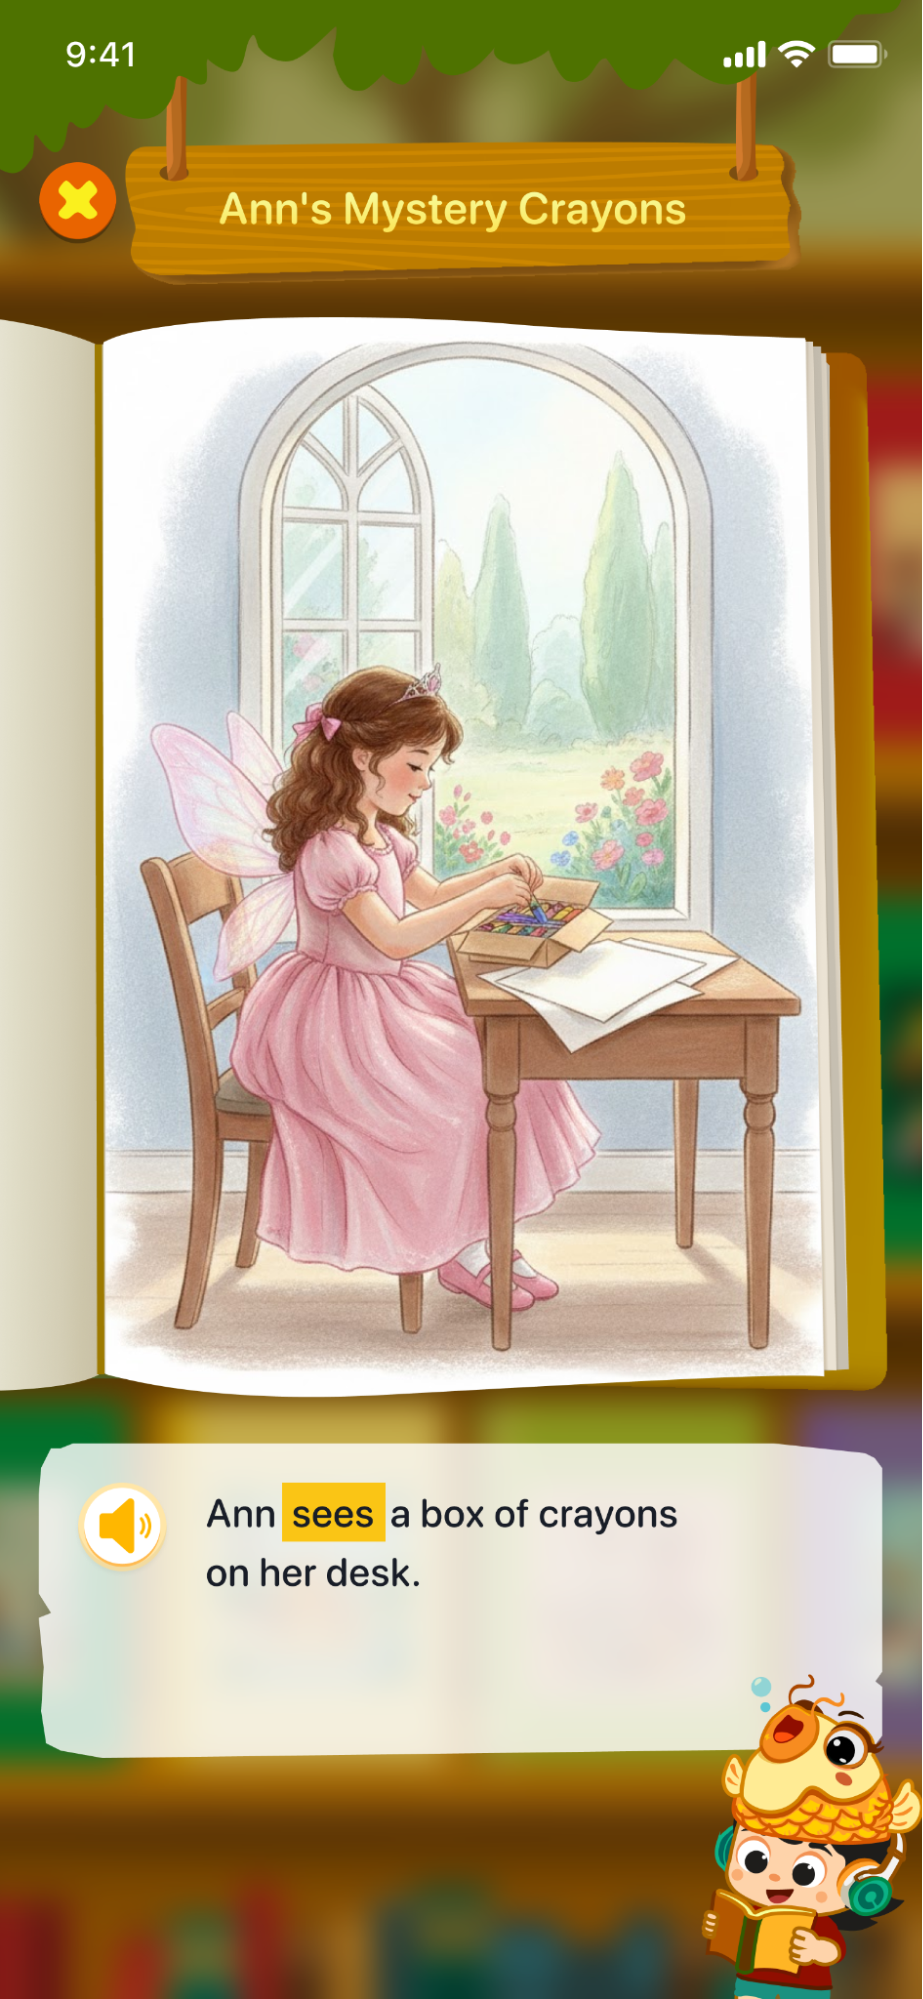
Step 5: Press the button  To listen to the content of the story page again.
Note: User cYou can listen to it multiple times to fully grasp the content.
Step 6: Swipe from right to left to turn the next page of the story, or swipe from left to right to revisit the previous page.
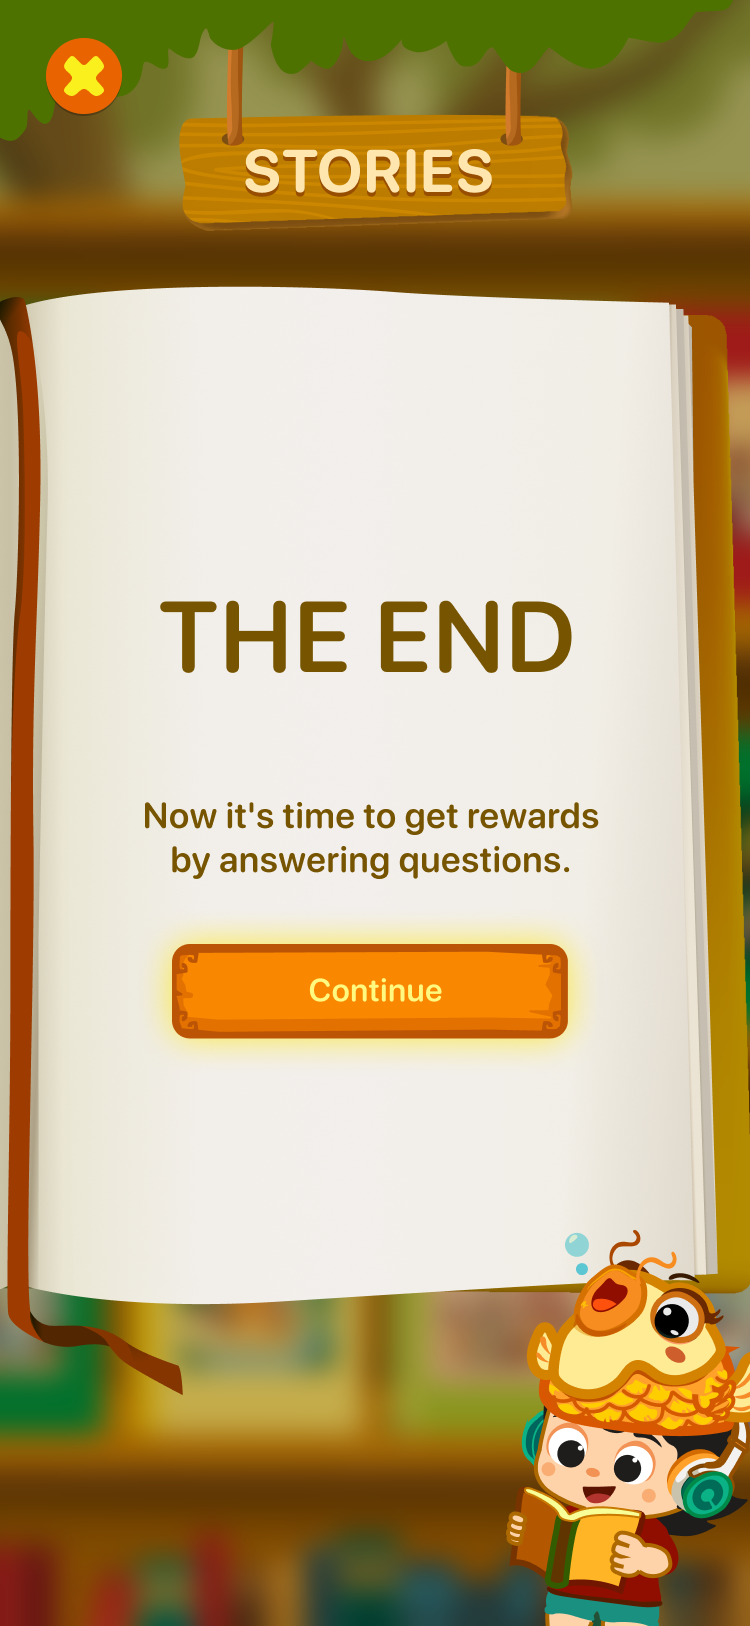
Step 7: After reading the story, the screen will display THE END; press the button  To switch to the screen for answering challenge questions and receiving rewards.
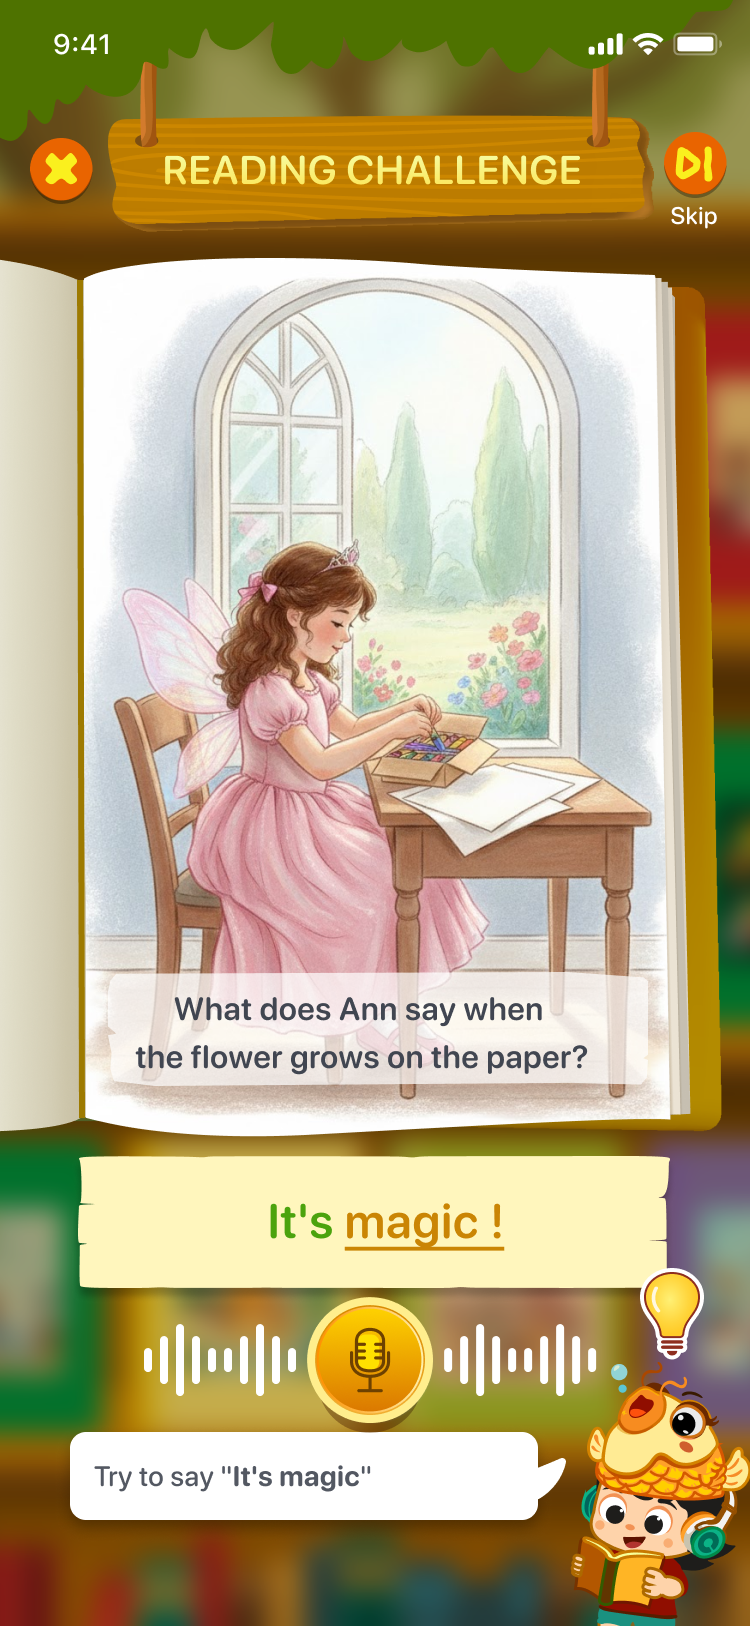
Step 8: On the Reading challenge screen, users can press the button  To see suggestions, or press the button
  Let's move on to the next question.
Step 9: In multiple-choice questions, users select the correct answer.
Step 10: For the Pronunciation option, press the button to record the dialogue.
Step 11: Press the button To return to the Fun Story area screen.
Note: If you go back, the entire question-answering process will not be recorded, meaning the user will not receive the reward or experience points for that book.
Step 12: After completing all the questions, the system will display a "Completed" screen and summarize the score as well as the prize the user has received.
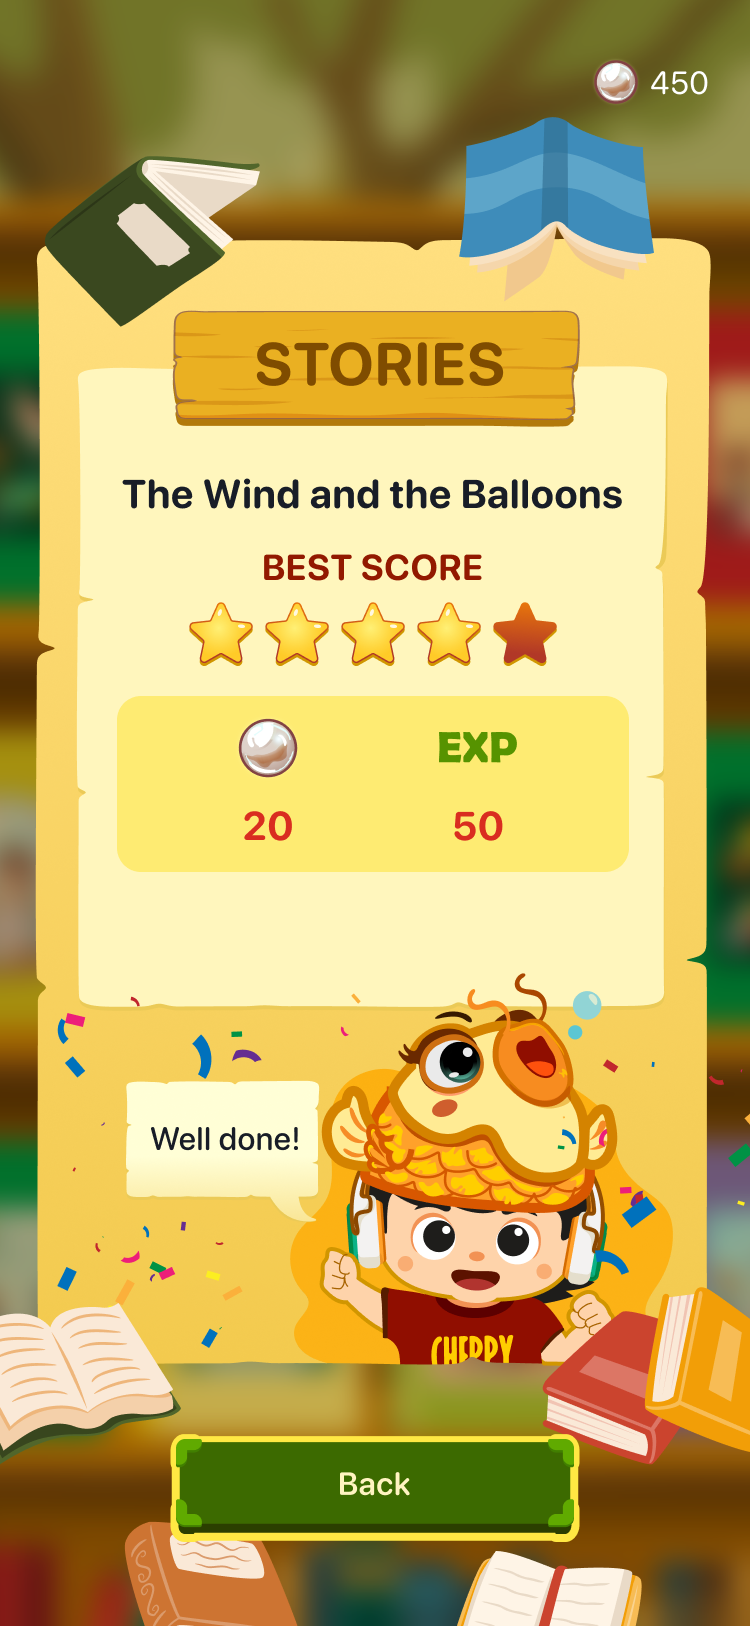
Step 13: Press the button  To return to the Fun Story area screen.
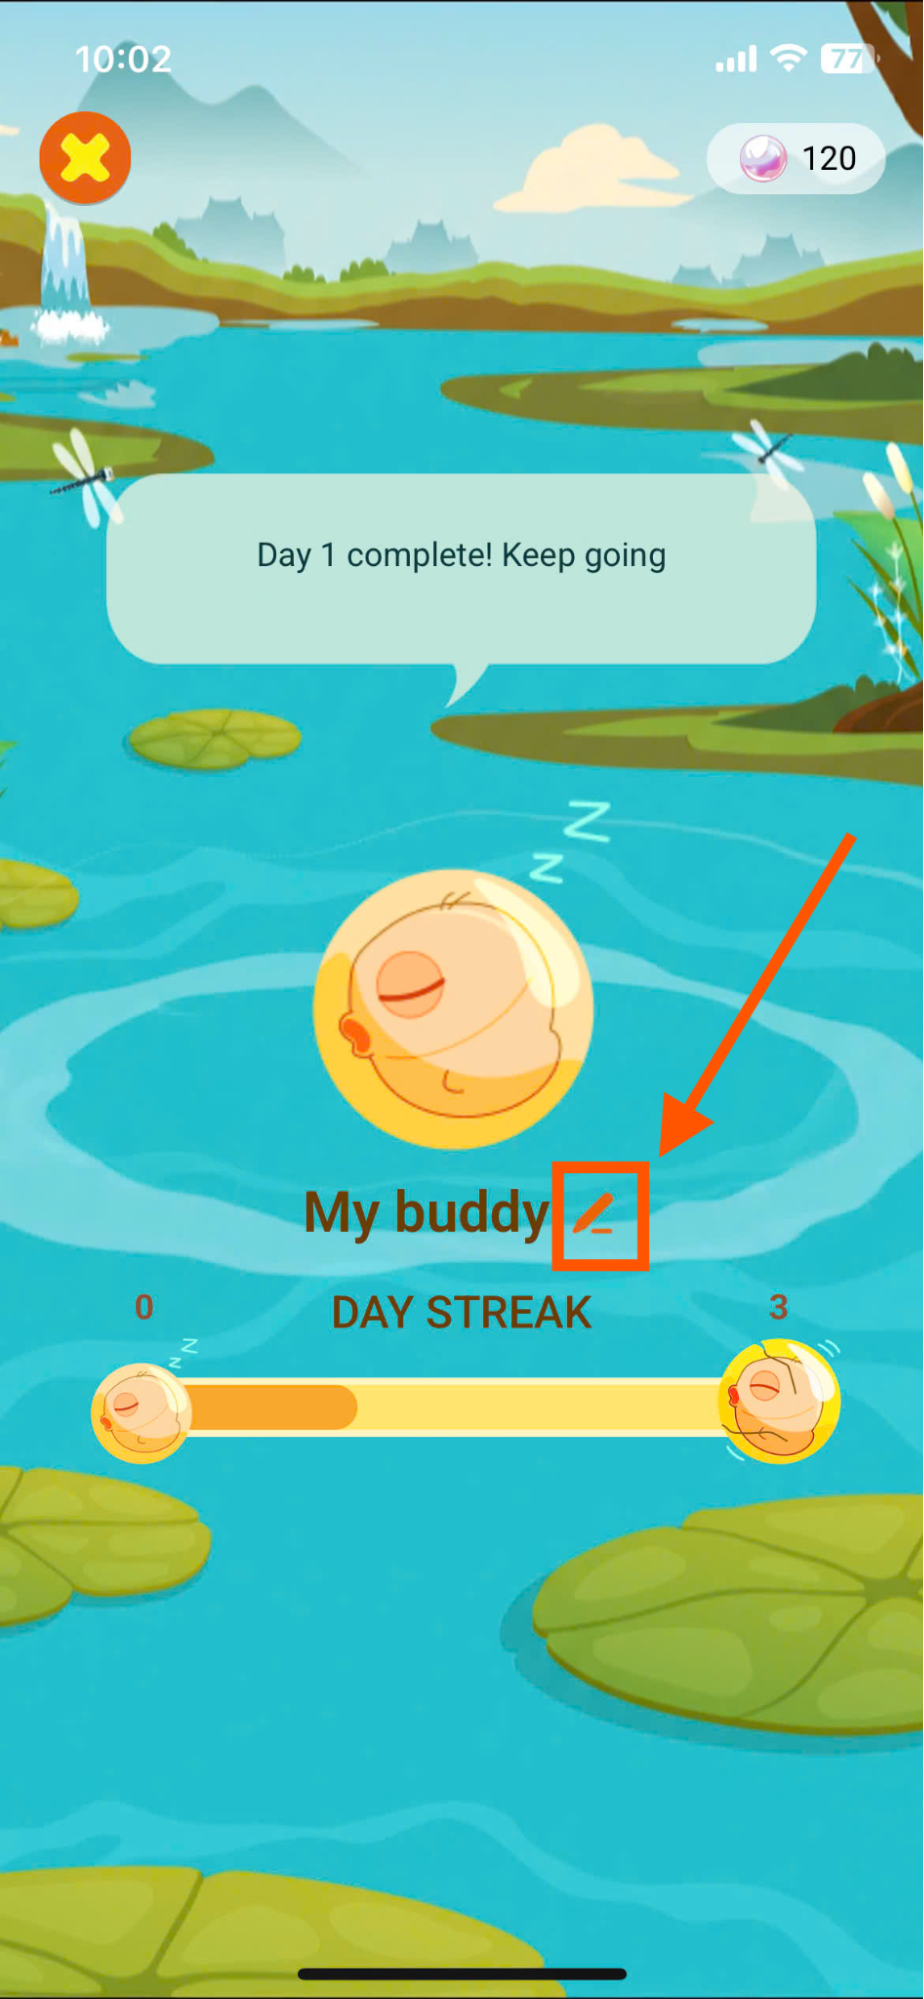
12. STREAK PET
Step 1: on the main screen, select the Streak Pet area.
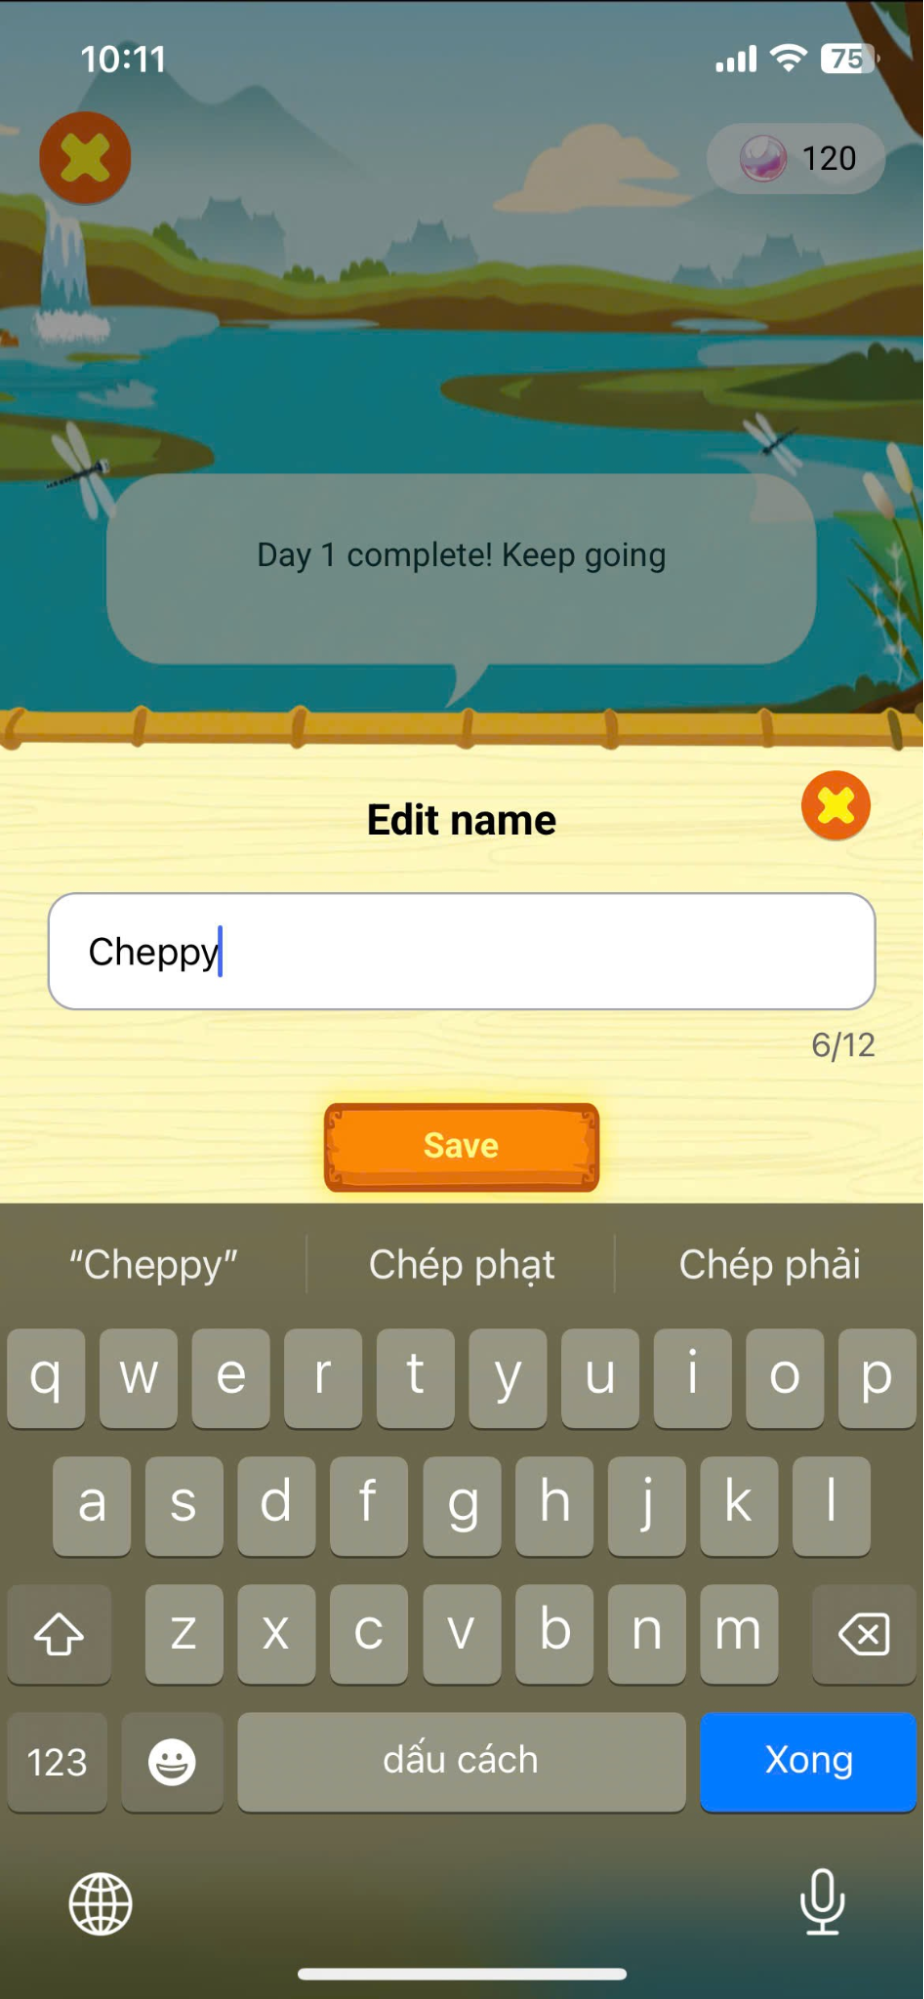
Step 2: The user presses  Enter the new name to change your pet's name.
Step 3: The system will display the user's pet. Users should log in daily to level up their pet. The pet levels include:
| STT | Icon | |
|---|---|---|
| Daughter | Boy | |
| 1 |  |  |
| 2 | 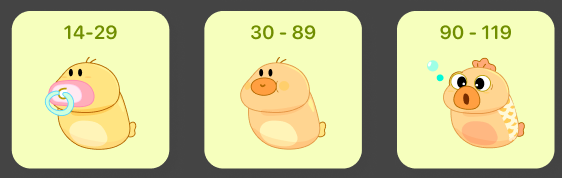 | 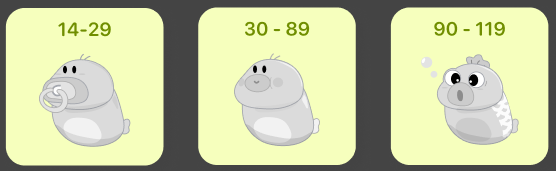 |
| 3 | 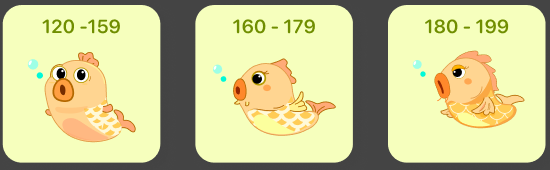 | 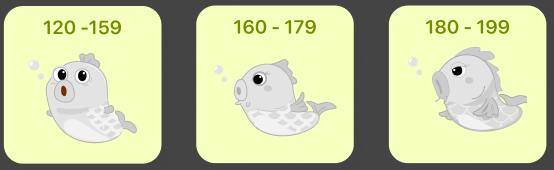 |
| 4 | 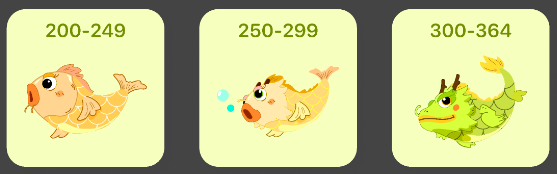 |  |
| 5 |  |  |
Note: If a learning streak is lost (no learning for 1 day), the user can still restore it for free within 48 hours (2 days). After this time, the user will need to spend 200 gems to restore the streak.